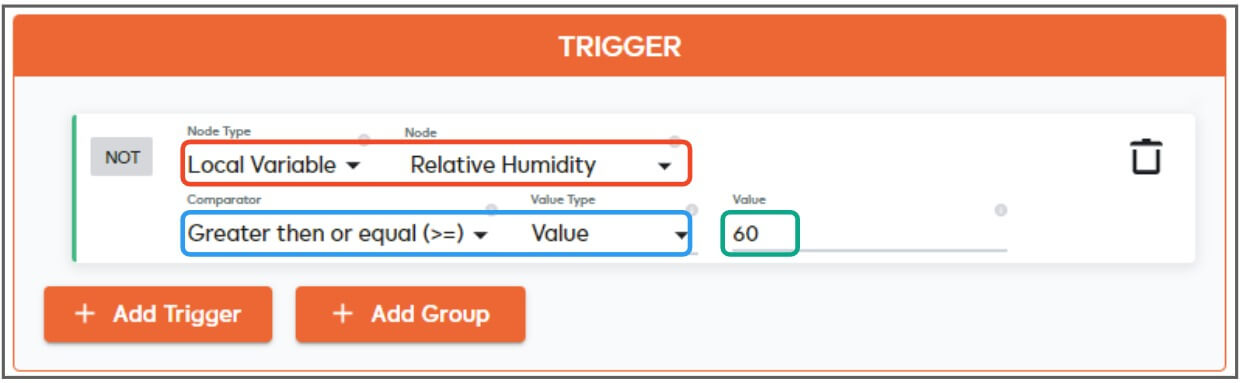
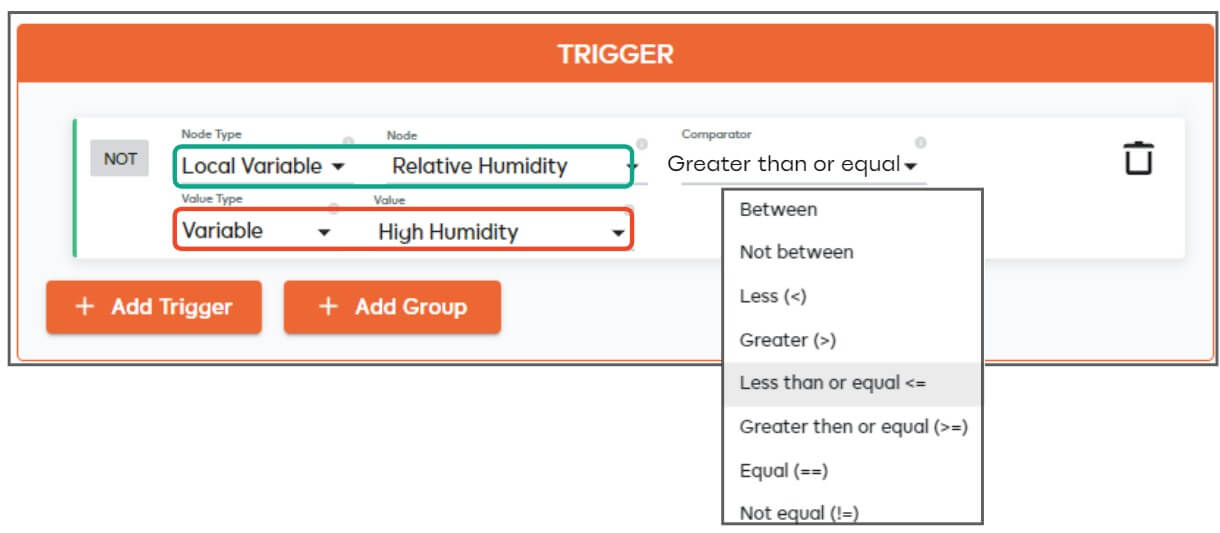
Local Variable
‘Local Variable’ is a trigger node type which lets you use the current value of an existing variable as the condition of your trigger.
- You can create triggers which activate when a variable achieves a specific value (e.g. when variable ‘X’ >= ‘27’ or when variable ‘Y’ = ‘False’).
- You can also use a comparison of one variable with another variable to trigger your action (e.g. if ‘Current Temperature Variable’ >= ‘Switch on the AC Temperature Variable’).
There are a variety of different variables you can create, including ‘Integer’, ‘Boolean’, ‘Scaleable’ and more. See the variables help page for more details on the different types.
Scenario
- You want all three windows in your apartment to be closed before running a scene. You plan to use this ‘all windows closed’ condition as the trigger for multiple, independent scenes.
- For example, you want a meshbot that waits until all windows are closed before turning on your air-conditioning unit. You also want a separate meshbot which only turns on your house alarm if all windows are closed.
- You can create a local boolean variable that goes ‘True’ if all three windows are closed, and ‘False’ if one or more windows are open. You can then use the variable in all meshbots that you want to make conditional on the ‘all closed’ state.
Create a variable
- Click ‘Automation’ > ‘Advanced Scripting’ > ‘Variables’ > ‘Add New Variable
- Create a boolean variable called ‘All Windows Closed’ and give it an initial value of ‘False’. This starting value doesn’t really matter as we will later use a meshbot action to determine its real value anyway:
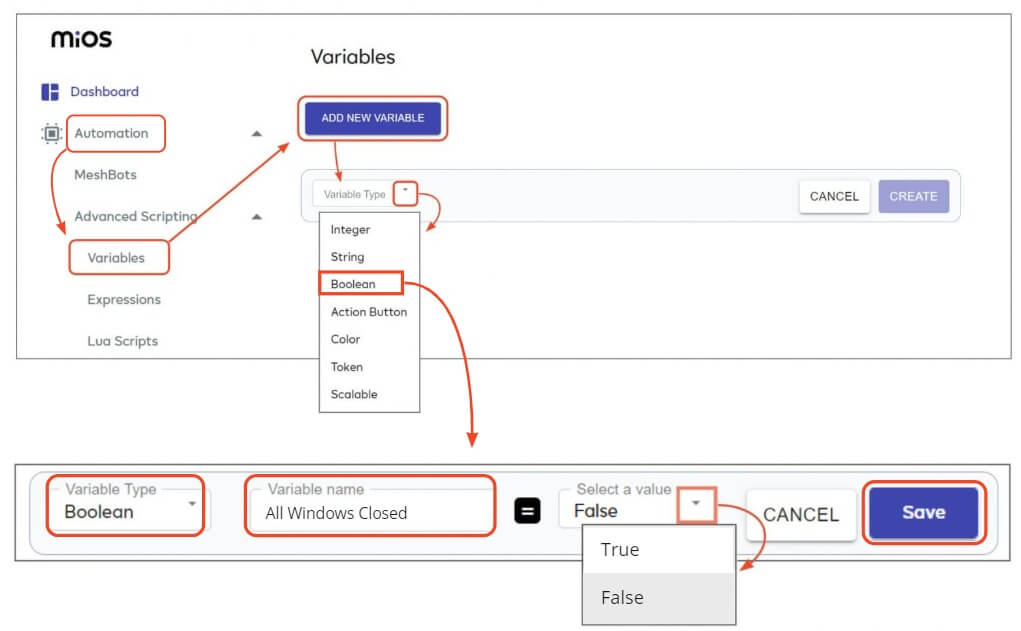
- Click ‘Save’ to register your new variable.
Set the variable’s value in a meshbot
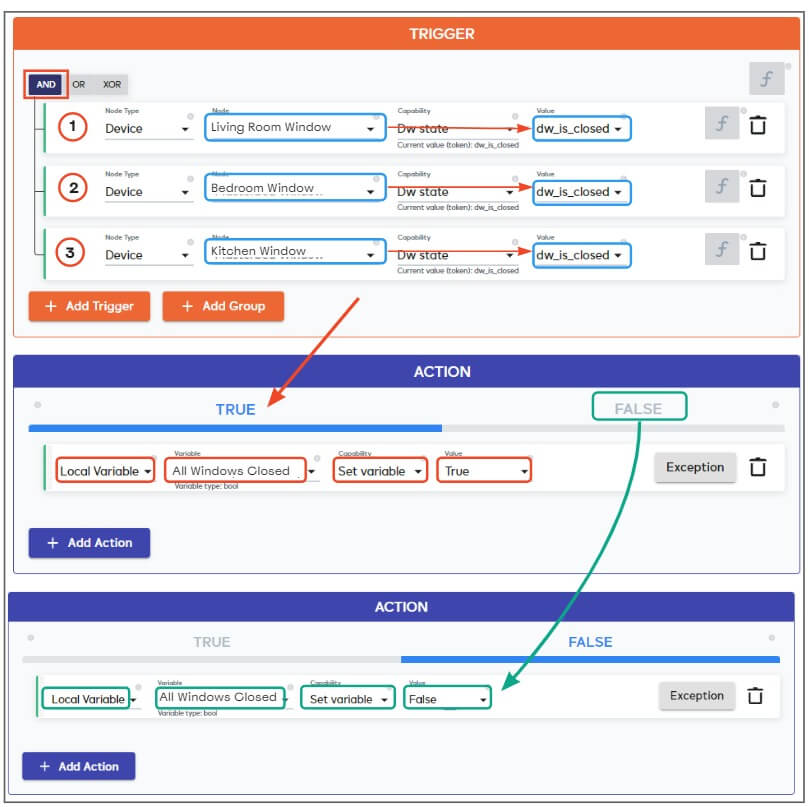
- Next, create a meshbot trigger that becomes true if all three windows are closed.
-
Setup the meshbot actions to update the variable accordingly:
- True action = set the ‘All Windows Closed’ variable to ‘True’.
- False action = set the ‘All Windows Closed’ variable to ‘False’.
- The final meshbot should look something like this:
Give the meshbot a name like ‘Status of Windows’ then click ‘Save’.
You now have the collective status of all three windows stored in a single variable. You can use the variable in any meshbots that you want predicate on the ‘True/False’ state of the variable.
Use the variable as a trigger node
Finally, create another meshbot to actually run your scene. In this example, we shall turn on the air conditioning only if our new variable has a status of ‘True’ (all three windows are closed).
Create a new meshbot called ‘AC On if Windows Closed’ or similar. Set up the triggers and actions as follows:
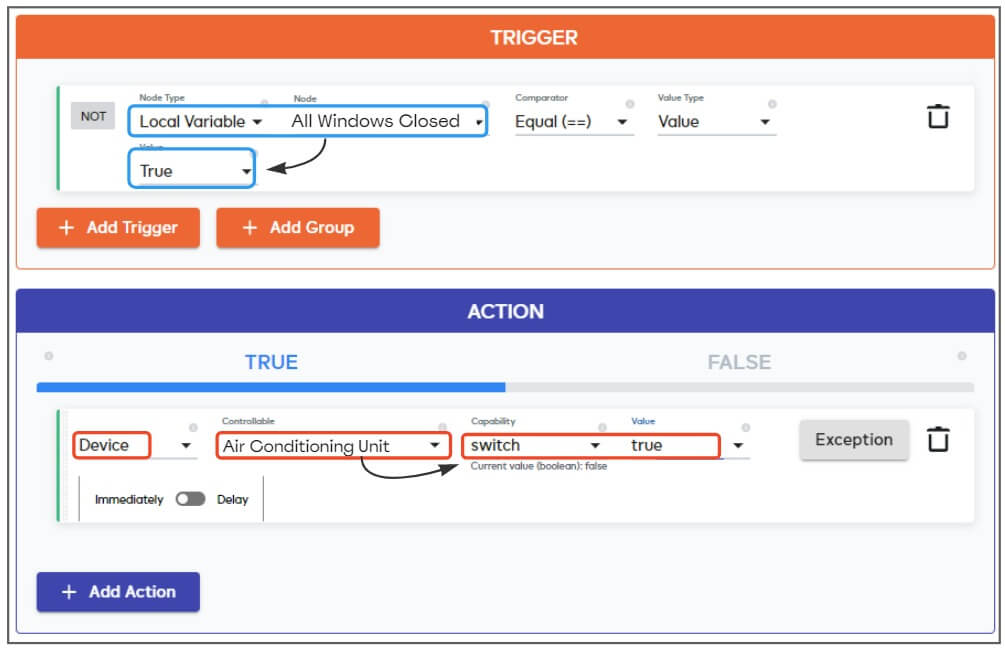
Trigger – Select ‘Local Variable’ as the node type then your new ‘All Windows Closed’ variable as the node. Choose ‘Equal (==)’ as the comparator, ‘Value’ as the value type and ‘True’ as the value. This means your trigger will become true and fire your action(s) if the windows variable is ‘True’.
Action – Select ‘Device’ as the controllable type and your AC device as the controllable. Choose the required capabilities and values to turn on your AC unit. These will vary from device to device. In the example shown above, the capability is ‘Switch’ and the value is ‘True’.
- The variables help page has more details on variable types and their usage in meshbots.
- This tutorial contains another example of how you can use variables in your automations: