Ezlo SiteSensor Plugin
The Ezlo SiteSensor plugin lets you periodically query remote and local sites/servers. You can use the sensor for a range of tasks – from a simple ‘is the site up’ checker to more complex requests that trigger meshbots based on the data received from the site.
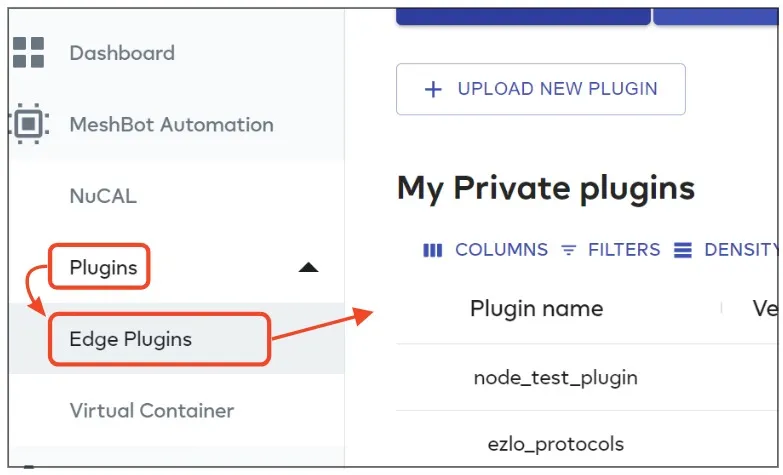
- Login to EZLogic then click ‘Plugins’ > ‘Edge Plugins’ in the left-hand menu
- Click ‘Marketplace’, locate the ‘Ezlo SiteSensor Plugin’ row then click ‘Copy to my Ezlo’:

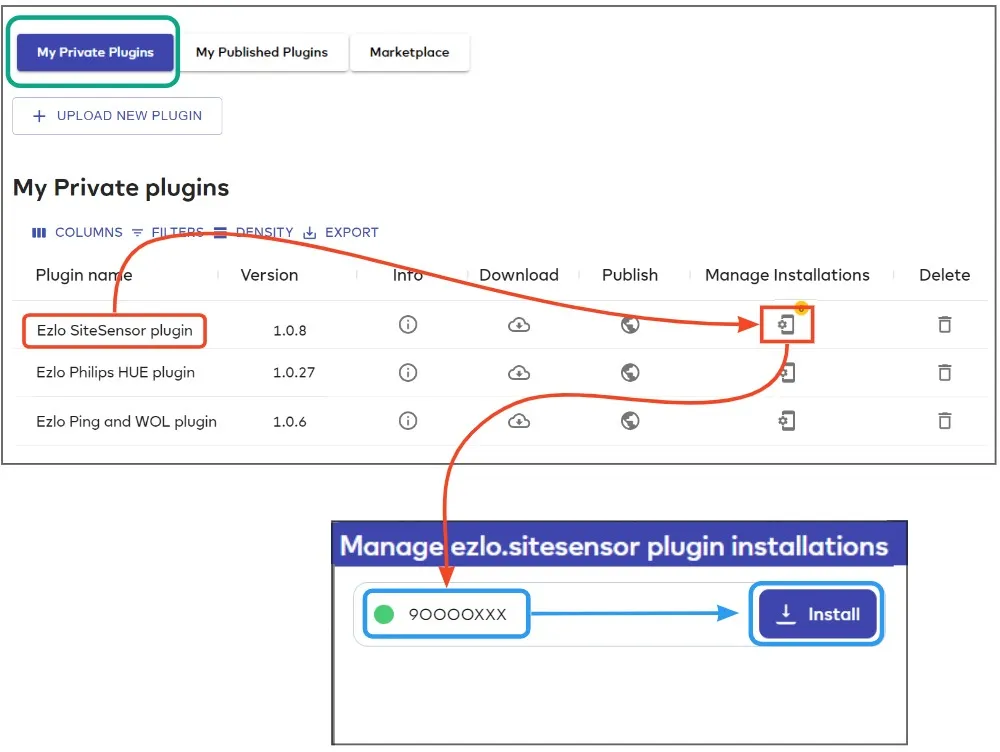
- Next, click the ‘My Private Plugins’ button along the top of the screen.
- Locate the SiteSensor row then click ‘Manage Installations’.
- Choose the controller you want to use then click ‘Install’:
- After installation, click the ‘Manage Installations’ icon again then click the ‘Configure’ button next to your chosen controller:
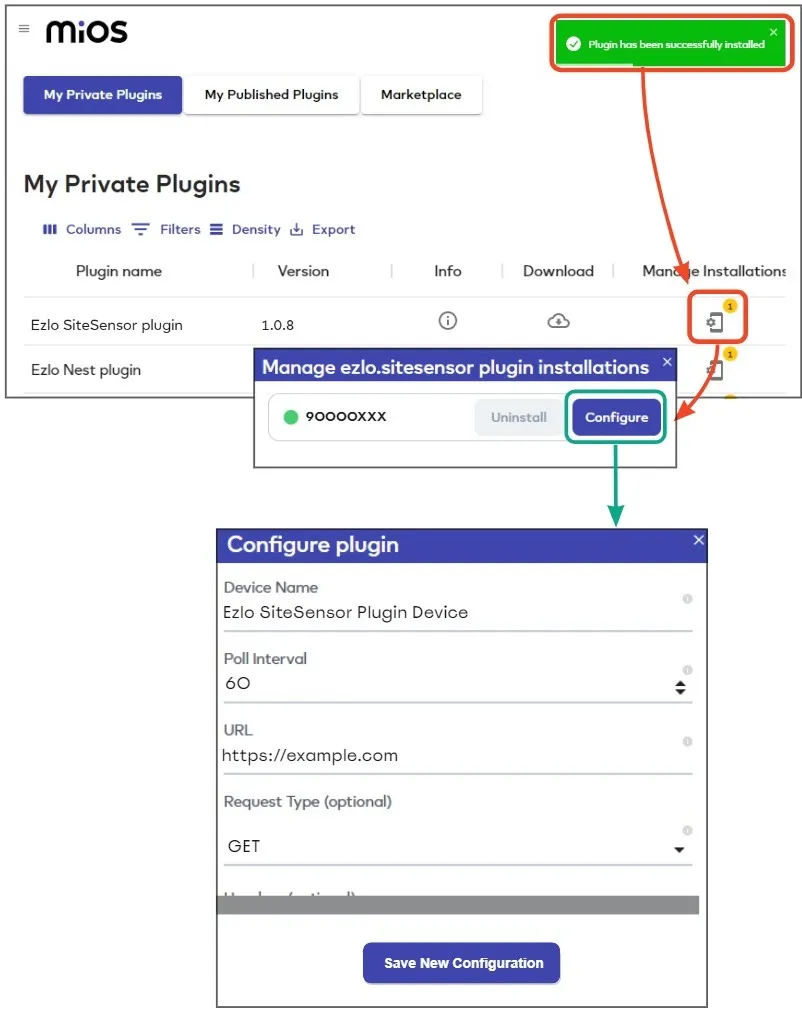
Complete the form as follows:
- Device Name – Choose a name that will help you easily identify your Ezlo SiteSensor device. For example, ‘Ezlo SiteSensor Plugin Device’, or something specific to its purpose like ‘SiteSensor Plugin – Weather updates’.
- Poll Interval – Optional. Specify how often you want to query your target site. The default interval of 60 seconds is a good starting point if you are unsure.
- URL – The address of the server or website that you want to query. You can specify the URL as a website address (e.g. https://example.com) or IP and port number (e.g. 192.168.11.1:20)
-
Request Type – Optional. Choose the method in which your command is sent. Note – what you choose here depends on the requirements of the site/server to which you are sending. Please consult their documentation to find out if it requires a particular request type. For example, some sites and services will accept ‘Get’ requests, while others only use ‘Post’. Here are some of the most commonly used methods:
- GET – ‘Get’ requests are usually used to read information such as a device setting or data from a website or service. Unlike ‘Post’, ‘Put’ and ‘Delete’, ‘Get’ does not modify or append to the target.
- POST – ‘Post’ requests are usually used to send data and set device parameters. In terms of data transference, ‘Post’ will always create a new resource at the target location. So making two identical post requests will likely lead to duplicate resources.
- PUT – ‘Put’ is usually used to update an existing resource. ‘Put’ will always update and replace the data at the URI if it already exists, whereas ‘Post’ will append to the existing data. You could therefore make multiple ‘Post’ requests to the same URI to produce an additive effect, but multiple ‘Put’ requests to the same URI will modify the existing resource.
-
Headers / Content Type / Data – Optional. Http headers let you send additional information to a target server along with your http request. Some requests require you to include certain types of header to communicate with the server.
‘Content-Type’ is a header which tells the server the format of the data you are requesting. Here are some examples:
- Content-Type: Image/jpeg
- Content-Type: Application/json
- Content-Type: Text/plain
This header also tells the system how to parse any content it receives. E.g., ‘Content-Type: image/jpeg’ tells your browser to show an image. Without the header, the browser would simply show the image data as code. ‘Content-Type: application/json’ tells a server that the data you require is in .json format.
Whether or not your request needs headers depends on the requirements of your target server. Please consult the target’s documentation to find out if the request needs custom headers. If in doubt, leave these fields blank then test to see if that works first.
You can learn more about http headers and their uses on this Mozilla help page.
Wikipedia’s list of http header fields explains the types and usage of many header fields.
- Username / Password – Optional. Complete these fields if your target site/server requires authentication. If not, then you can leave these fields blank.
Click ‘Save new configuration’ to create your new SiteSensor device.
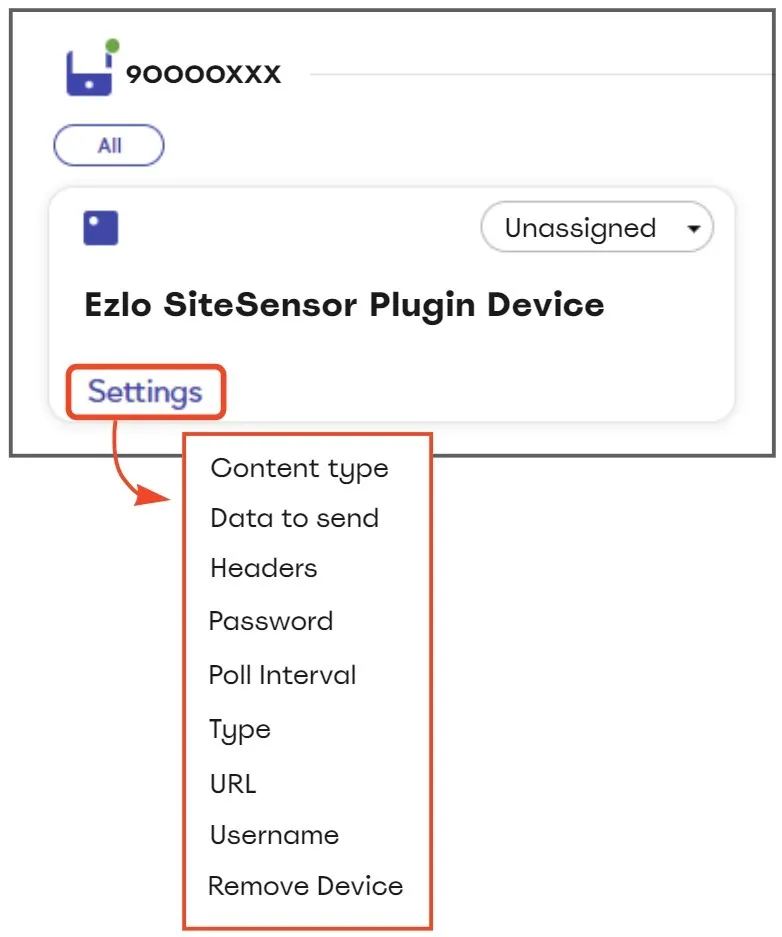
You can view and edit your new device in the devices area. Click ‘Settings’ to modify the device URL, poll interval and other details as required:
- To create devices for other sites/servers, just click Manage Installations > Configure again and repeat the configuration process.
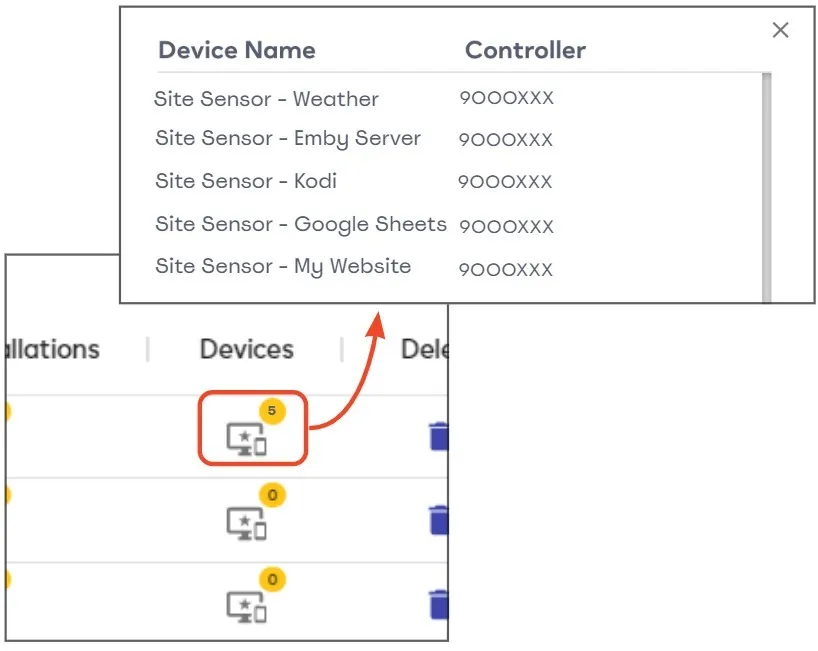
- Click the ‘Devices’ icon in the SiteSensor plugin row to quickly view all devices that you have created:
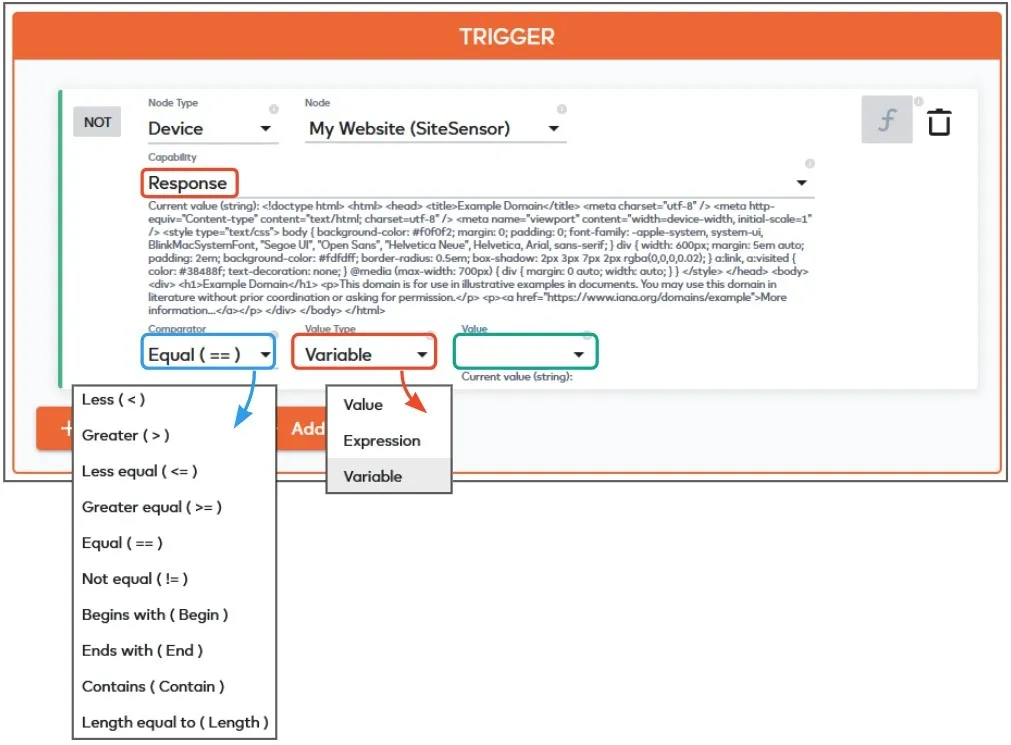
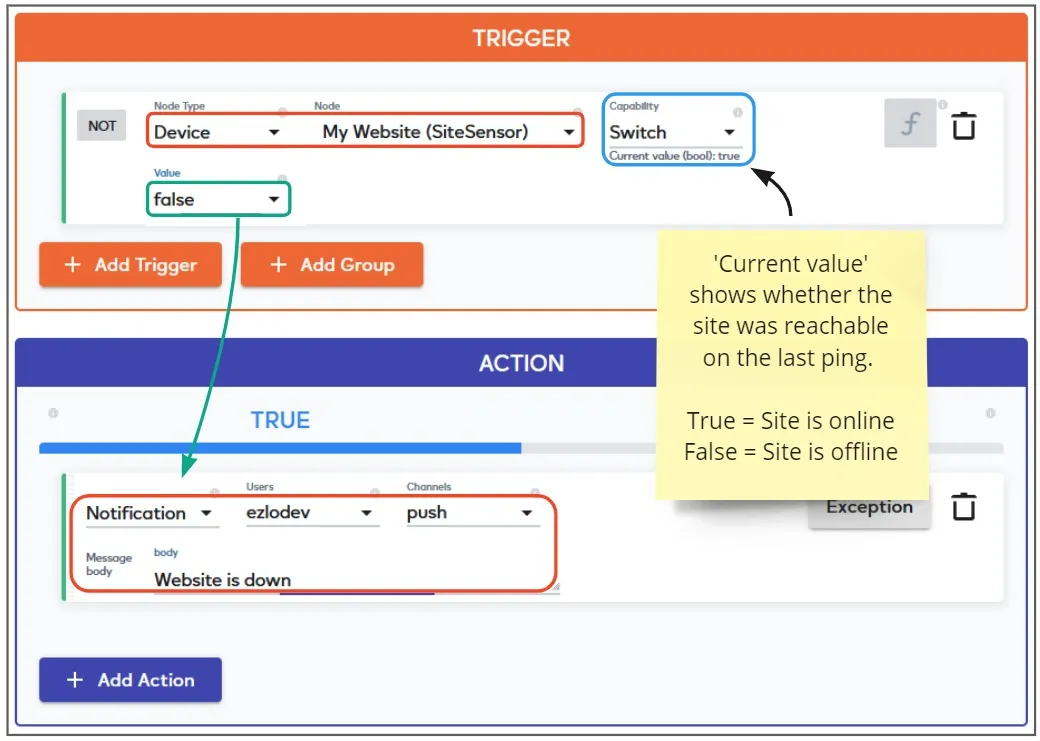
You can now use the response from the site/server as a trigger for your meshbots. Select ‘Device’ as the node type then your SiteSensor device as the node. The ‘capability’ field has two options – ‘Switch’ and ‘Response’:
- Switch – Status of the target site/server. ‘Current value’ shows whether or not the device successfully received a response from the site/server on the last request. You can run meshbot actions based on this response. For example, you could set up a meshbot to send you a push notification if your target site is not reachable:
- Response – Shows the full data of the response from your target server. You can use operators the compare the response to an expression, variable or specific value: