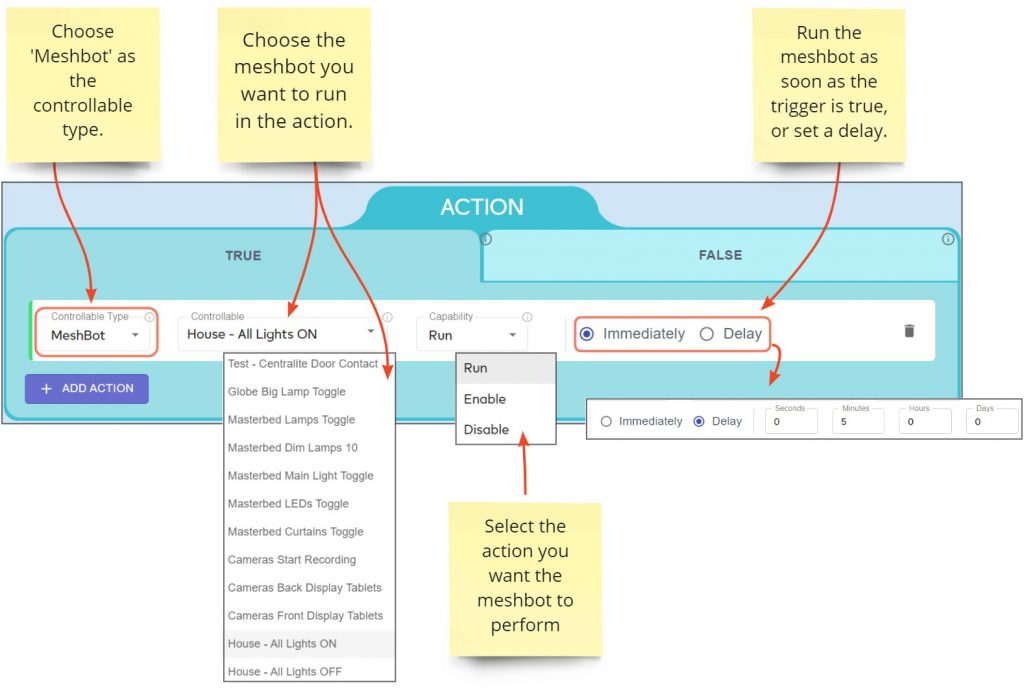
‘Meshbot’ is a type of controllable item you can select in the ‘Actions’ panel of a meshbot. The chosen meshbot will run when the conditions of its trigger group are ‘true’. You can choose the action that the meshbot should perform from a list as shown below:
Run – Executes all actions in the named meshbot. This option disregards the triggers in the meshbot and simply runs the actions. The actions run even if the meshbot is disabled in the meshbot list screen.
Enable – Activates the named meshbot. The meshbot will run its actions if its triggers become true.
Disable – Deactivates the named meshbot. The meshbot will not run its actions, even if its triggers become true.
Unlatch – Resets a named latch on a trigger in the target meshbot. ‘Latch’ is a trigger function that locks a trigger at true once its condition has been met. See the latch page for more help.
Using a meshbot as an action can offer flexibility and time-saving benefits when constructing scenes for your home or work environment. Here’s a couple of ways you might find this feature useful:
Reference Actions. If you can think of multiple situations where you’d want the same actions performing, then you can set up a meshbot as a ‘reference’ action.
For example, you have two meshbots with actions to ‘Switch On All Lights’ and ‘Switch Off All Lights in your home’. You might want to run one or both of those actions in a few different situations. For example, when you enter the house, or when you put your home in ‘Night Mode’, or if there is an emergency such as a fire or water leak.
You could set up a meshbot that has no triggers but contains actions to turn-on all lights in your house. Set up a complementary bot that switches off all lights in your house. You can then add these bots as actions to as many other meshbots as you like with whatever triggers you want.
Save time. Setting up a meshbot in the manner described above will also save you time. You only have to modify the reference meshbot and all meshbots that reference it are instantly updated. This means you don’t have to open and reconfigure multiple meshbots everytime you want to change something. It also gives you flexibility to add temporary actions which you can quickly activate or deactivate by enabling/disabling the meshbot in the meshbot list screen.
Example
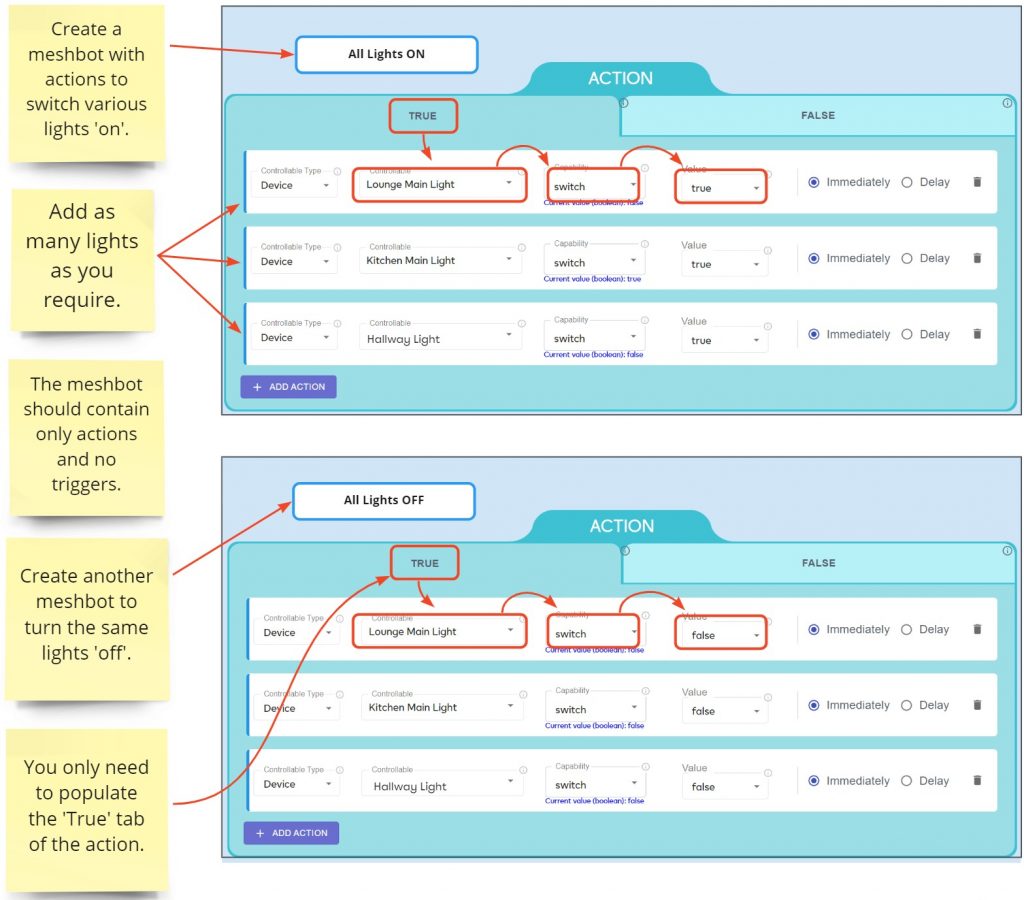
In this example we will create two ‘reference’ meshbots to switch on and off all lights in a home. We will then show how to reference those bots in the action panels of meshbots with different triggers.
First, create a meshbot which turns on all, or selected, lights in your house. The bot should contain only actions and no triggers.
Create another meshbot to turn the same lights off. Again, don’t add any triggers to this meshbot:
You can now add the ‘All Lights ON’ and ‘All Lights OFF’ bots to the action sections of meshbots that have completely different triggers.
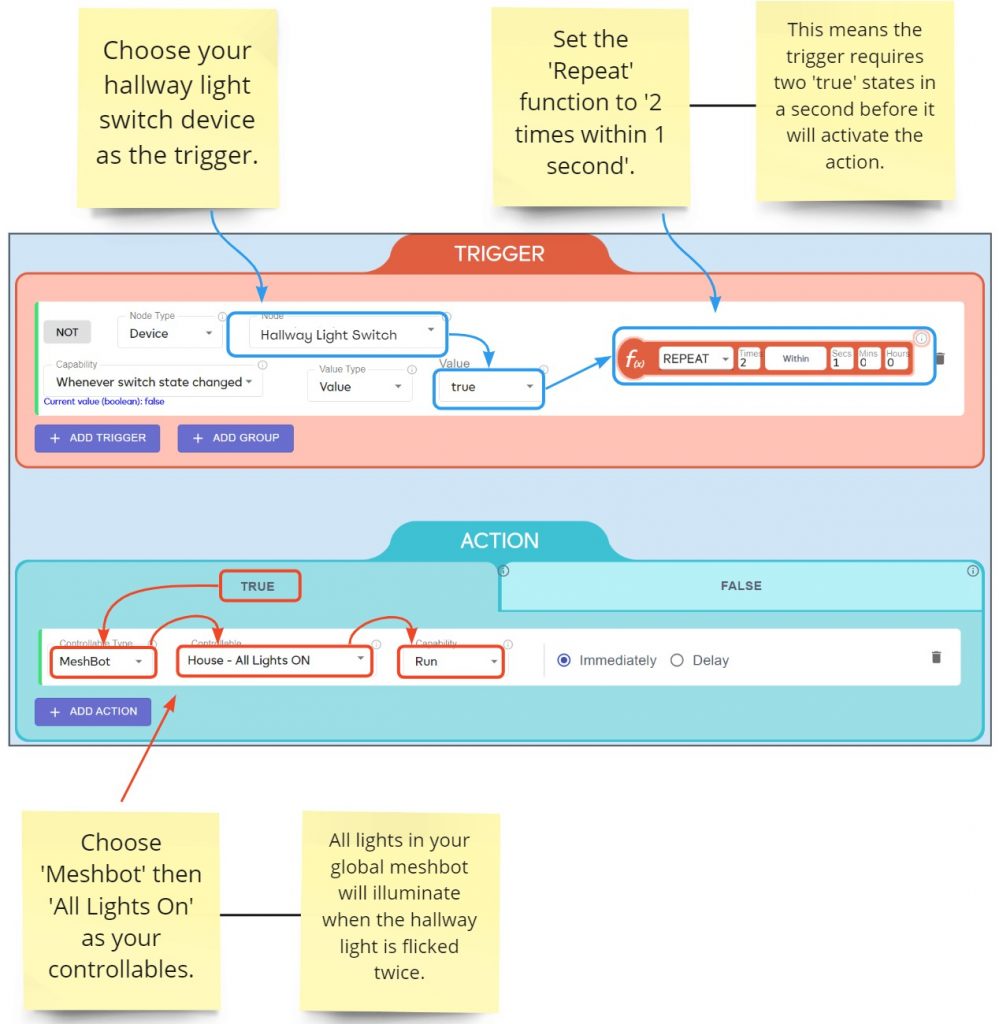
This first example shows a reference meshbot triggered by a hallway light switch.
Ordinarily, the hallway switch will only turn on the hallway lights. By adding a ‘repeat’ function to the switch trigger, and using the ‘All Lights On’ meshbot as the action, you can also make it turn on all house lights IF you quickly flick the switch on-off twice.
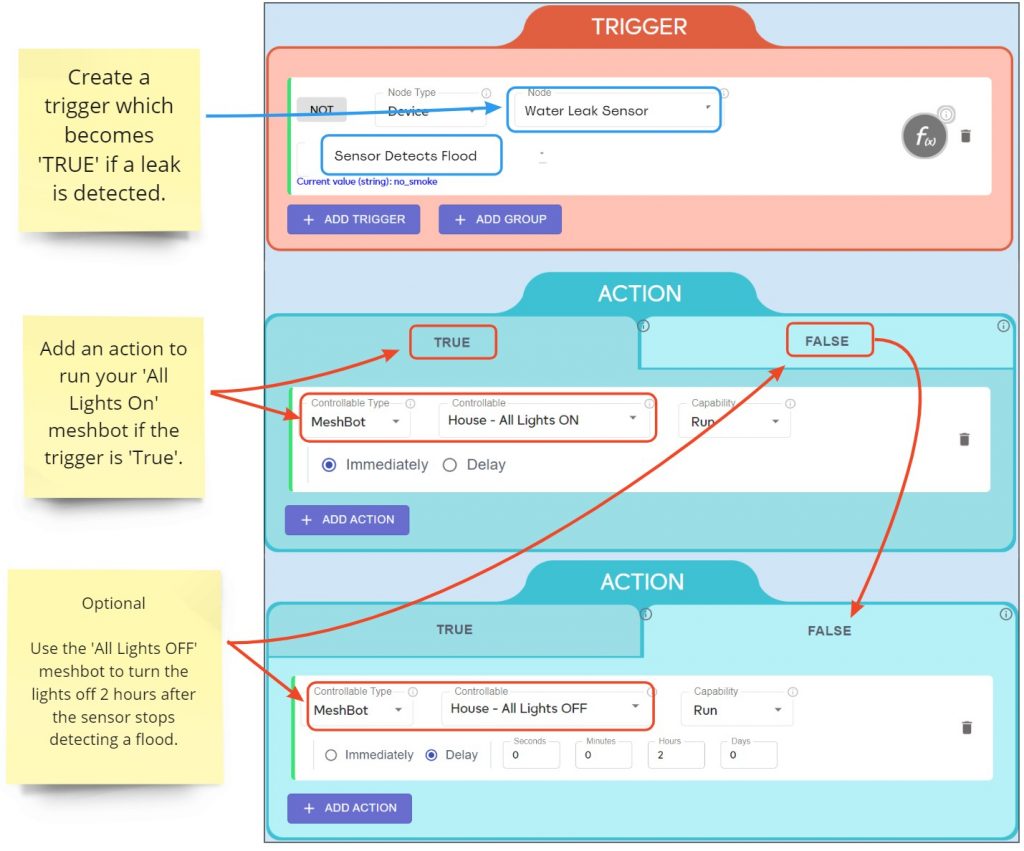
The next example shows a meshbot that turns on all house lights if a water leak sensor detects a flood.
This screenshot only shows the ‘All Lights ON’ and ‘All Lights OFF’ meshbots. In reality, you would likely have other actions on this bot such as sending out notifications and making alarms sound.
You must have created and saved at least one meshbot before you can use this feature. See Create your first meshbot if you need help with this.
See the exceptions section in the action overview page if you want to learn about this feature. For example, you want to run a meshbot but only when another meshbot has completed its run.
How can we help?
A premium WordPress theme with integrated Knowledge Base,
providing 24/7 community based support.