IP Devices
The IP devices area lets you easily create virtual devices capable of sending http commands to any physical WiFi device, or any service that accepts http requests. This provides fast integration and control of generic WiFi devices without needing 3rd party plugins or logic engines.
For example, you can create virtual switches that send http commands to any service that accepts http requests, like node-red or IFTTT web-hooks. You can use these services to in-turn control real devices on your network. You can also control your virtual devices via dashboard tiles and use them in meshbot triggers and actions.
You can also create shareable templates for your devices which other users can download and modify to suit their needs.
Download and install the IP devices plugin
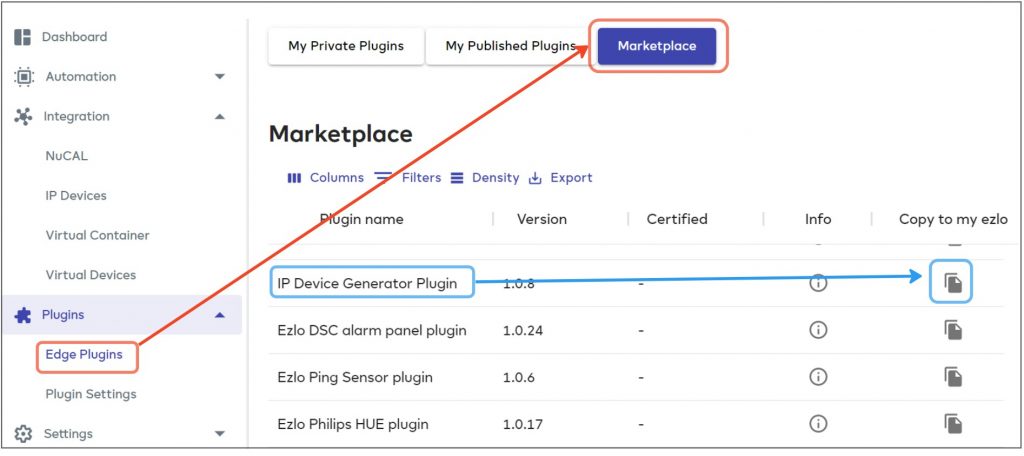
- Click ‘Plugins’ > ‘Edge Plugins’ > ‘Marketplace’
- Locate the ‘IP Device Generator Plugin’ row
- Click the ‘Copy to my Ezlo’ button
- This will copy the plugin to the ‘My Private Plugins’ area:
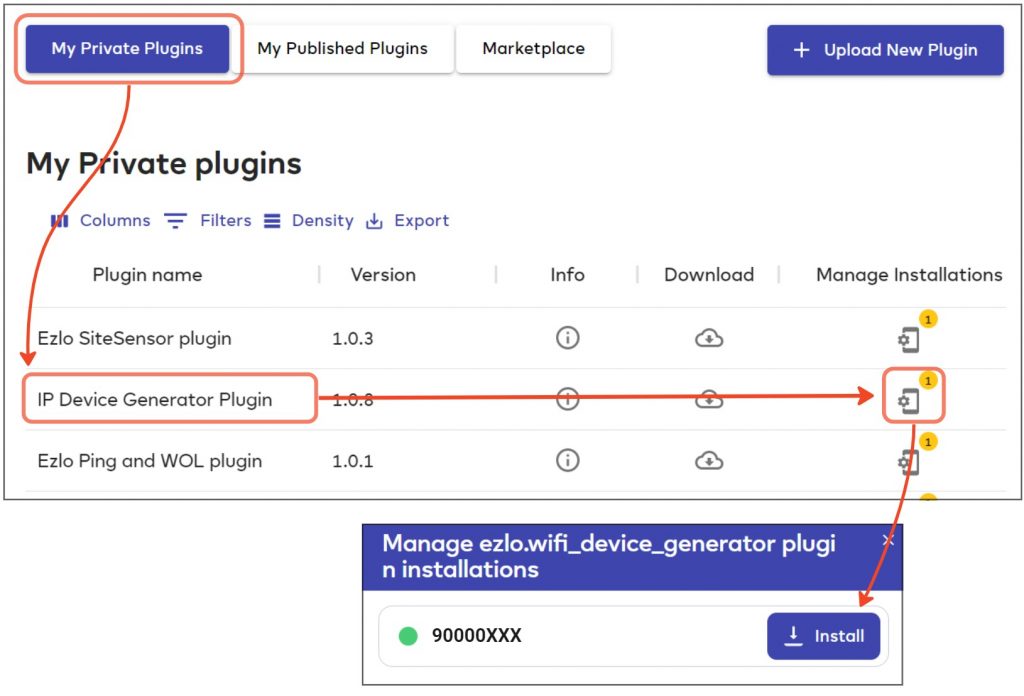
- Click the ‘My Private Plugins’ tab
- Click the ‘Manage Installations’ icon in the ‘IP Device Generator’ row
- Install the plugin onto the controller of your choice:
Example – Create a WiFi template and virtual device to send http commands to a service
This example shows how to use the IP Devices plugin to create a virtual switch which controls a physical device via the Node-Red service. (See this help page if you are unfamiliar with Node-Red and want to learn how to set it up).
- The first step is to create a WiFi device template. The template specifies the type of virtual device that you can create from the template and the commands that are sent by the virtual device.
- You will then use the saved template to actually create your virtual devices. You and others can, of course, reuse the same template to create as many virtual devices as you need.
Create a new template
After installing the plugin, go back to the the ‘IP Devices’ area then click ‘Create New Configuration’ to open the new template screen:
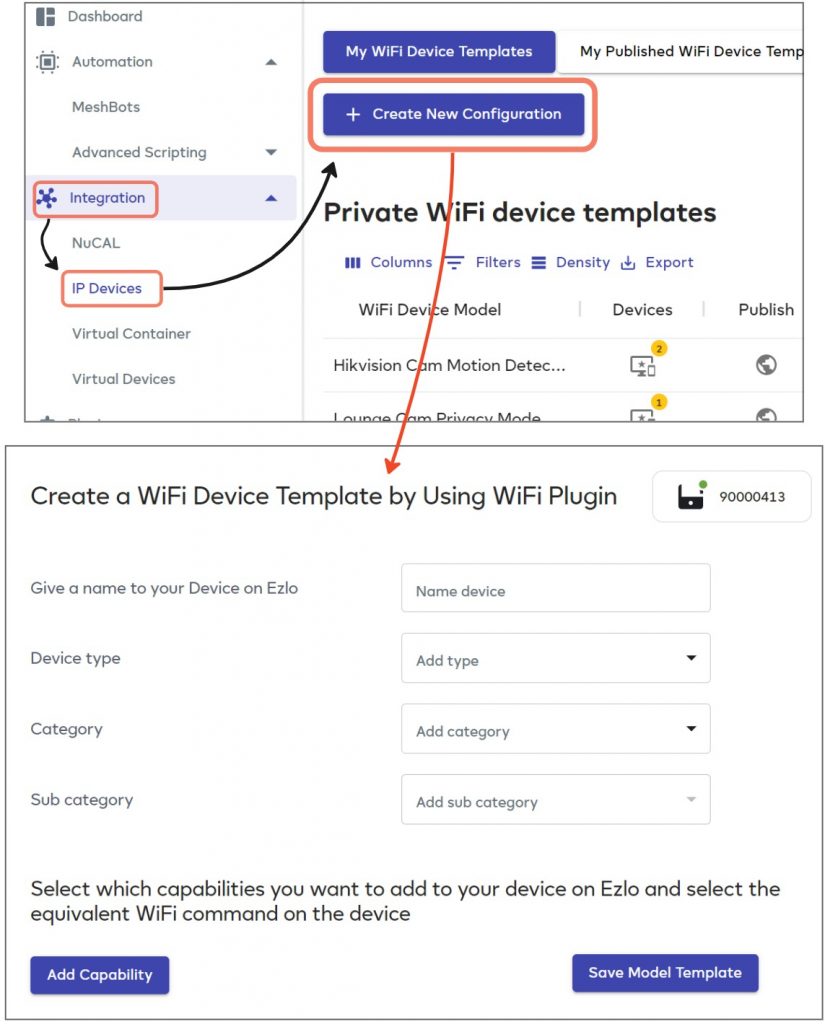
First, setup the template name and the type of device that it will create:
Name – Provide a name for your template. This should address the function of the template and can be as descriptive as you feel necessary. For example, ‘Simple Virtual Switch Template’ or something more specific like ‘Start/Stop Recording on HikVision Cams’.
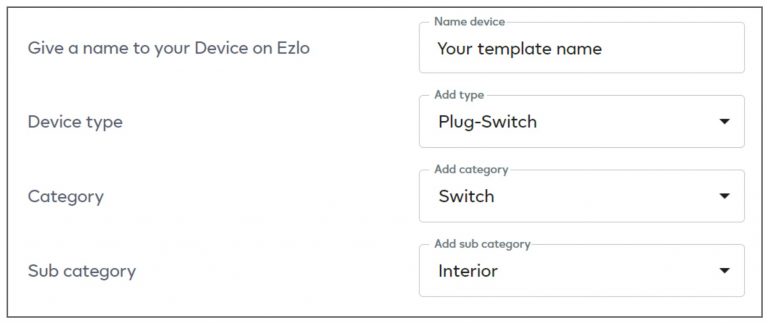
Device Type / Category/ Sub-Category – Choose the category and sub-category of virtual device that you want to create. These fields let you and other users more easily identify the purpose of the template.
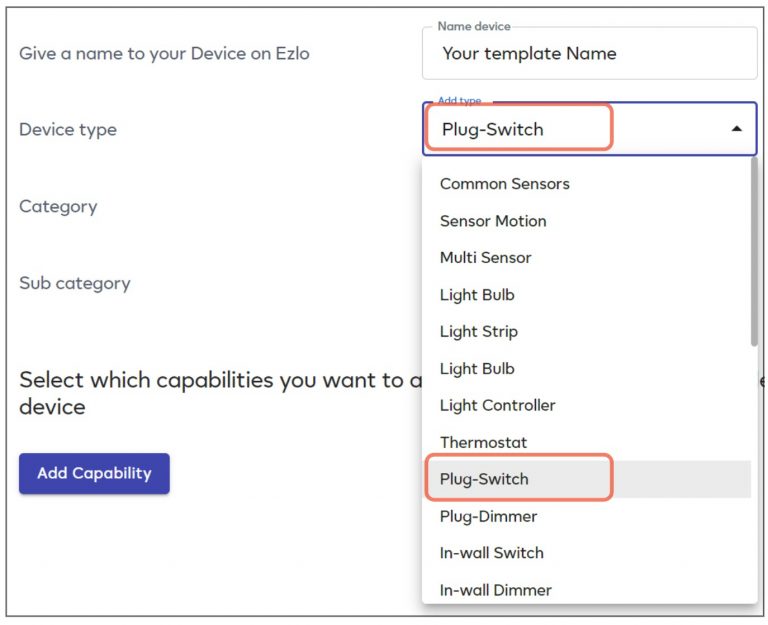
- We are creating a simple virtual switch in our example, so select ‘Plug-Switch’, ‘Switch’ and ‘Interior’ for type, category and sub-category respectively:
- Next, click the ‘Add Capability’ button then choose ‘Switch’ from the capability drop-down menu:

- This opens a screen which lets you configure the http commands for the device. The actions presented on the capabilities screen differ according to the type of device you want to create.
- For a simple switch device, we can configure commands for its ‘On’ and ‘Off’ states:
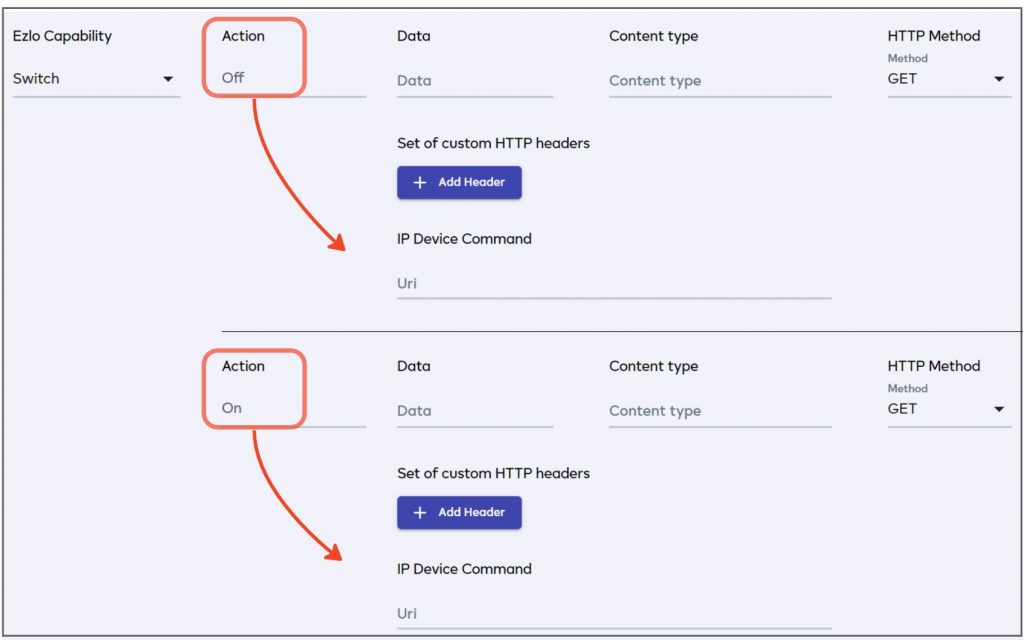
You need to create commands for each action on your device. In our case, a command for ‘On’ and a command for ‘Off’. The IP Device Command’ and ‘HTTP Method’ fields are important, while the ‘Data’, ‘Content Type’ and ‘Custom HTTP Header’ fields are more dependent on the requirements of your target.
‘Data’, ‘Content Type’ and ‘Custom HTTP headers’
HTTP Method – Choose the method in which your command is sent. Note – what you choose here depends on the entity to which you are sending the request, so you should consult their documentation to find out which method it requires. For example, some devices and services will accept ‘Get’ requests, while others only use ‘Post’. Here are some of the most commonly used methods:
- GET – ‘Get’ requests are usually used to read information such as a device setting or data from a website or service. Unlike ‘Post’, ‘Put’ and ‘Delete’, ‘Get’ does not modify or append to the target.
- POST – ‘Post’ requests are usually used to send data and set device parameters. In terms of data transference, ‘Post’ will always create a new resource at the target location. So making two identical post requests will likely lead to duplicate resources.
- PUT – ‘Put’ is usually used to update an existing resource. ‘Put’ will always update and replace the data at the URI if it already exists, whereas ‘Post’ will append to the existing data. You could therefore make multiple ‘Post’ requests to the same URI to produce an additive effect, but multiple ‘Put’ requests to the same URI will modify the existing resource.
We will use ‘GET’ in our example as that is a method accepted by our target service, Node-Red.
Data / Content Type / Custom HTTP Headers – Http headers let you send additional information to a target server along with your http request. Some requests require you to include certain types of header to communicate with the server.
‘Content-Type’ is a header which tells the server the format of the data you are requesting. Here are some examples:
Content-Type: Image/jpeg
Content-Type: Application/json
Content-Type: Text/plain
This header also tells the system how to parse any content it receives. E.g., ‘Content-Type: image/jpeg’ tells your browser to show an image. Without the header, the browser would simply show the image data as code. ‘Content-Type: application/json’ tells a server that the data you require is in .json format.
Whether or not your request needs headers depends on the requirements of the target server. Please consult the target’s documentation to find out if the request needs custom headers. If in doubt, leave these fields blank then test to see if that works first.
You can learn more about http headers and their uses on this Mozilla help page.
Wikipedia’s list of http header fields explains the types and usage of many header fields.
You can leave these fields blank in our example as they are not required in order to interact with Node-red.
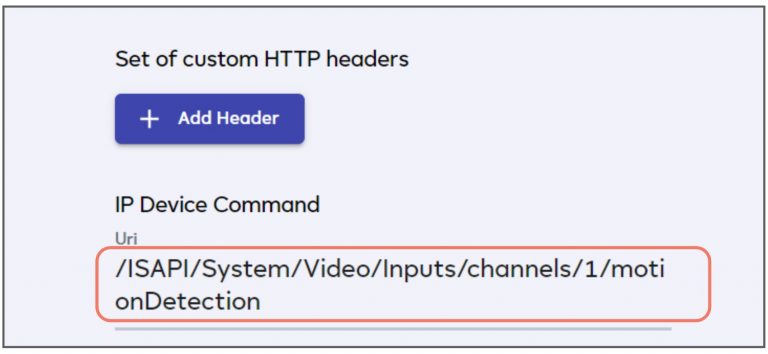
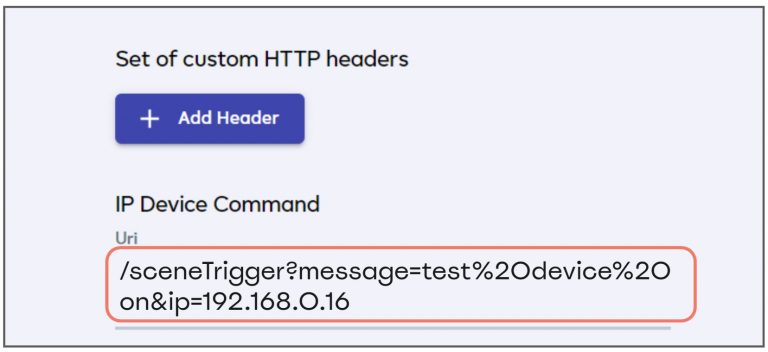
IP Device Command – Enter the payload or command you want to send to the device.
- Note – you do not need to enter the IP address or port of the target entity here. You will do that later when you create the virtual device from the template.
- You need only specify the ‘command’ portion of your request here.
- Example 1 – The following URL targets the motion detection feature of a local video camera for the ‘On’ command: http://192.168.0.14/ISAPI/System/Video/Inputs/channels/1/motionDetection You need only enter ‘/ISAPI/System/Video/Inputs/channels/1/motionDetection’ in the ‘IP Device Command’ field:
- Example 2 – Send a command via Node-Red to a Google Home speaker so it says ‘Test Device On’ for the ‘On’ action. The full URL might be something like http://127.0.0.1:1880/sceneTrigger?message=test%20device%20on&ip=192.168.0.16 127.0.0.1:1880 is the address of the target – a local Node-Red server. However, you only need to enter the ‘command’ part of the request here:
…so the template is ultimately a repository of the commands you want to send. You (and other users) can apply these commands to specific devices in the device creation stage of the process. This can be a great time-saver as the command configuration process described above is often the trickiest and most complex for new users.
- Repeat the same process for the ‘Off’ command. For example, enter an IP Device Command to say ‘Test Device Off’ when the virtual switch is turned off.
- The full template for the example above should look something like this:
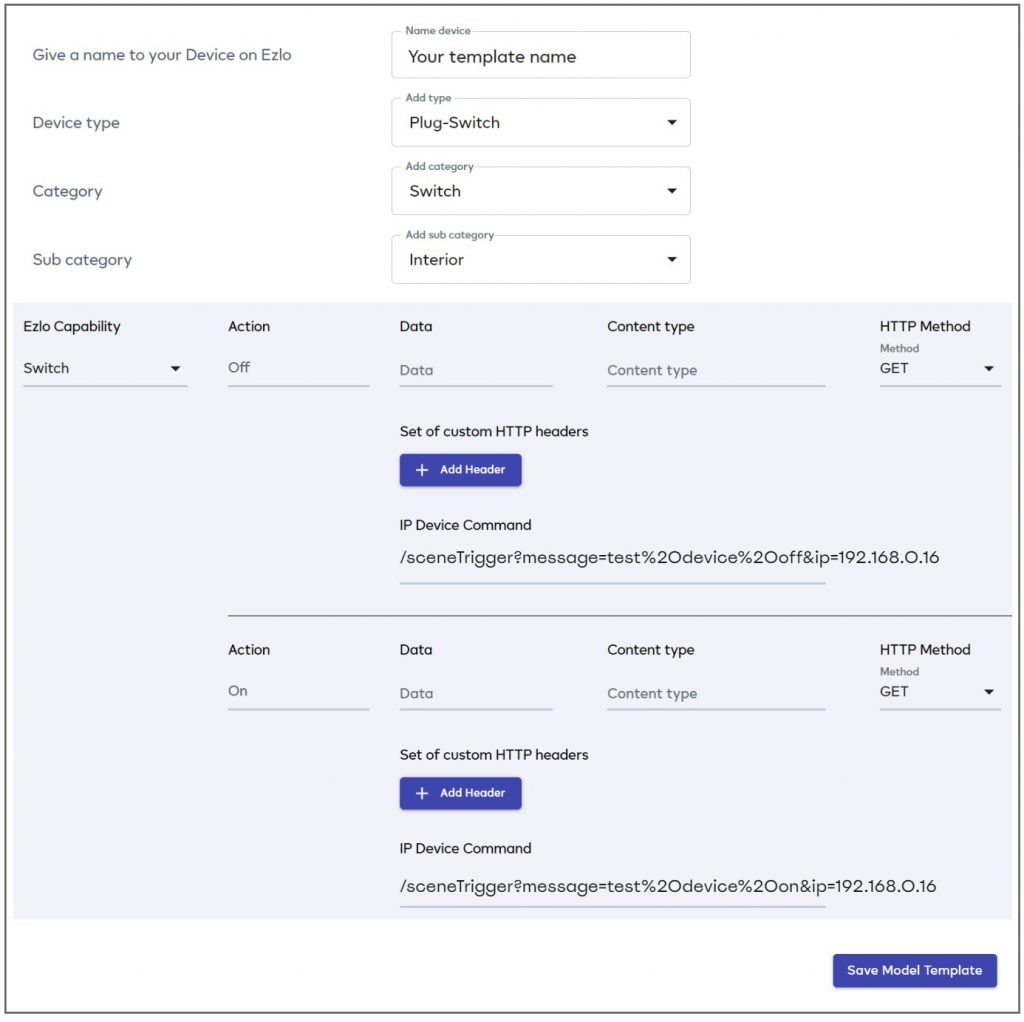
- Click ‘Save Model Template’ to save the template.
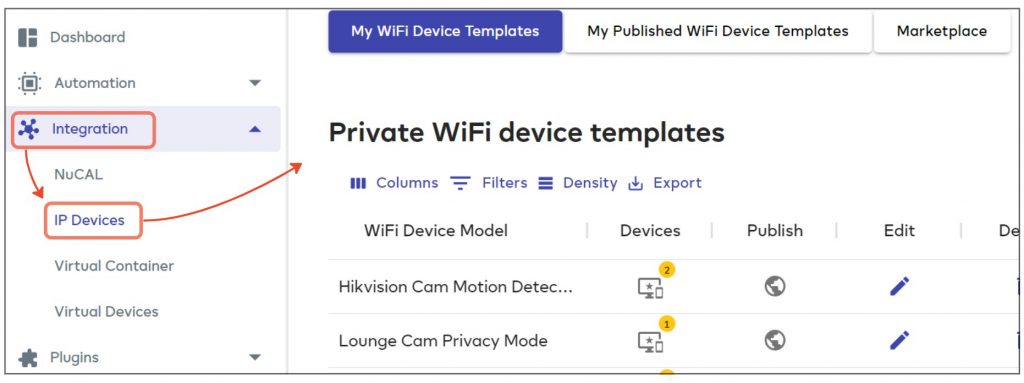
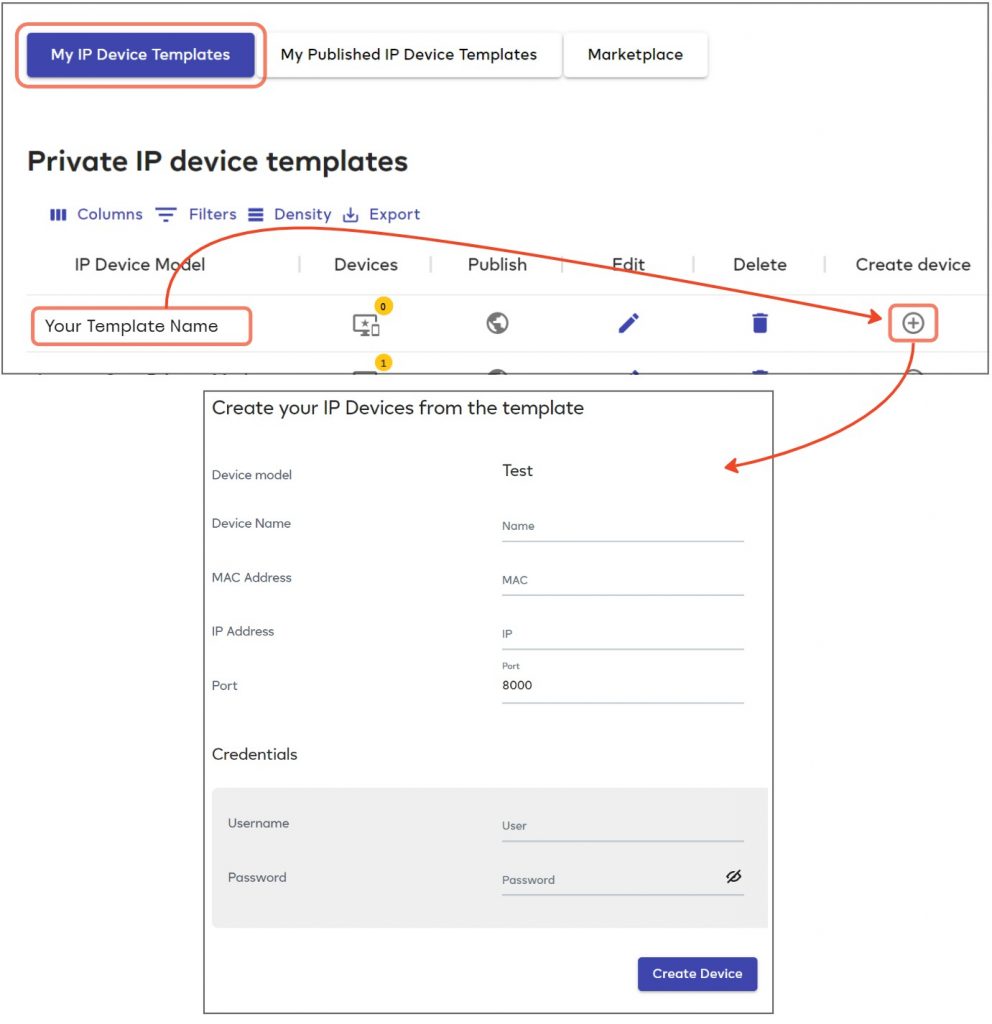
Your new template will be listed in the ‘Private IP Device Templates’ area.
- Use the ‘Edit’ or ‘Delete’ buttons to modify or remove the template as required.
- Click the ‘Publish’ icon to publish the template to the marketplace where other users can download it.
- Click the ‘Devices’ icon to view all devices that you have created with this template:

Create Virtual Devices from the template
- Open the ‘My IP Device Templates’ section.
- Click the ‘Create Device’ icon in the row of your new template to open the new device screen:
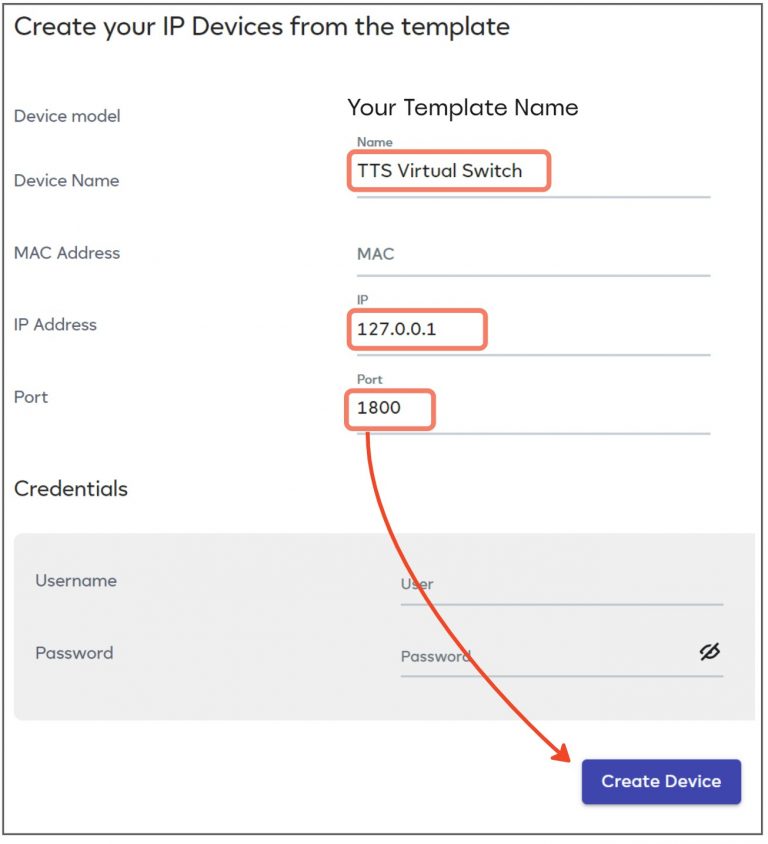
Device Name – Create a name for your virtual device. The device will be listed under this name in the ‘Devices’ area of Ezlogic. The name should ideally describe the device’s purpose. For example, ‘TTS Virtual Switch’ or ‘Enable Hikvision camera recording’.
MAC Address – Enter the MAC address of your target service, device or server if required. Consult your target entity’s documentation to find out if this field is required. If not then you can leave this field blank.
IP Address – Enter the IP address of your target service, device or server. You do not need to enter the ‘http://’ prefix, just the IP itself. In our example the request is sent to a local Node-Red server, so you need to enter the part of the URL highlighted in red below:
http://127.0.0.1:1880/sceneTrigger?message=test%20device%20on&ip=192.168.0.16
Port – Enter the port address of your target service, device or server if required. In our example we are required to enter the port number of the local Node-Red server as highlighted below:
http://127.0.0.1:1880/sceneTrigger?message=test%20device%20on&ip=192.168.0.16
Credentials – A service, website or LAN server may require you to provide a username and password before it will accept your requests. If your target entity requires authentication then enter the username and password here. If it doesn’t then you can leave these fields blank.
- Click ‘Create Device’ after entering all information required by your target entity:
View and operate your new device
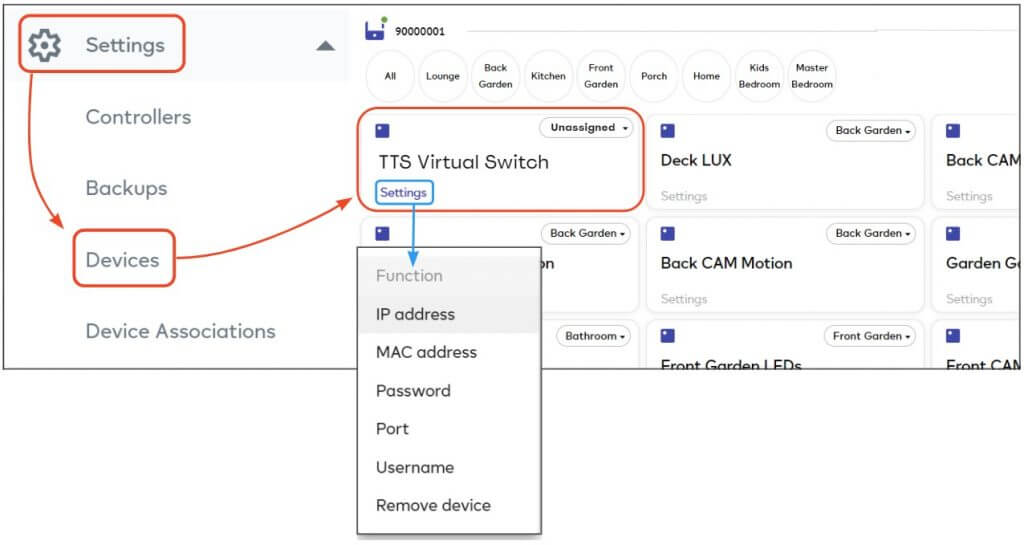
- You can view the status of your new device in the ‘Settings’ > ‘Devices’ area. Click ‘Room’ to assign it to a room, or ‘Function’ if you want to modify its settings:
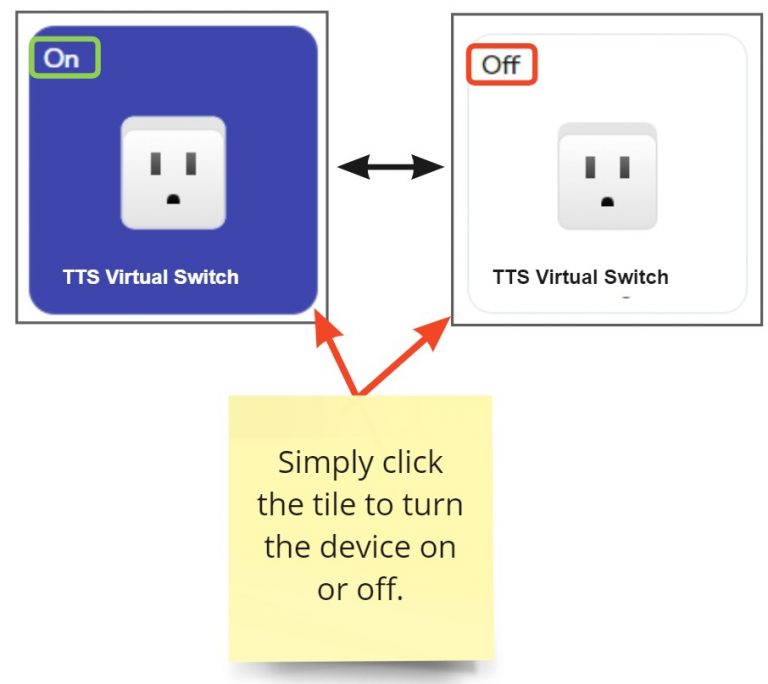
- You can operate your new virtual device via its EZLogic dashboard tile:
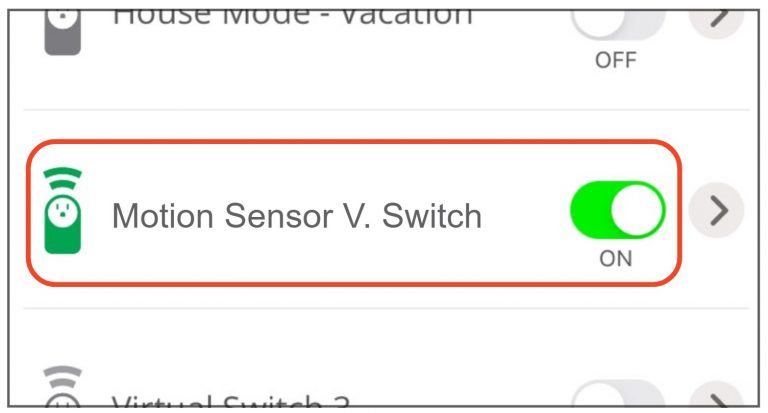
- …or by using the MiOS/Vera mobile app:
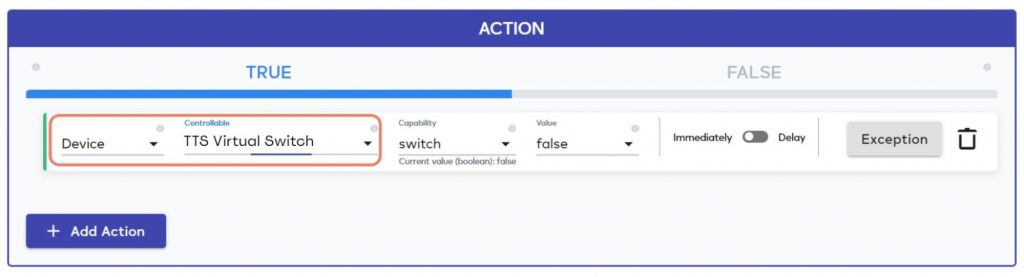
- You can also use the virtual device as a trigger for a meshbot action:
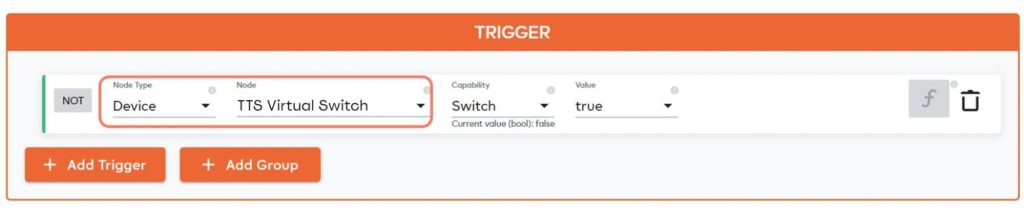
- Or as the target action of a different trigger:
Further reading
Community Posts:
Use the IP devices plugin to control an Envis Camera via IFTTT webhooks
(credit @cw-kid – valued community leader).
Use the IP devices plugin to control Hikvision IP cameras
(credit @cw-kid – valued community leader).
Video – Use the WiFI/IP device generator plugin
Guide page – How to create HTTP request actions in EZLogic