Ezlo SmartThings Plugin
The SmartThings plugin lets you integrate your SmartThings hub and devices into the Ezlo ecosystem. Once imported, you can control your SmartThings devices via EZLogic meshbots, via our mobile apps and via the dynamic dashboard. This first iteration of the plugin supports SmartThings switches, dimmers, dimmer-switches and contact sensors.
You need to obtain a SmartThings api token in order for this plugin to work. Please see the relevant section below if you do not have a token or wish to generate a new one.
Generate a SmartThings api token
Install and configure the plugin
Generate a SmartThings api token
Our plugin uses the SmartThings api to communicate with your SmartThings devices. You need to authorize the plugin to access your devices by entering an api token during setup. You can use an existing token if you have one, or generate a new token by following the steps below:
- Click this link to login to your SmartThings account: https://account.smartthings.com/tokens. Create a new account if you do not already have one.
- Click ‘Generate new token’ on the ‘Personal access tokens’ screen:

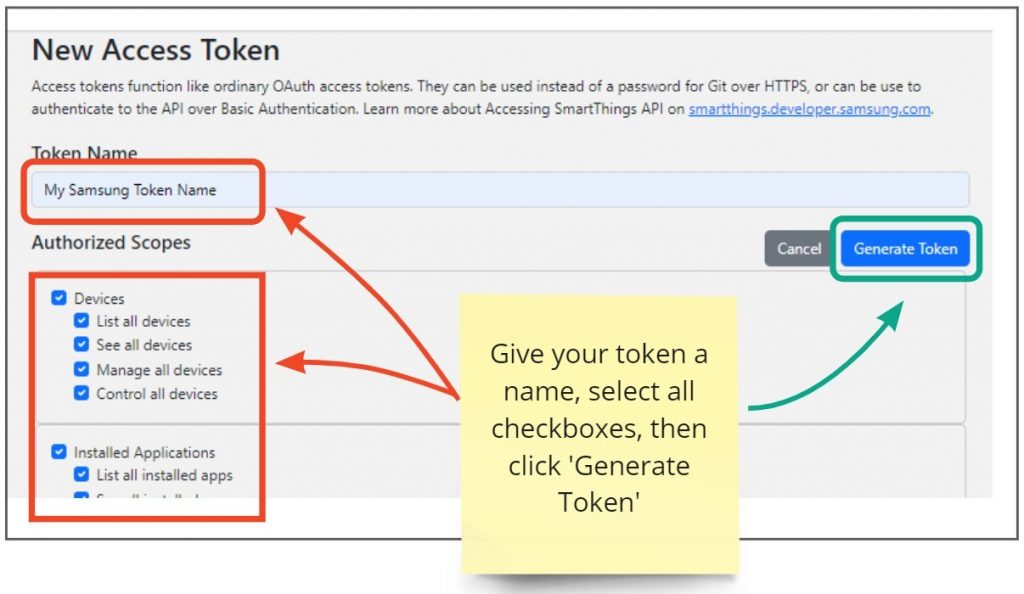
- Create a name for your token, select all the checkboxes in the list, then click ‘Generate Token’:
- Your new token is the string of characters shown on the next screenshot. Please copy and save the token right now as you won’t be able to view it on future visits to the site.
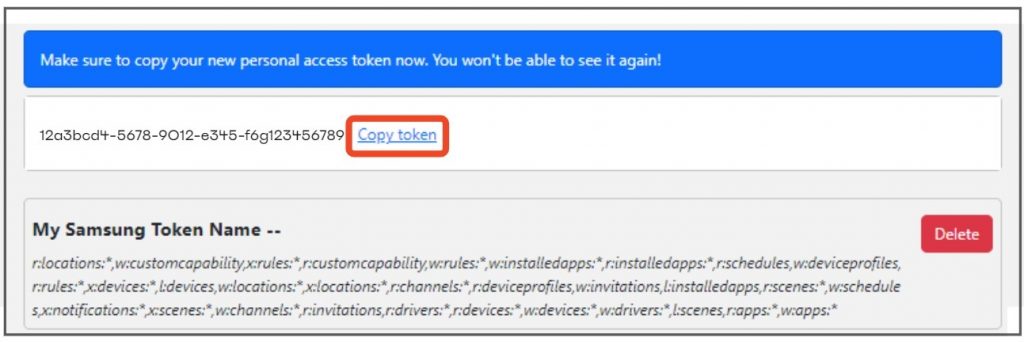
- You can always go back and create a new token if you lose/cannot find your token. For security reasons, we advise you to delete any old tokens that you are not using, or are not being used by other people in your organization.
Install and configure the plugin
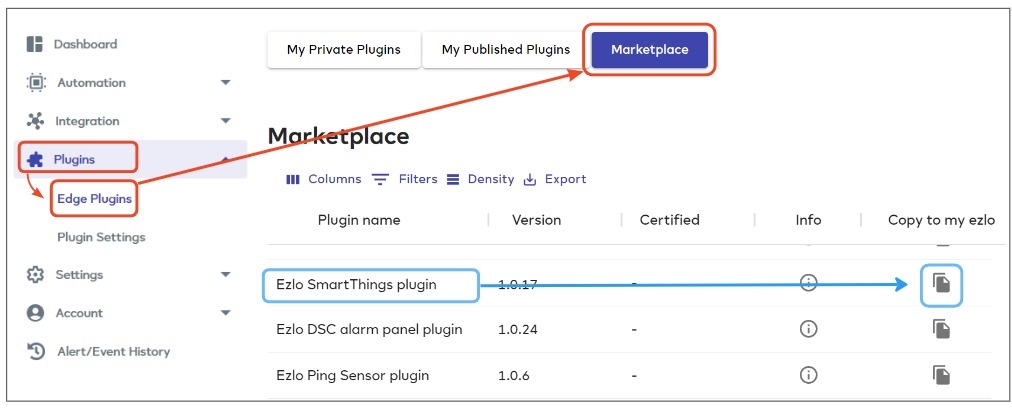
- Login to EZLogic then click ‘Plugins’ > ‘Edge Plugins’ in the left-hand menu.
- Click ‘Marketplace’, locate the ‘Ezlo SmartThings Plugin’ row then click ‘Copy to my Ezlo’:
- Next, click the ‘My Private Plugins’ button along the top of the screen.
- Locate the ‘Ezlo SmartThings Plugin’ row then click ‘Manage Installations’.
- Choose the hub you want to control your SmartThings devices then click ‘Install’:

- After successfully installing, click the ‘Manage Installations’ icon again then click the ‘Configure’ button next to your chosen controller:
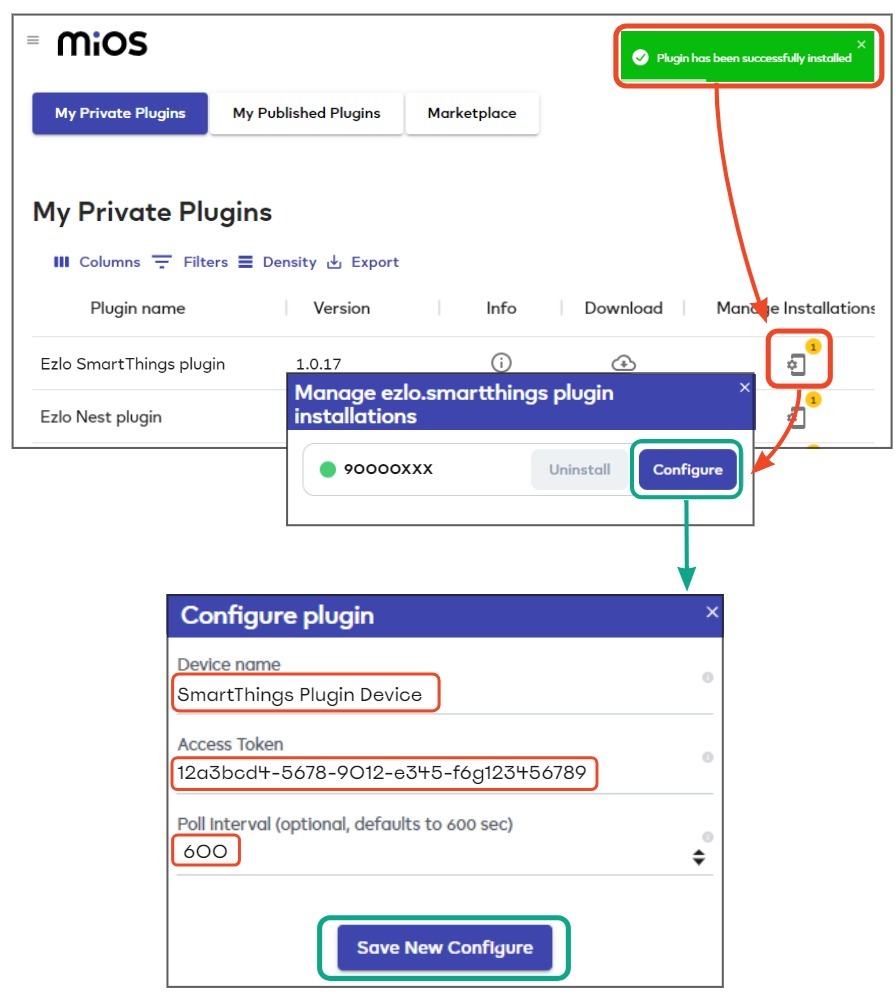
Complete the ‘Configure plugin’ form as follows:
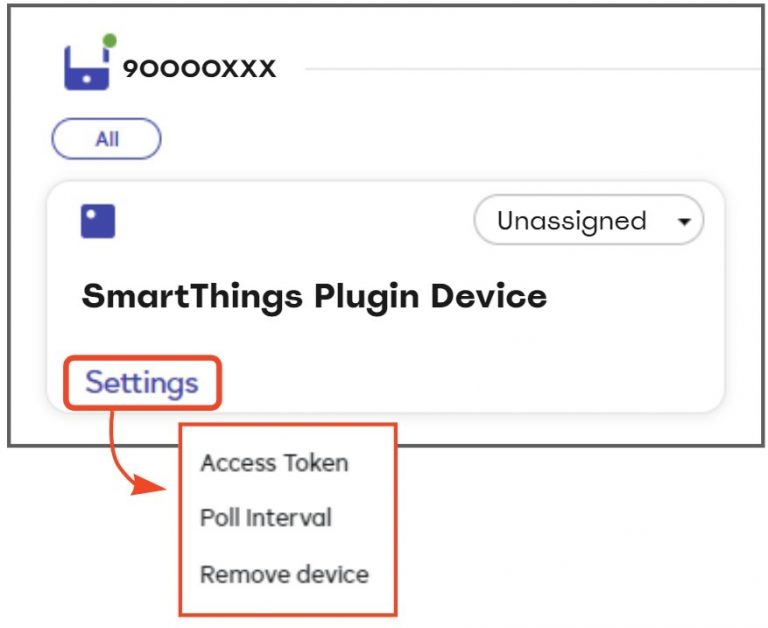
- Device Name – Choose a friendly name for your Ezlo plugin device. This device controls the connection between your Ezlo hub and your SmartThings account and is automatically created after you click ‘Save’. You can view the device in ‘Settings’ > ‘Devices’ and change the token, polling interval and other details as required:
- Access Token – Enter the SmartThings api token you obtained earlier into this field.
- Polling Interval – Optional. You can safely leave this field blank to implement the default polling interval of 600 seconds. The polling interval is simply how often your Ezlo controller sends a message to your SmartThings devices to request their current status (on/off, dim level etc). It does not affect ‘how fast your automations will run’ or anything like that. Most controllers poll every device on a network right after start-up and it is usually not necessary to do so again, with most devices automatically reporting their status at regular intervals anyway.
Click ‘Save new configuration’ to begin importing your SmartThings devices.
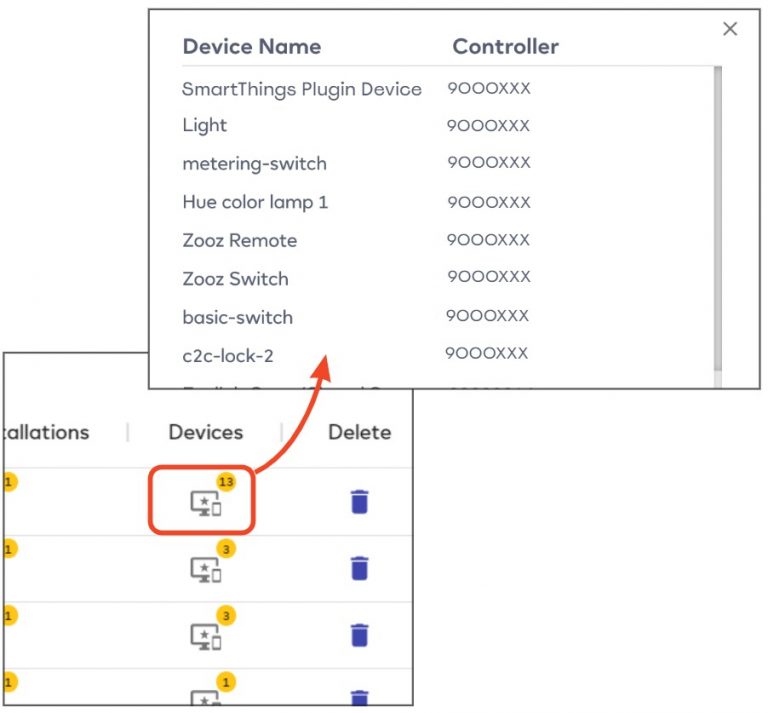
- You can quickly view a list of imported devices by clicking the ‘Devices’ icon in the SmartThings plugin row:
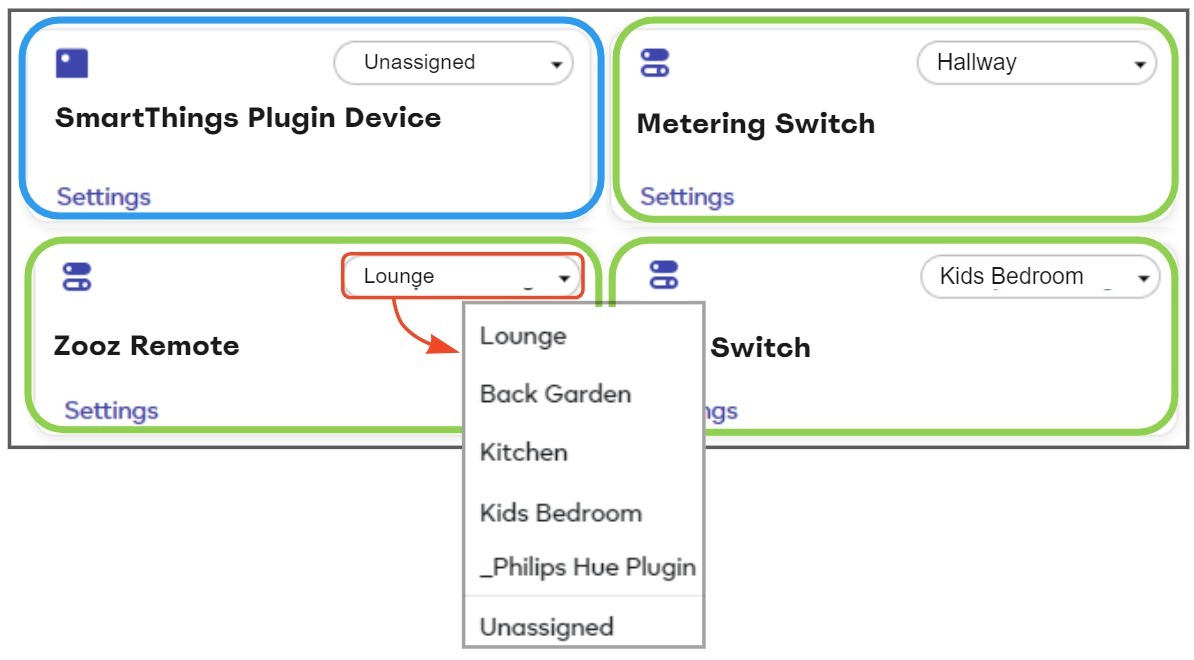
- The plugin device and all imported devices also appear in the Devices area. Each device tile lets you change the device name, settings and room:
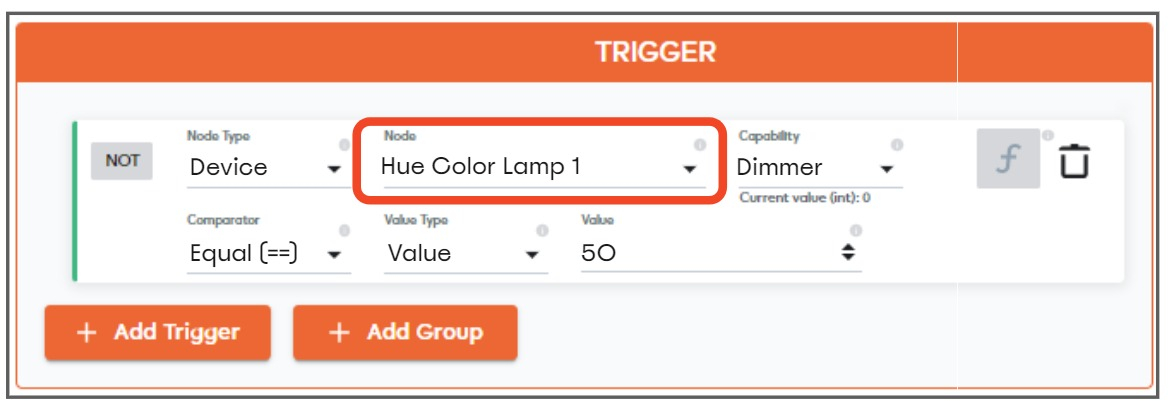
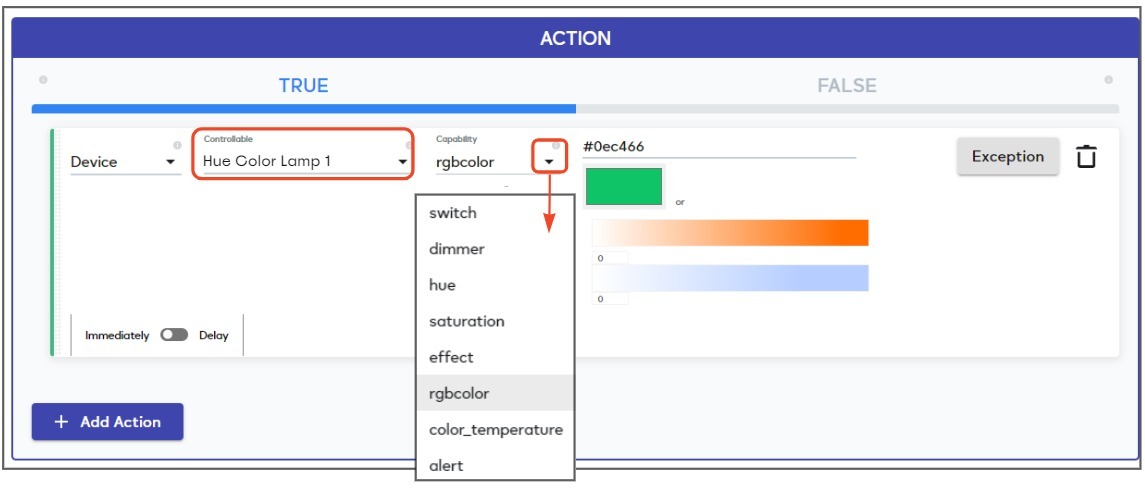
You can now control your SmartThings devices via our mobile apps and in EZLogic. Choose a SmartThings device in meshbot trigger or action and they’ll work exactly as if they were paired to your Ezlo controller:
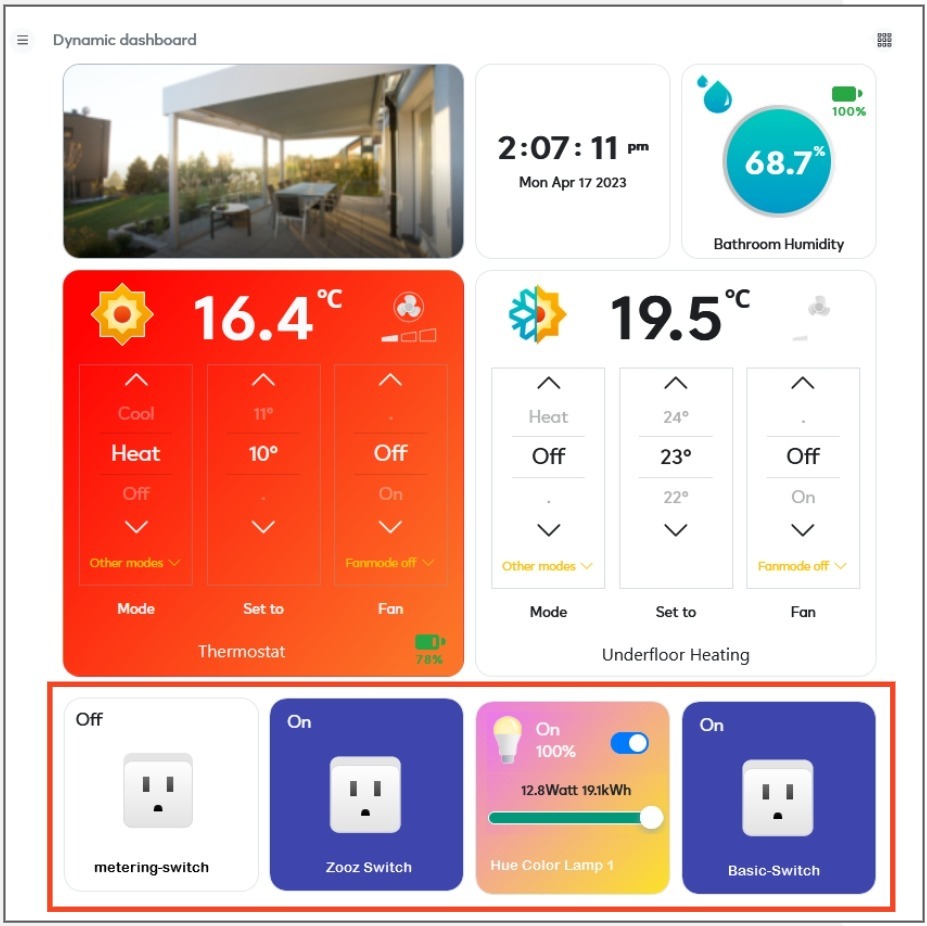
You can also view and control your SmartThings devices in the EZLogic dynamic dashboard: