The ‘Customization’ area lets you change the look and feel of the EZLogic interface. You may want to simplify the UI so you only see the items you use most often and the information you find most valuable. You can also change the color scheme and the logo to match your personal tastes or for corporate branding.
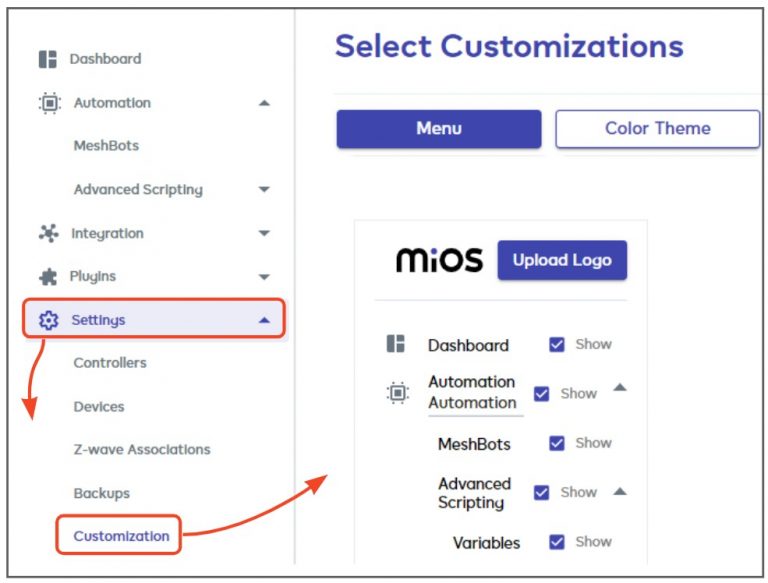
Click ‘Settings’ > ‘Customization’ to get started:
The customization area lets you change the following items:
Main menu – Choose which items are shown and which are hidden. You can also rename the ‘Automation’ section if required.
Upload Logo – Replace the ‘MiOS’ logo at top-left with your own logo.
Color Theme – Change the color of menu texts, buttons and backgrounds across the entire UI.
Nodes & Controllables – Change the order in which items are shown in the first drop-down menu of meshbot actions and triggers.
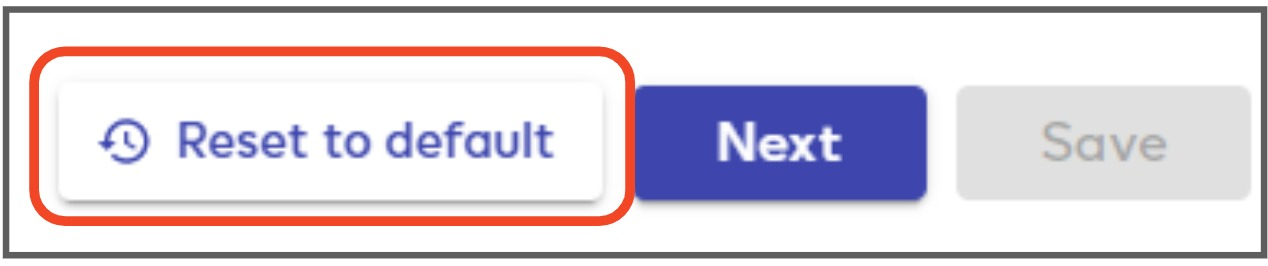
You can undo any changes you have made by clicking the reset button in the lower-right corner:
Notes
Any customizations you make only apply to the currently logged-in user. Other users on your account will continue to see the standard user-interface when they login.
The customization menu item is only available and visible to account admins. It is not visible to advanced users, basic users or notification-only recipients.
We hope to implement account-wide customizations and more user-specific options in future updates.
Menu
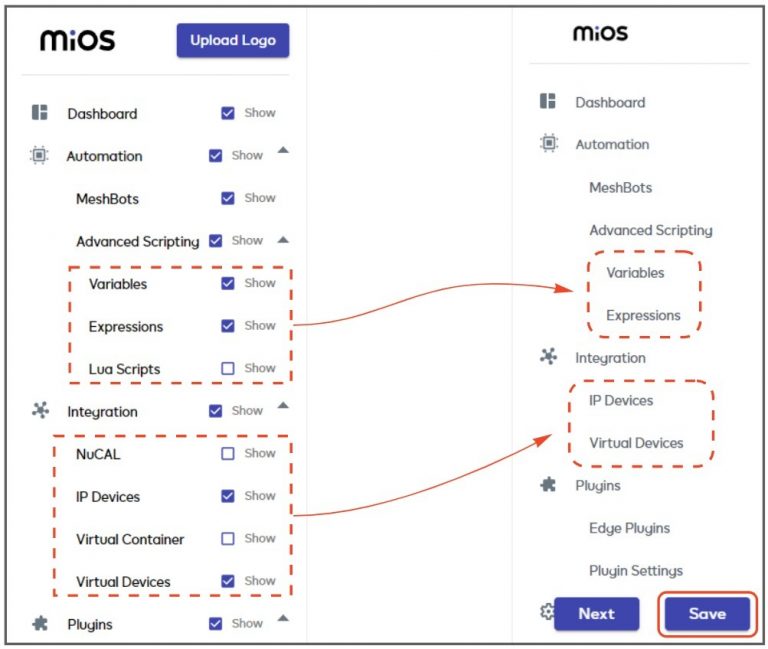
The ‘Menu’ area lets you modify which items are shown in the left-hand menu and to replace the ‘MiOS’ logo image with a logo of your own.
Use the checkboxes on the left to hide any items you do not want to see in the menu.
The ‘Preview’ panel on the right lets you view your new menu in real-time.
Changes are not applied to the interface until you click the ‘Save’ button.
The following example shows how the menu would look if chose to hide ‘Lua Scripts’, ‘NuCAL’ and the ‘Virtual Container’:
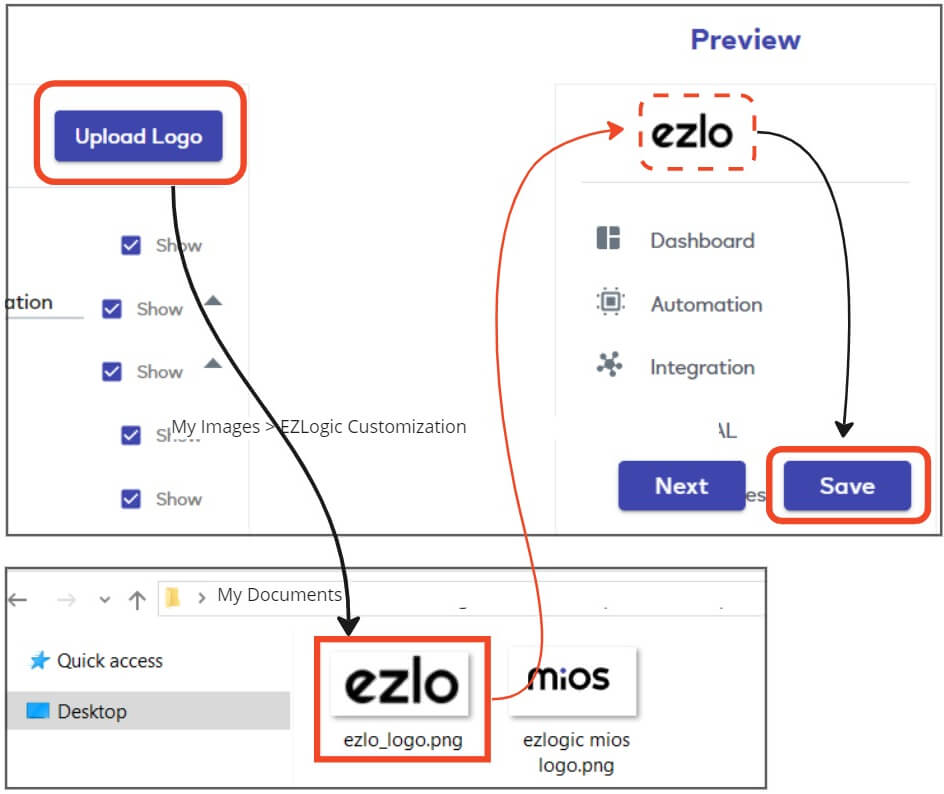
Upload Logo
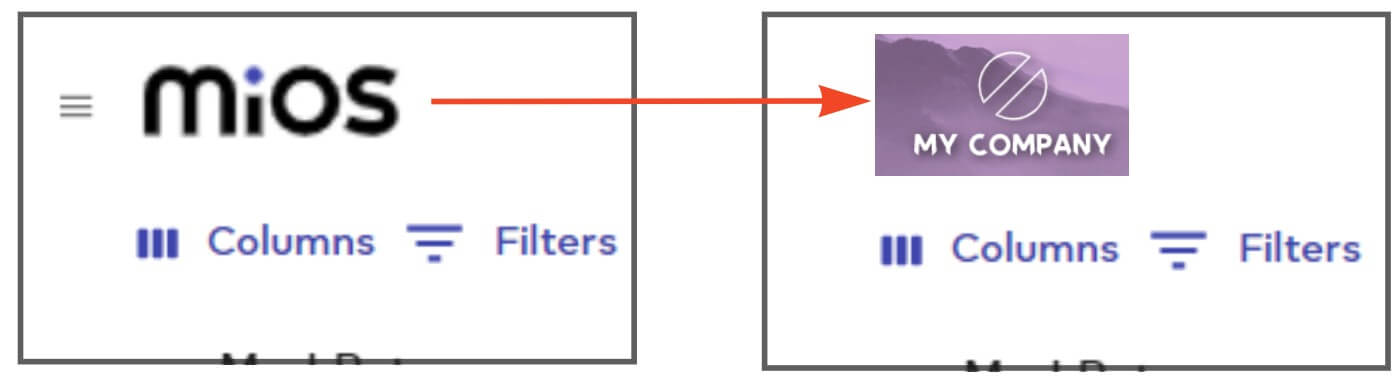
The ‘Upload Logo’ button lets you change the image shown at the top-left of the interface. You may want to use this feature to promote your company brand or simply to change the look of the interface.
Click ‘Settings’ > ‘Customization’ > ‘Menu’.
Click ‘Upload Logo’
Select the image you want to use. EZLogic will auto-resize the image you upload to fit the interface.
Check the preview to confirm the image is to your liking.
Click ‘Save’ to deploy the logo to the EZLogic interface:
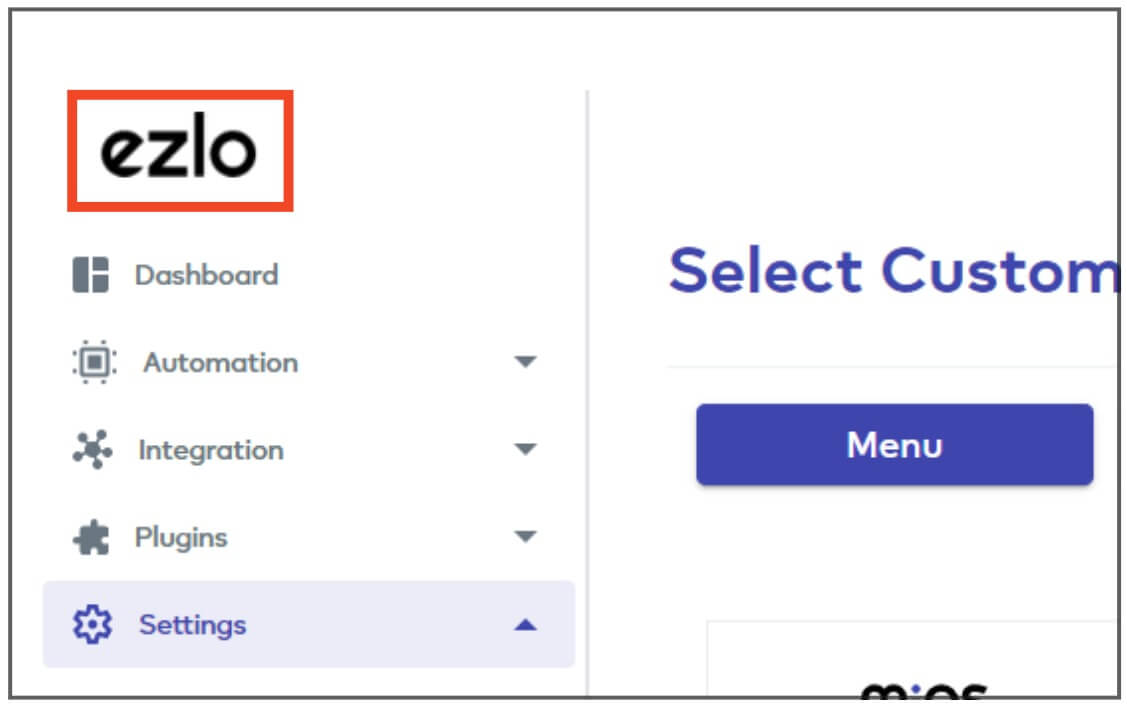
Your new logo is shown at the top-left corner of the interface and above the navigation menu:
Notes:
Logo changes only apply to the currently logged-in user. Other users on your account will continue to see the ‘MiOS’ logo when they login. We hope to implement account-wide logos and more nuanced customization options in future updates.
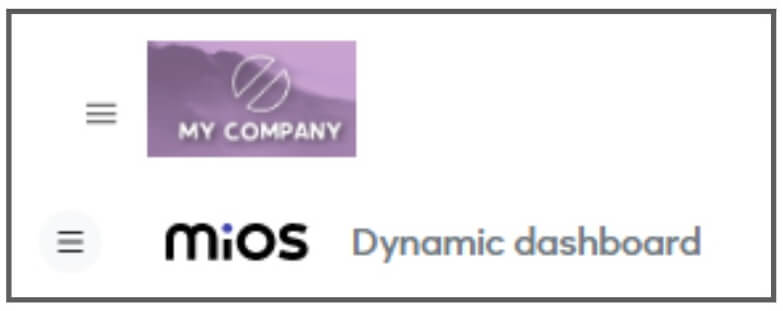
Custom logos appear at the top-left of the interface but, for now, the MiOS logo still appears on the dynamic dashboard. Again, we aim to improve on this in future updates.
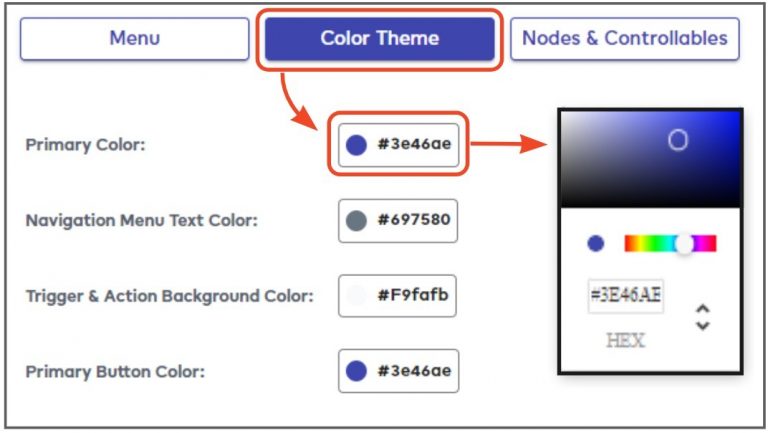
Color Theme
The ‘Color Theme’ area lets you modify the color of menus, texts and buttons in the EZLogic UI. Use the color pickers to change the interface to suit your personal tastes or to match your corporate branding:
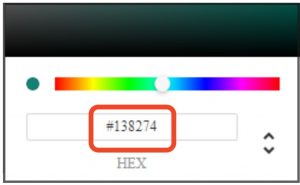
Tip – You can copy and paste the hex value to ensure an exact color match across your modified items:
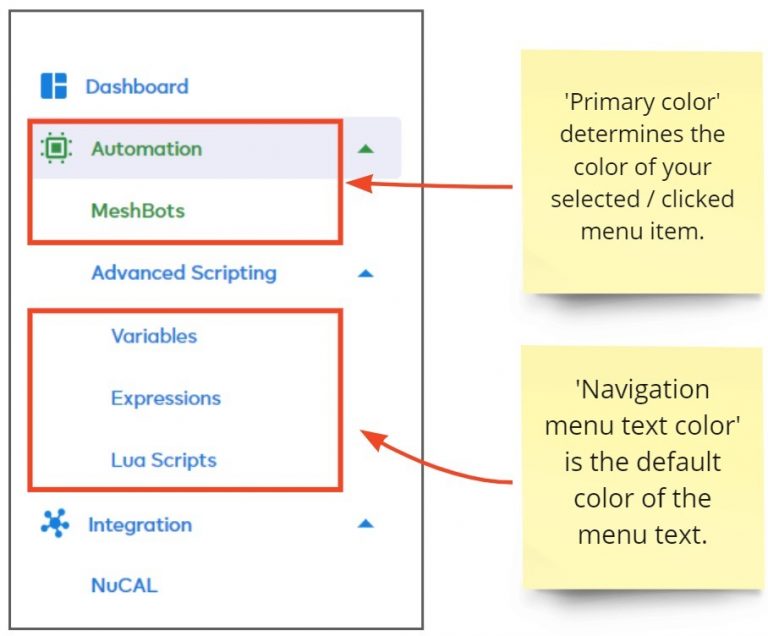
Primary Color – Change the color of menu items you have selected (clicked on) and core labels and icons:
Navigation Menu Text Color – Change the default color of menu texts:
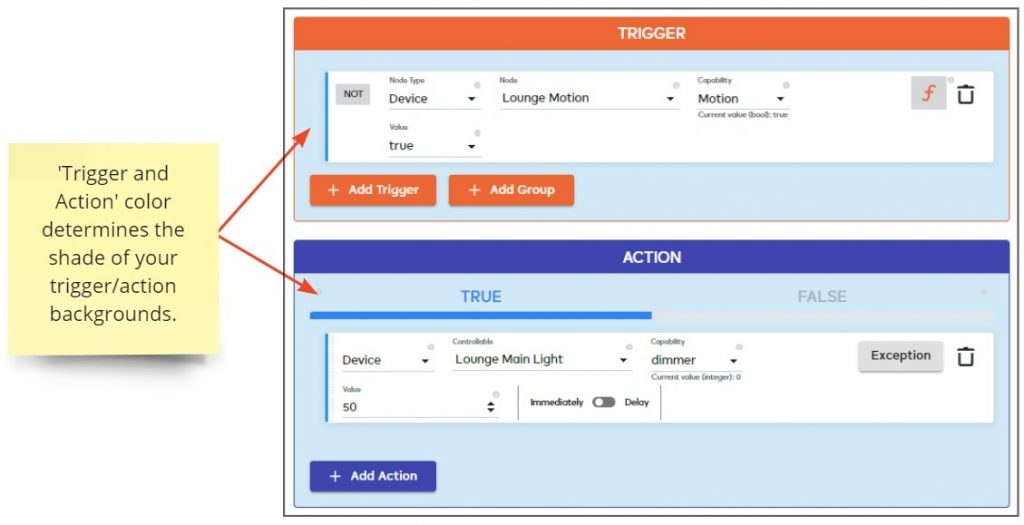
Trigger & Action Background Color – Choose the color used as the background for meshbot triggers and actions:
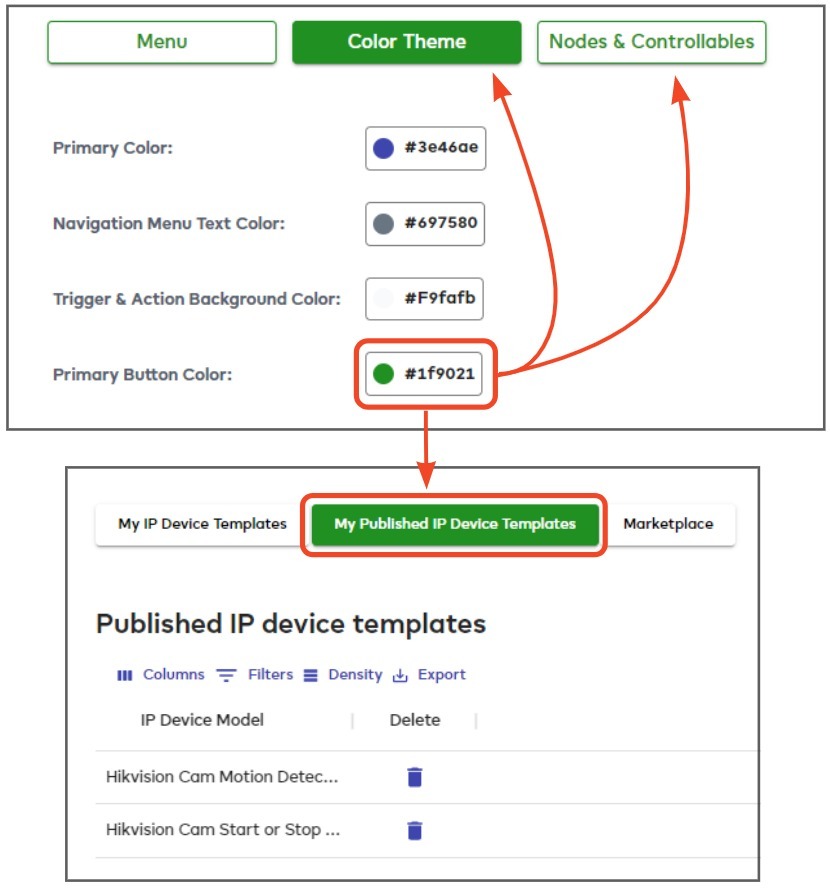
Primary Button Color – Change the background color of buttons in the EZLogic interface:
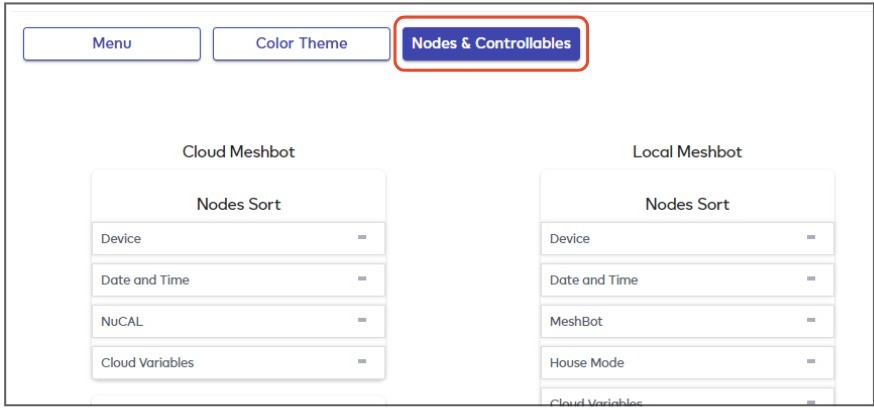
Nodes & Controllables
The ‘Nodes & Controllables’ area lets you rearrange the order of menu items in local and cloud meshbots. Simply drag and drop the menu items into your preferred order then click ‘Save’:
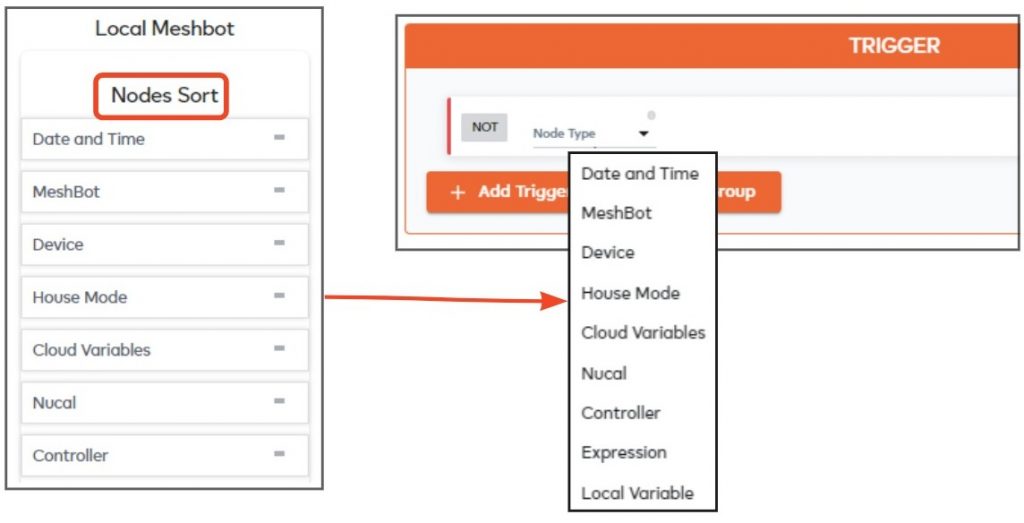
Nodes Sort – Arrange the menu items in the ‘Node Type’ drop-down of a meshbot trigger:
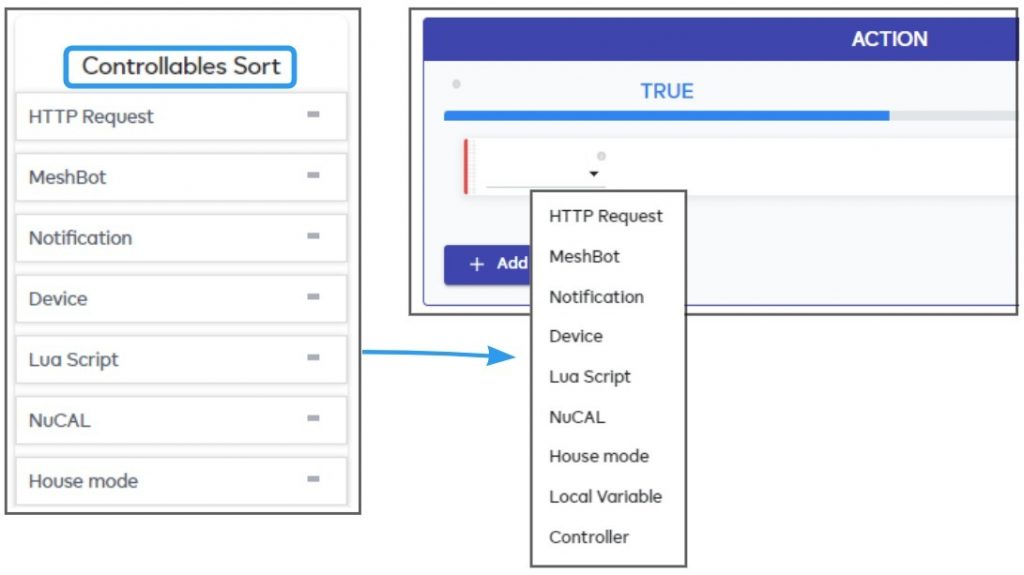
Controllables Sort – Arrange the menu items in the ‘Controllables’ drop-down of a meshbot action:
How can we help?
A premium WordPress theme with integrated Knowledge Base,
providing 24/7 community based support.