Ezlo SONOFF Plugin
The Ezlo Sonoff plugin lets you import Sonoff devices that support DIY mode into the Ezlo ecosystem. You can then use them in EZLogic meshbots, control them with our mobile apps, and access them in the dynamic dashboard.
DIY mode allows you to control Sonoff devices via local HTTP connections rather than Sonoff’s eWeLink technology. You need to enable DIY mode on all Sonoff devices that you want to control with our plugin.
- See Sonoff’s DIY documentation for general help to enable DIY mode on your device.
- The following table shows which device models are supported by our plugin along with some support links and advice that may help you:
| Device Model | Device Type | DIY Mode Instructions |
|---|---|---|
| D1 | Smart DImmer Switch |
– Go to the Sonoff help page and scroll to: ‘Example for Single Channel DIY Dimmer (D1) enters DIY Mode’. |
| MINIR3 | Smart Switch |
Go to the Sonoff help page and scroll to: ‘Example for Single Channel DIY Plug (BASICR3, RFR3, MINI/MINIR2, MINIR3)’. |
| BASICR3_RFR3_MINI |
– Go to the Sonoff help page and scroll to: Example for Single Channel DIY Plug (BASICR3, RFR3, MINI/MINIR2, MINIR3)’. |
|
| B05-BL | Smart LED Bulb |
– Go to the Sonoff help page and scroll to: ‘Example for Smart LED Bulb (B02-BL-A60, B05-BL-A19,B05-BL-A60)’. |
| B02-BL | Smart LED Bulb |
– Go to the Sonoff help page and scroll to: ‘Example for Smart LED Bulb (B02-BL-A60, B05-BL-A19,B05-BL-A60)’. |
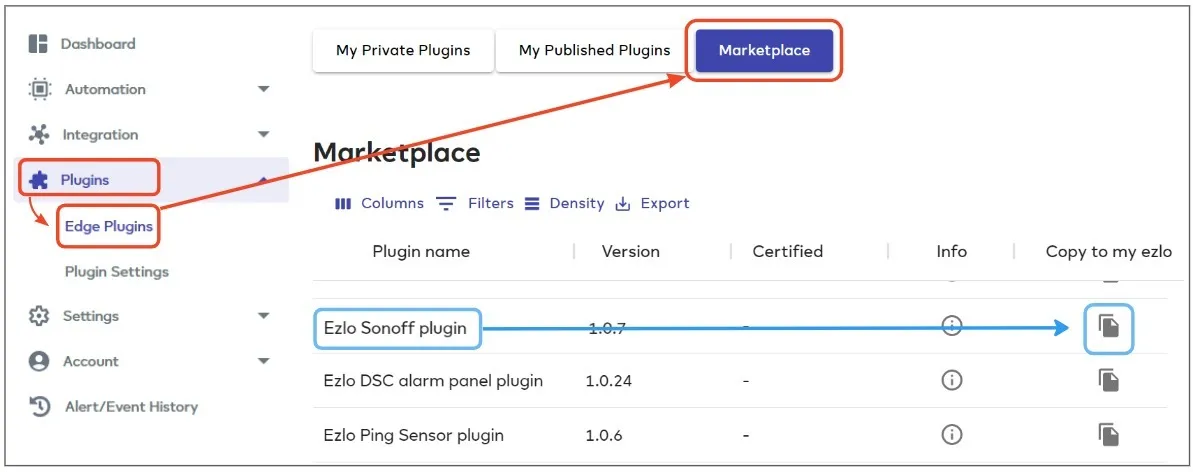
- Login to EZLogic then click ‘Plugins’ > ‘Edge Plugins’ in the left-hand menu.
- Click ‘Marketplace’, locate the ‘Ezlo Sonoff plugin’ row then click ‘Copy to my Ezlo’:
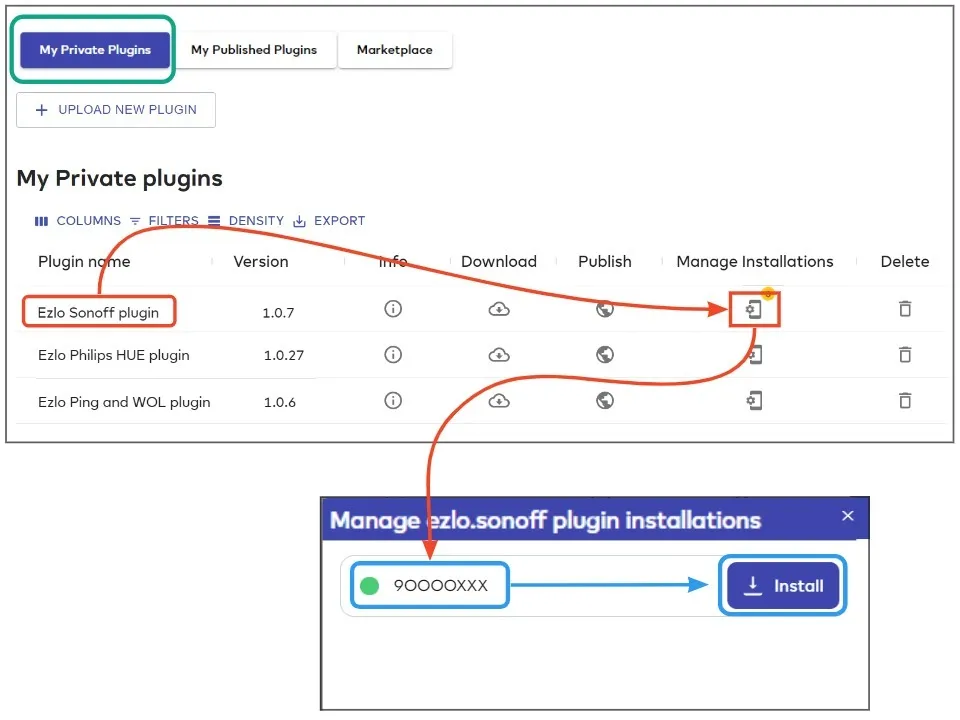
- Next, click the ‘My Private Plugins’ button along the top of the screen.
- Locate the ‘Ezlo Sonoff Plugin’ row then click ‘Manage Installations’.
- Choose the hub from which you want to control your Sonoff devices then click ‘Install’:
- After installation, click the ‘Manage Installations’ icon again then click the ‘Configure’ button next to your chosen controller:
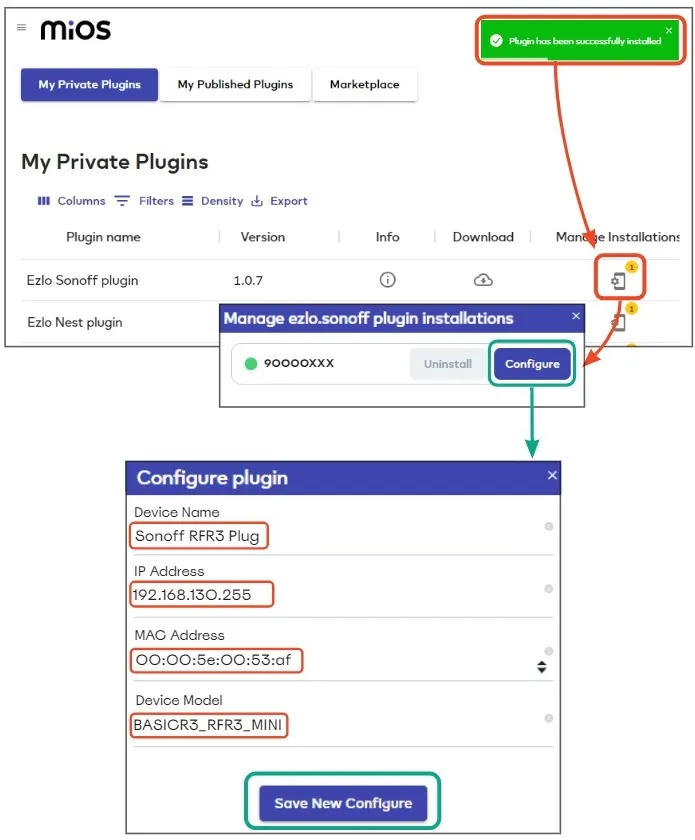
Complete the form as follows:
- Device Name – Choose a name that will help you easily identify your virtual Ezlo Sonoff device. This device establishes the connection between your Ezlo hub and your physical Sonoff device. A good starting point is to name it similarly to the device model. For example, ‘Sonoff MINIR3 Switch’.
- IP Address – Enter the local IP address of the target Sonoff device. Tools such as the Advanced IP scanner and Fing can help you find the IP address if you need help.
- MAC Address – Enter the MAC address of the target Sonoff device. Again, tools such as the Advanced IP scanner and Fing can help you find the MAC address if you need help.
- Poll Interval – Optional. You can safely leave this field blank to implement the default interval. The poll interval is simply how often your Ezlo controller sends a message to your Sonoff devices to request their current status (on/off, dim level etc). Most controllers poll every device on a network right after start-up and it is usually not necessary to do so again. This is because most devices automatically report their status at regular intervals anyway.
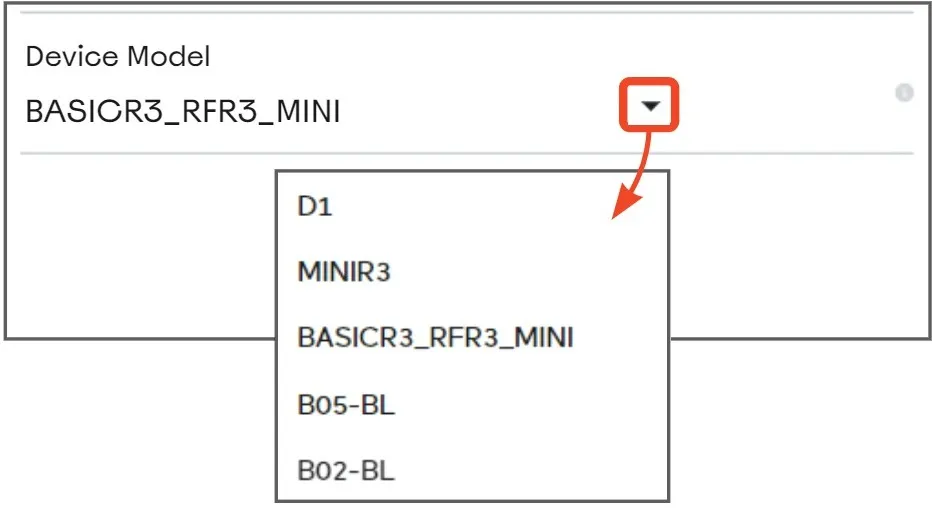
- Device Model – Select the class of Sonoff device you want to control with the plugin. See the Sonoff DIY section above if you need help to identify your device model.
Click ‘Save new configuration’ to create your virtual Sonoff device.
- You can view and edit your new device in the devices area. You can modify the device name, IP / MAC address and other details as required:
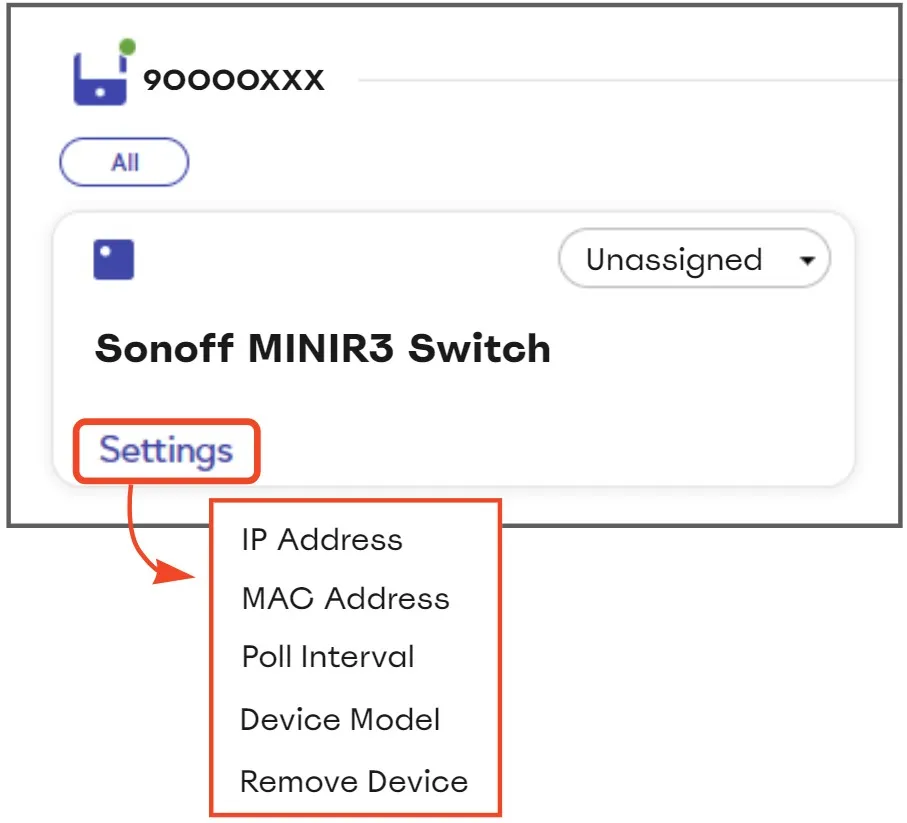
- To add more Sonoff devices, just click Manage Installations’ > ‘Configure’ again and repeat the configuration process.
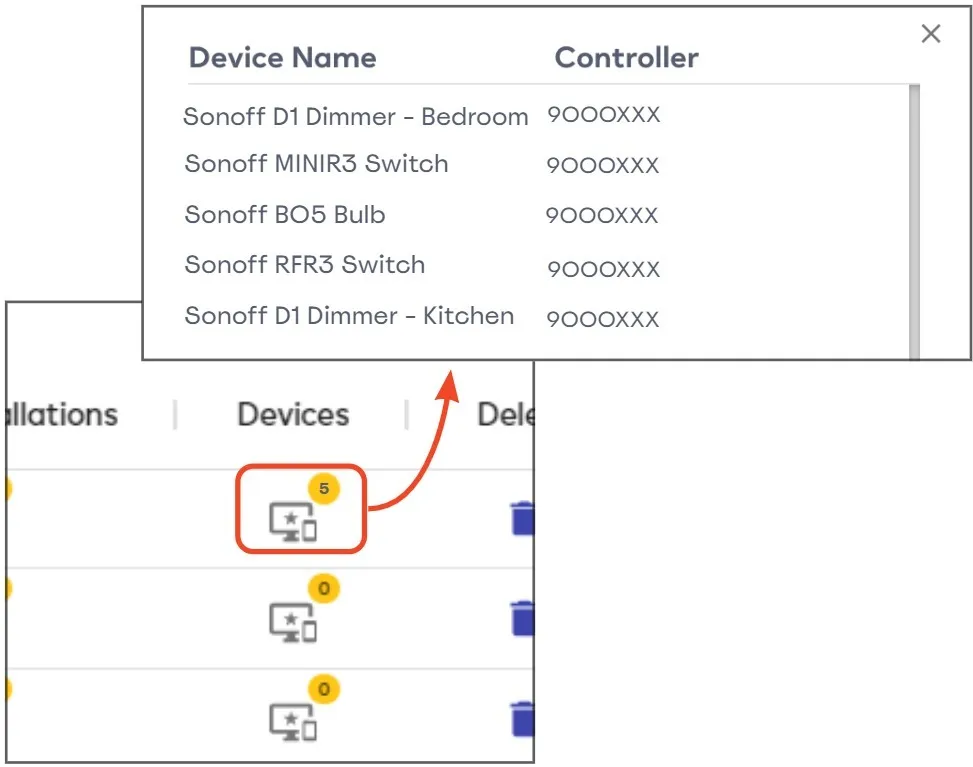
- Click the ‘Devices’ icon in the Sonoff plugin row to quickly view all devices that you have created:
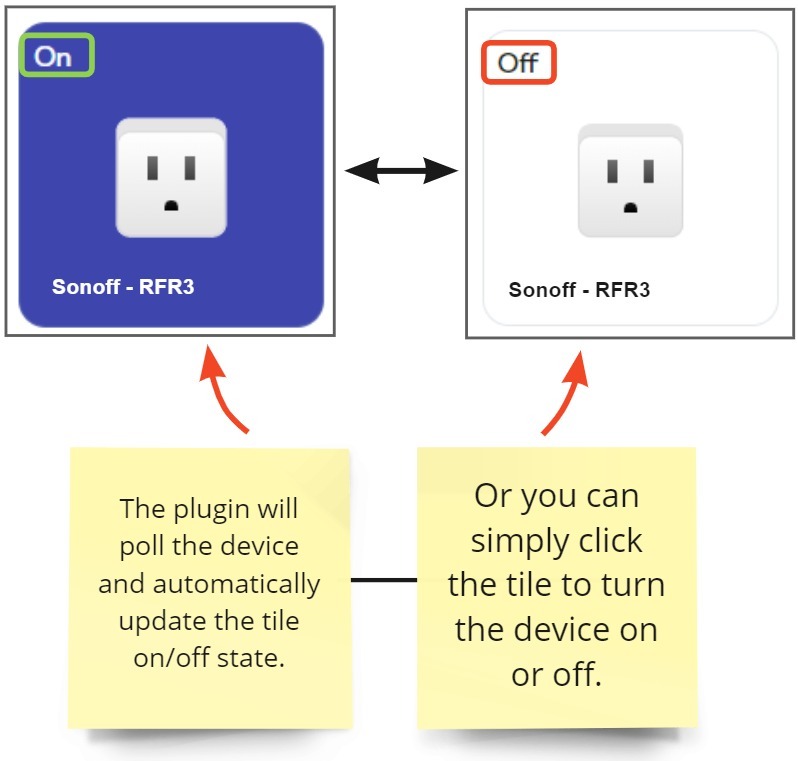
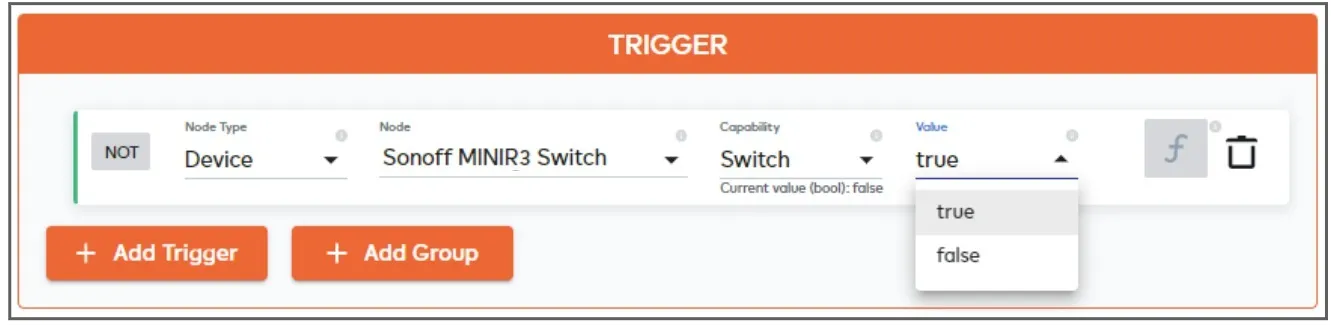
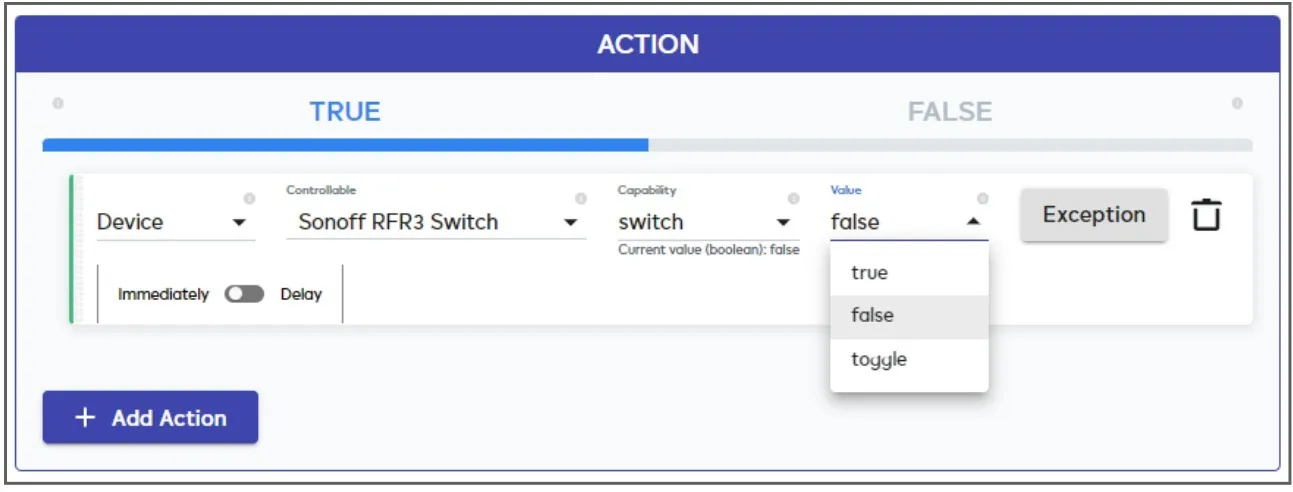
- You can now control your Sonoff devices via our mobile apps, the dynamic dashboard, and in meshbot triggers and actions: