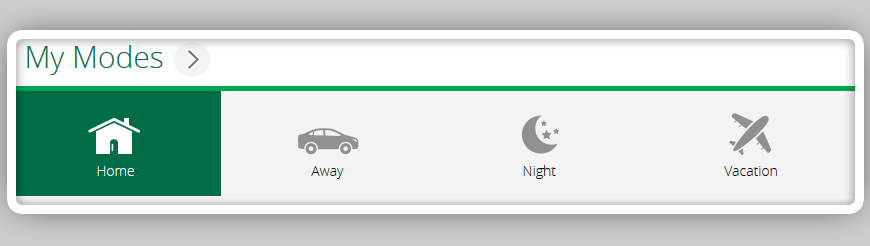
Vera house modes are collections of device settings that let you quickly set the status of a range of devices with a single click. Your controller is always in one of four modes – Home, Away, Night or Vacation:
This tutorial shows you how to create your own house modes in EZLogic using meshbots controlled by virtual switches. You can then activate any house mode with a single touch in the dashboard in the MiOS mobile app or EZLogic web UI. You can also operate your house modes via voice commands, HTTP API calls and even 3rd party dashboard apps.
Note. The house modes you will create in this tutorial are not the same as the house modes you see in the Vera mobile app/Web UI. This is essentially a parallel system. To avoid conflicts and confusion, you should disable the house modes in the Vera system if you plan to use meshbot-based house modes.
This section teaches you how to create four virtual ‘On/Off’ switches which you will use to activate and deactivate your house modes.
Login to EZLogic with your MiOS/Vera/Ezlo username and password.
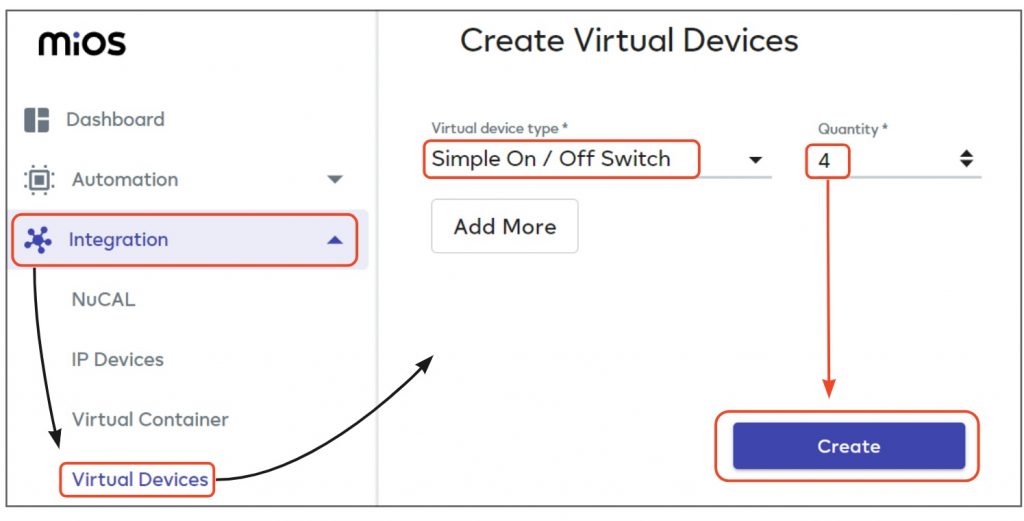
Click ‘Integration’ > ‘Virtual Devices’
Select ‘Simple On / Off Switch’ as the device type
Set the quantity to ‘4’
Click ‘Create’ to save the devices:
See the dedicated virtual devices help page if you want a more detailed version of the steps above, or to learn more about virtual devices in general.
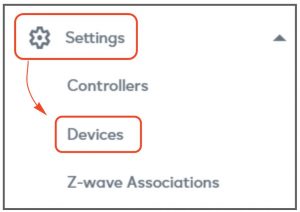
Next, login to EZLogic and open the ‘Devices’ menu.
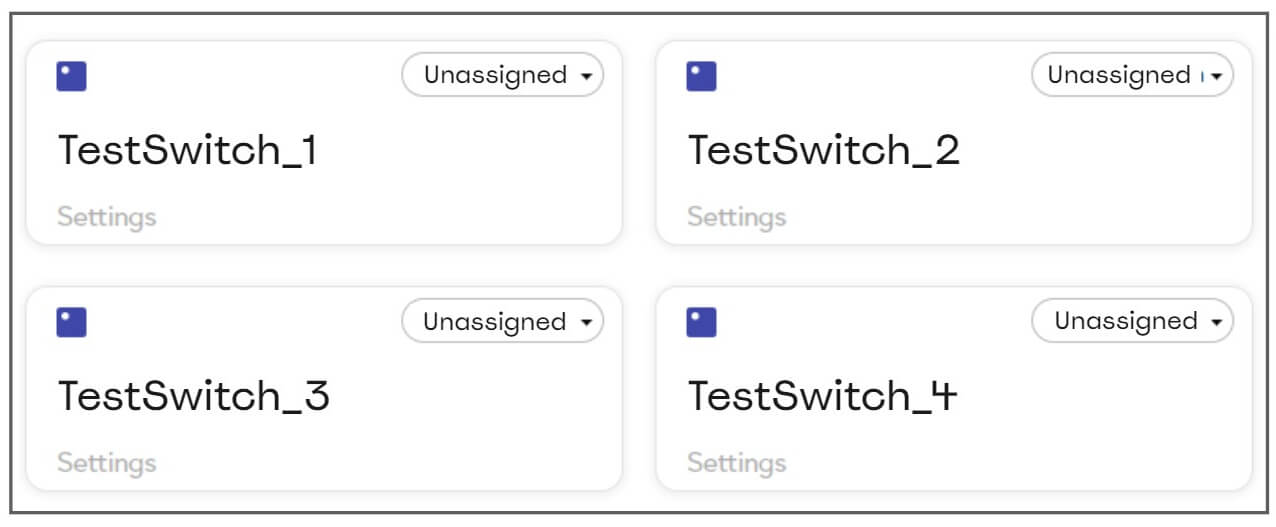
Locate the four new virtual switches. They will initially have default names like ‘TestSwitch_1’, etc:
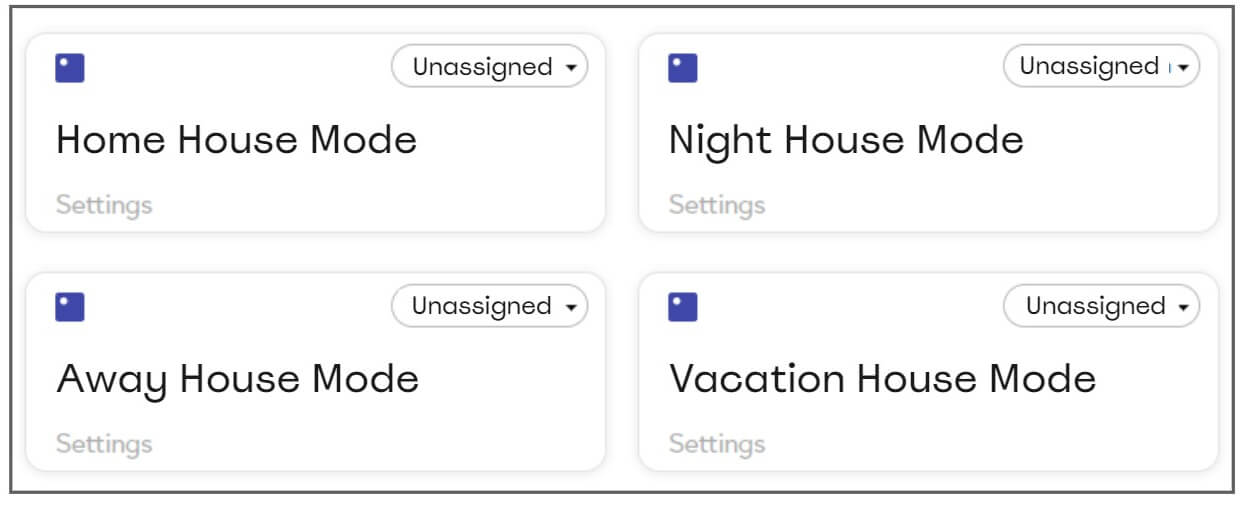
You now need to rename these switches to match the four house modes.
Click on the name of the first switch and rename it as ‘Home House Mode’, or simply ‘Home’ if you prefer.
Repeat the process for the other three switches, calling them ‘Night House Mode’, ‘Away House Mode’ and ‘Vacation House Mode’ respectively.
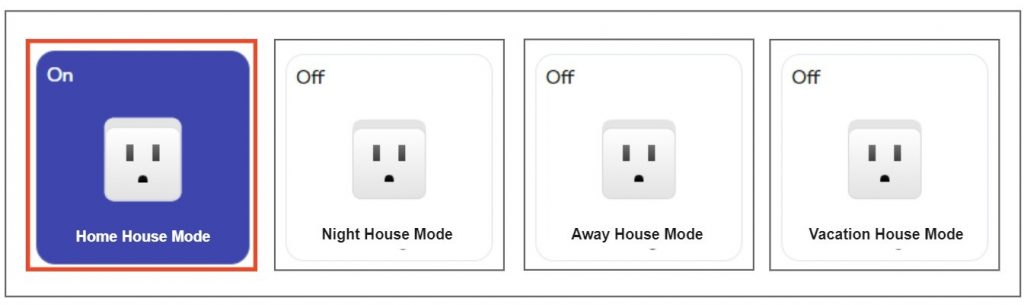
Your final switches should look something like this:
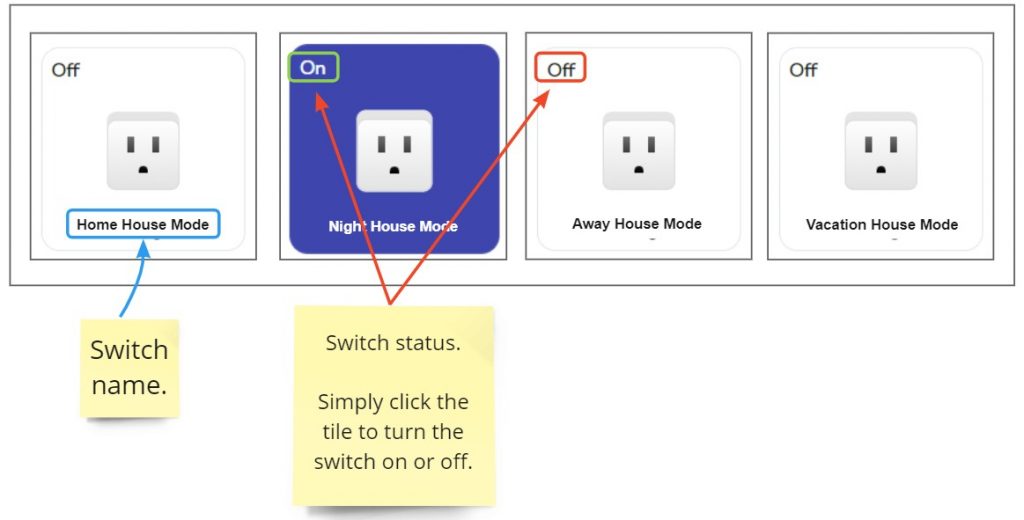
These switches will automatically appear in your dynamic dashboard as shown below:
The next step will show you how to hook these switches up to meshbots that run your house modes.
Set up meshbots for each house mode
This section shows you how to create meshbots which contain all the actions you want to implement in a given house mode. The trigger to activate the meshbots will be the ‘On/Off’ status of the switches you set up in the previous step.
Click ‘Automation’ > ‘Meshbots’ > ‘Create new Meshbot > ‘Local’:
You need to set up 4 new meshbots, once for each house mode. The following sections use the ‘Home’ house mode meshbot as an example.
Triggers
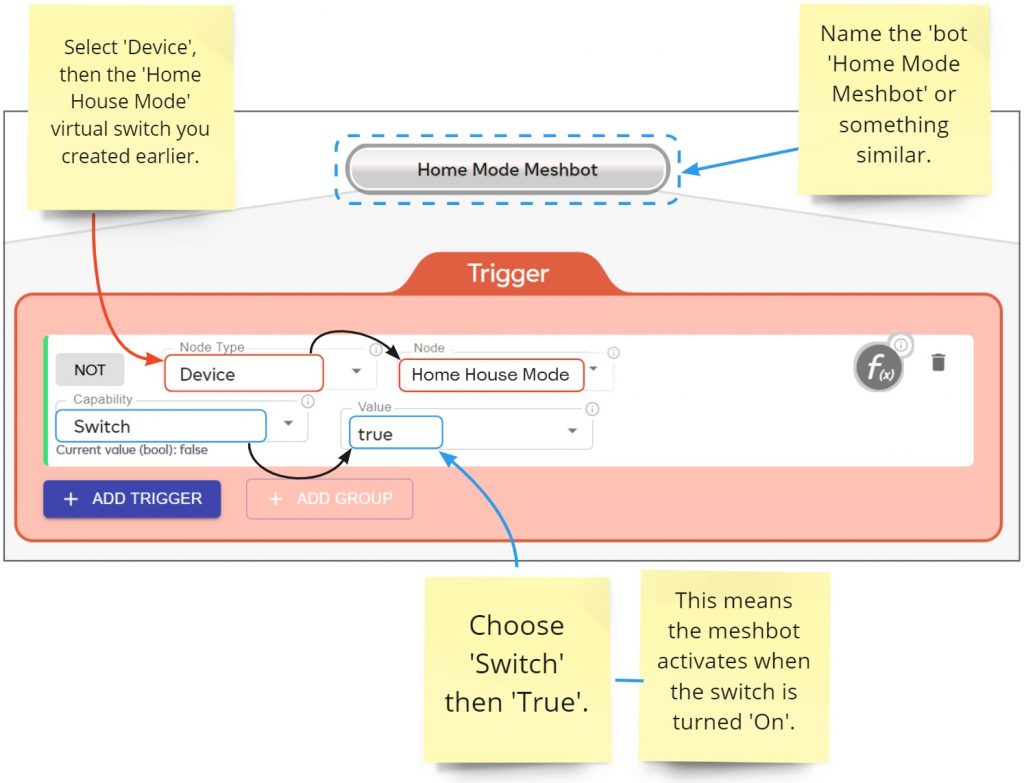
Add a single trigger to the meshbot with the following settings:
Name the meshbot something like ‘Home Mode Meshbot’:
‘True’ Actions
The next step is to add actions to the meshbot which reflect what you want to happen when your house is in ‘Home Mode’. These actions should cover all the security and other device settings that you want to implement AND disable any actions unique to that mode AND disable all other house modes.
It is beyond the scope of this tutorial to anticipate every possible action and notification you may want in your house modes.
However, a good starting point is to copy the device arm/disarm settings for each house mode as explained in this Vera help page. You can then expand and customize your actions as you see fit.
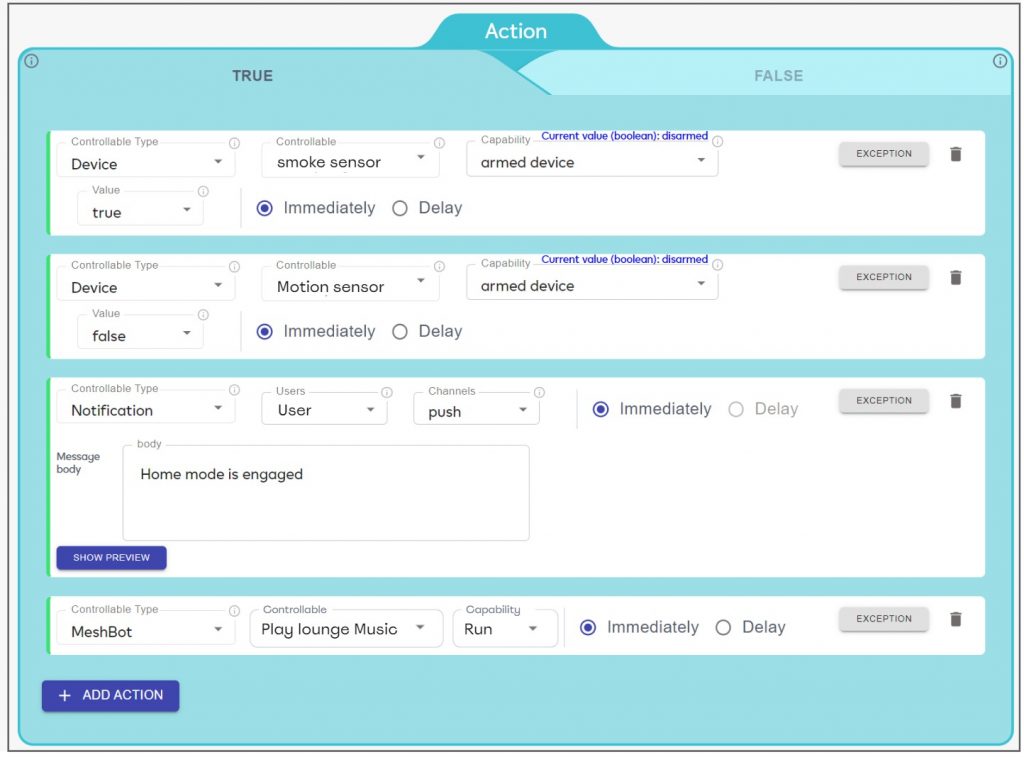
The following image shows a very simplified action set that could represent your ‘Home’ mode. It contains arming instructions for two example devices, a notification, and another action to run a music meshbot:
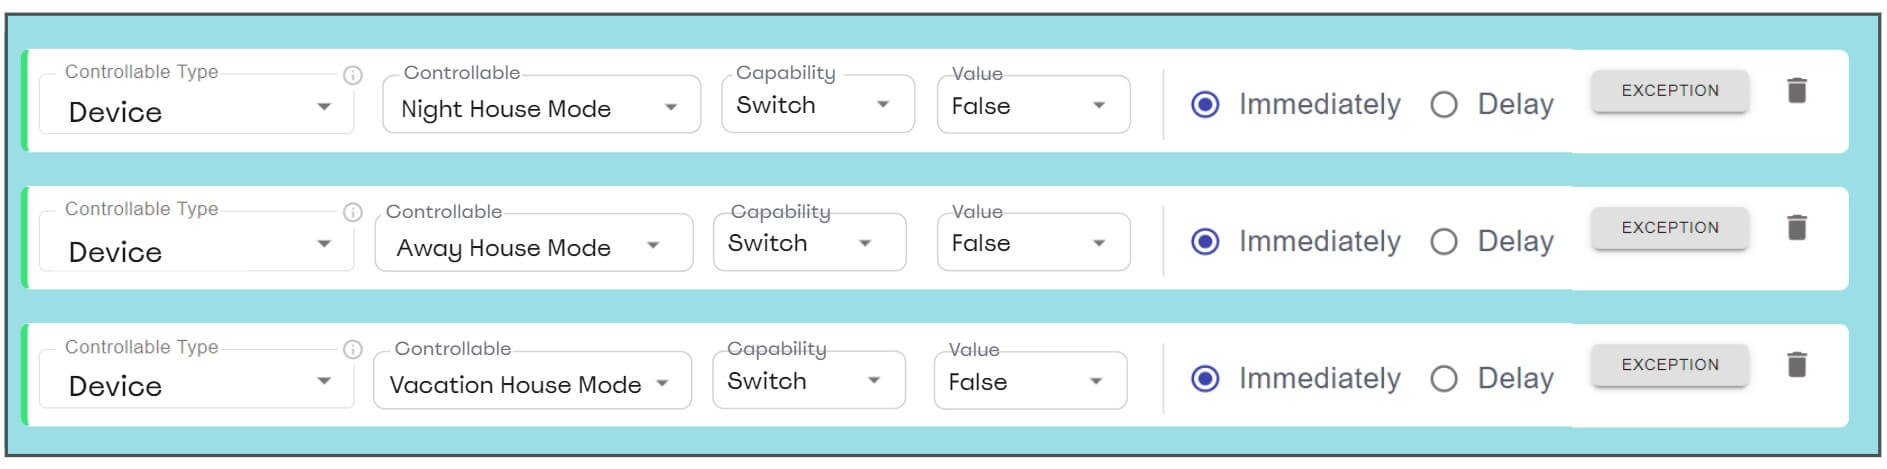
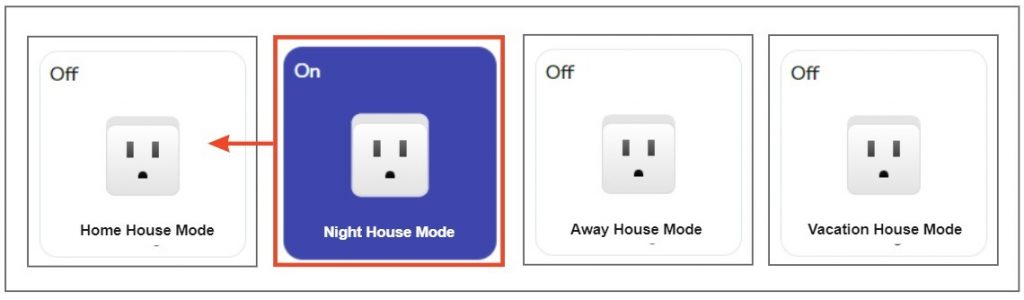
Next, you must add actions to disable the other three house modes when one mode is active. House modes are mutually exclusive so only one mode can be active at once.
To do this, add actions to turn off the other three house mode switches. The following image shows the three ‘disable house mode’ actions for the ‘Home’ meshbot:
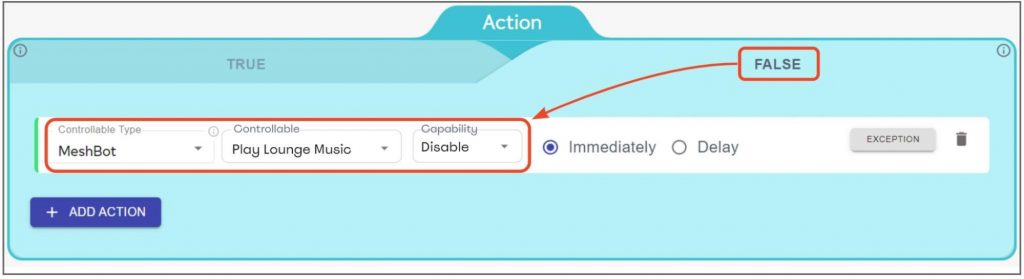
False actions
You should also use the false tab to disable any actions that are unique to that house mode. Otherwise they will just keep running forever.
You do not need to create false actions for devices/meshbots that are already covered in the ‘True’ tab of other house modes. This is because the actions in the newly active mode will over-rule those in the previous mode anyway.
For example, in the ‘Home’ mode meshbot shown above you would only need to create a false action to disable the lounge music meshbot:
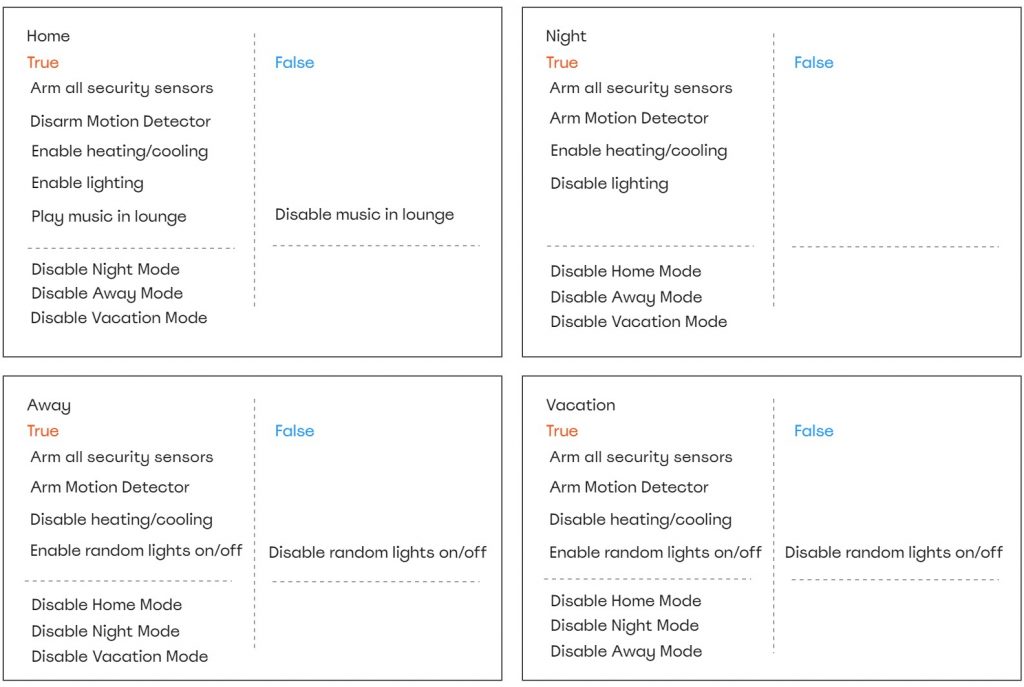
Here’s a simple representation of how the action sets could look in all four of your house modes:
Test and use your new house modes
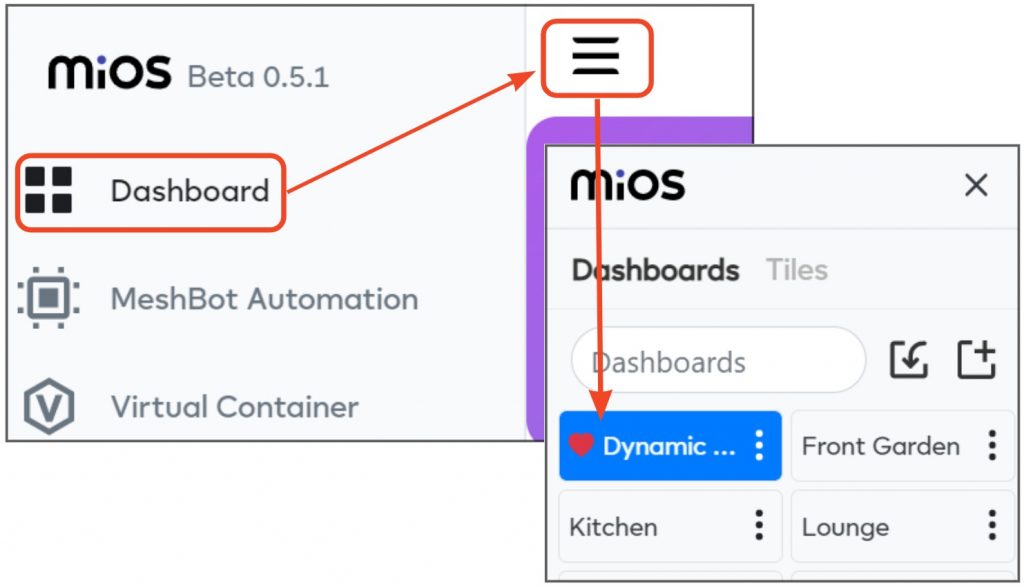
Open your dynamic dashboard. Click the menu icon to switch to the dynamic dashboard if it is not already active: