The Ezlo YeeLight plugs lets you integrate YeeLight smart bulbs into your automated Ezlo network. Once installed and configured, you can control YeeLight bulbs via EZLogic meshbots and the dynamic dashboard.
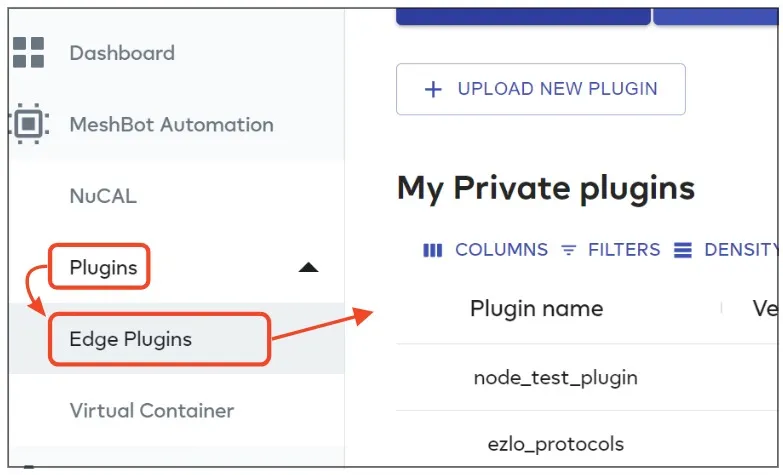
Login to EZLogic then click ‘Plugins’ > ‘Edge Plugins’ in the left-hand menu:
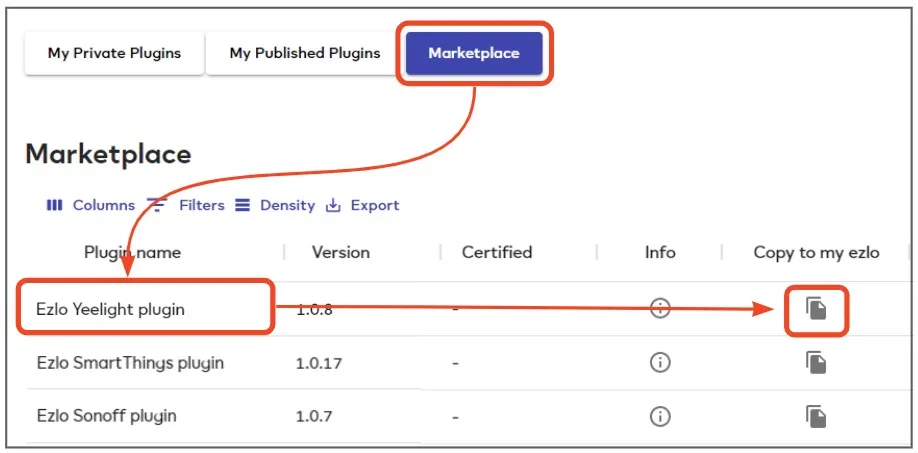
Click ‘Marketplace’, locate the ‘Ezlo Yeelight Plugin’ row then click ‘Copy to my Ezlo’:
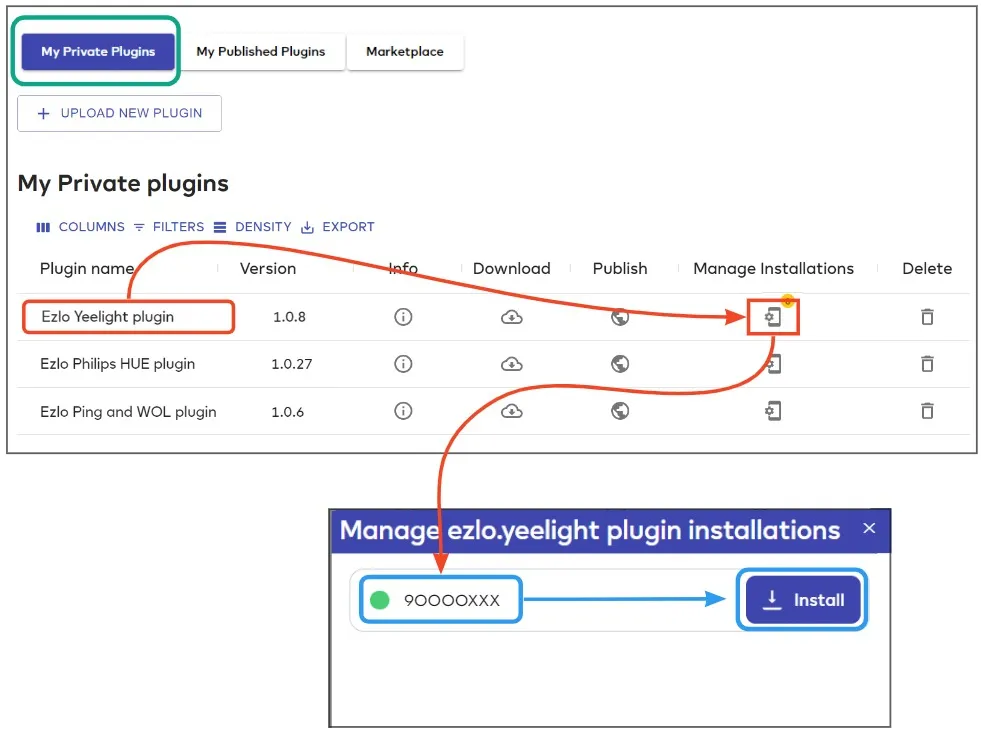
Next, click ‘My Private Plugins’ at the top of the screen.
Locate the Yeelight plugin row then click ‘Manage Installations’.
Choose the controller you want to use then click ‘Install’:
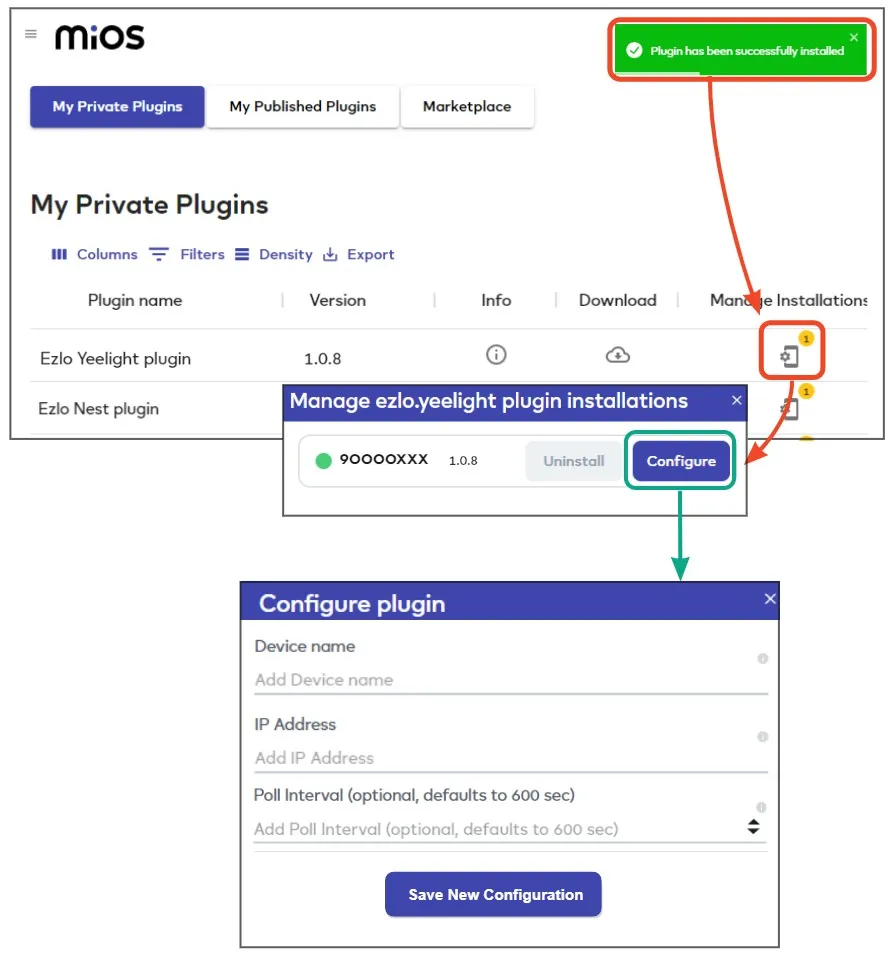
After installation, click the ‘Manage Installations’ icon again then click the ‘Configure’ button next to your chosen controller:
Complete the form as follows:
Device Name – Choose a name that lets you easily identify your YeeLight virtual device. This device establishes the connection between your Ezlo hub and your physical YeeLight device.For example, ‘Ezlo YeeLight Plugin Device’.
IP Address – Enter the local IP address of the target YeeLight device. Tools such as the Advanced IP scanner and Fing can help you find the IP address if you need help.
Poll Interval – Optional. You can safely leave this field blank to implement the default interval of 600 seconds. The poll interval is simply how often your Ezlo controller sends a message to your YeeLight devices to request their current status (on/off, dim level etc). Most controllers poll every device on a network right after start-up and it is usually not necessary to do so again. This is because most devices automatically report their status at regular intervals anyway.
Click ‘Save new configuration’ to create your virtual Yeelight device.
How can we help?
A premium WordPress theme with integrated Knowledge Base,
providing 24/7 community based support.