Before starting the installation make sure you are familiar with the contents of the included accessories and also consult our list of compatible mechanical and digital chimes on our website.
For convenience, you are also provided with faceplates in three colors and three angled mounting plates to accommodate installation on both flat and angled surfaces.
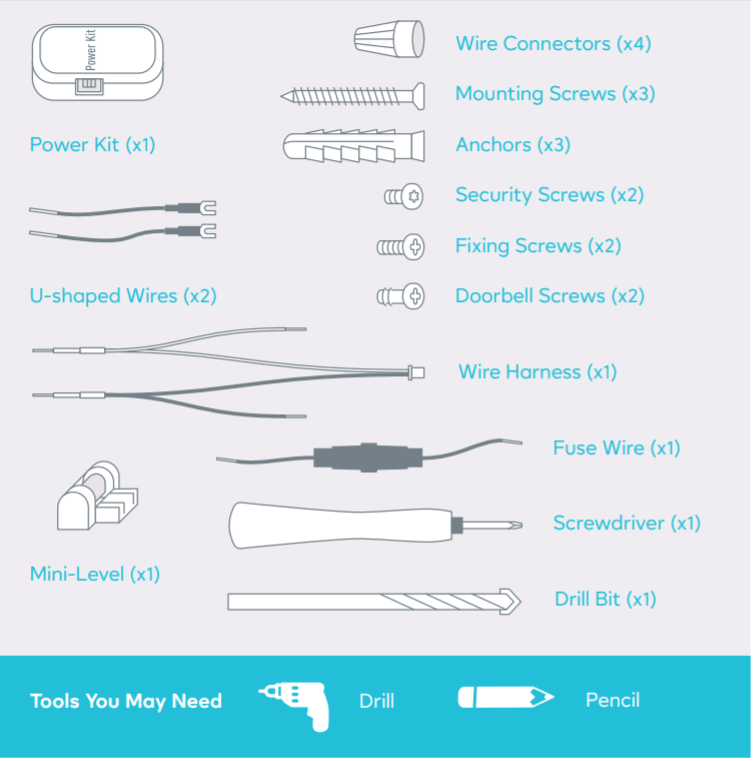
What’s in the Box
Doorbell x1
Faceplates x3
Mounting Plates x3
Plate Foam x1
Wire Connectors x4
Anchors x3
Security Screws x2
Fixing Screws x2
Doorbell Screws x2
Power Kit x1
U-Shaped Wires x2
Wires Harness x1
Fuse Wire x1
Mini-Level x1
Screwdriver x1
Drillbit x1
Additional tools you may need and make your life easier:
Drill
Pencil
Warning
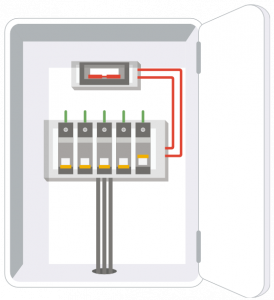
Before doing anything else, shut off the breaker that controls the doorbell’s circuit.
If you have a mechanical chime installed in your home, install the power kit and doorbell.
If you have an electronic chime installed in your home, refer to its own manual to install the power kit, and install the doorbell.
If your home does not currently have chimes, please consult a local installer or contractor for assistance.
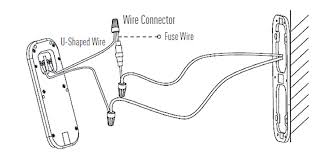
Additional Note: The Fuse
The fuse is recommended for setups that don’t use a chime. It can be installed by connecting it between the wires from the video doorbell to the chime wires.
Wiring the Power Kit
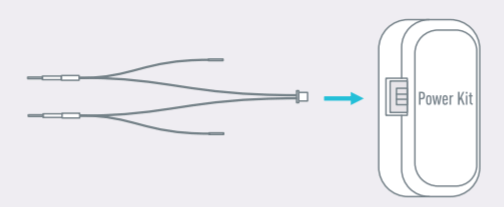
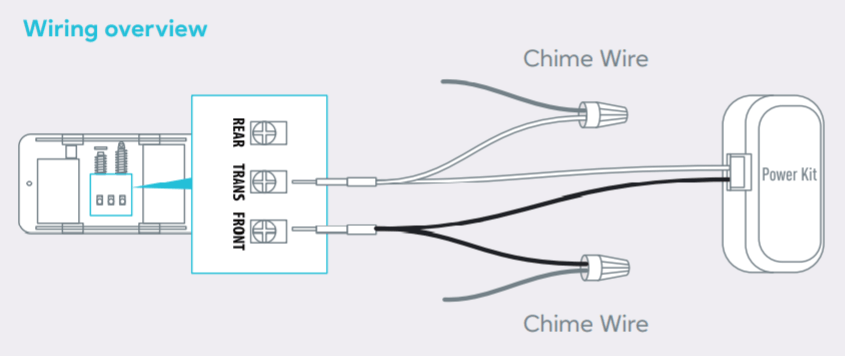
1. Insert one end of the provided wire harness into the power kit.
2. Now go to your mechanical chime and remove the plastic cover
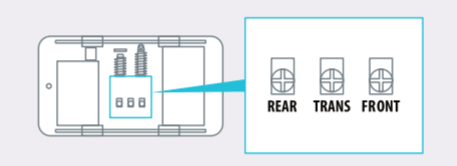
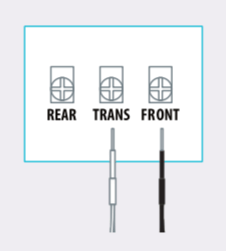
3. Remove the existing chime wires in the terminals named TRANS and FRONT.
4. Pick the previously wired Power Kit and the attached wire harness, and connect the wire harness to the chime’s terminals named TRANS and FRONT.
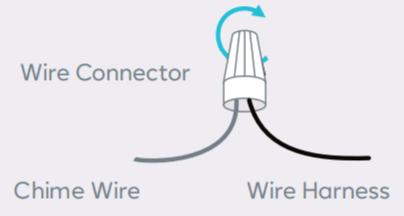
5. Now connect your existing chime wires by inserting both the existing chime wire and the remaining end of the wire harness into the wire connector, then twist it tightly. Repeat this step with the other chime wire
Wiring the Power Kit
1. Insert one end of the provided wire harness into the power kit.
6. Attach the power kit to the side of the chime, with the pre-applied double-tape, and put back the chime cover.
Doorbell Installation
Warning: Make sure the electricity at the breaker that controls the doorbell’s circuit is still off.
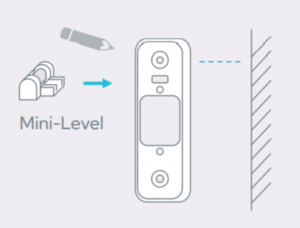
1. Insert the mini-level into the provided mounting plate and mark the drill points when its bubble stays in the middle.
(Optional) If the wall is uneven, paste the plate foam to the mounting plate.
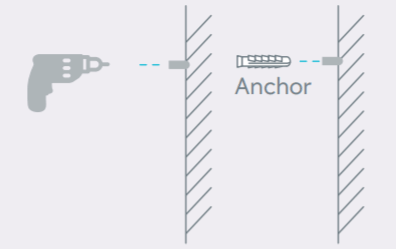
2. Drill holes according to drill points, insert anchors, and fix the mounting plate to the wall.
3. Connect the doorbell with your existing doorbell wires.
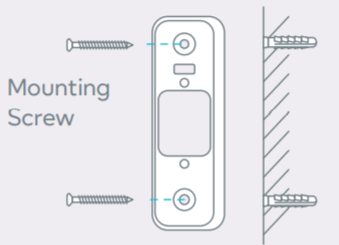
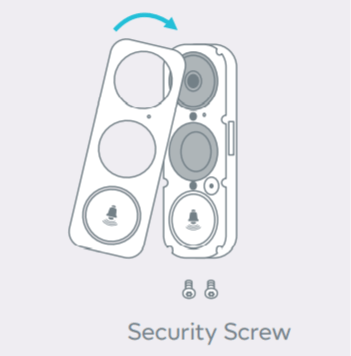
4. Remove the faceplate on your doorbell from bottom to top and fix the doorbell to the mounting plate by inserting the doorbell screws.
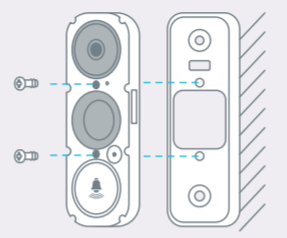
5. Put the faceplate back and insert two security screws into the bottom of the doorbell to secure the faceplate.
6. Now it’s safe to restore the electricity at the breaker box.
Note 1: The doorbell is powered on when its indicator flashes blue quickly. If you see this blue flash, proceed to the doorbell setup. If you do not see the indicator flashing blue quickly, make sure your electricity is off and check the wiring.
Note 2: If you want to change your doorbell’s Wi-Fi or want to reset it for whatever reason, press and hold the reset button for 5s and repeat the device adding process.
Need help setting up?
You can reach our Customer Care team seven days a week at 866.966.2272 between 6am and 10pm US CST/EST or at support@getvera.com.