Add another Z-Wave controller to an Ezlo controller’s network
Add another Z-Wave controller to an Ezlo controller’s network
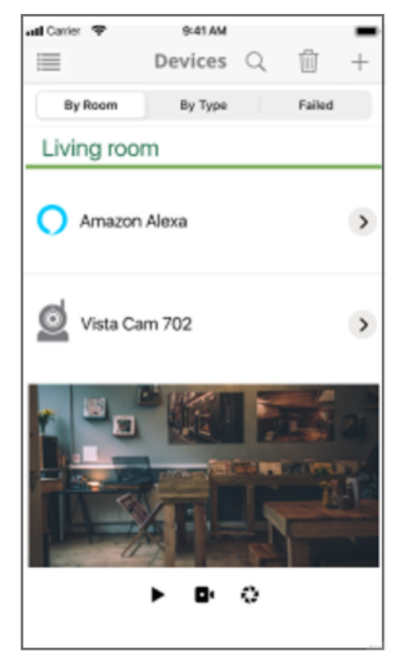
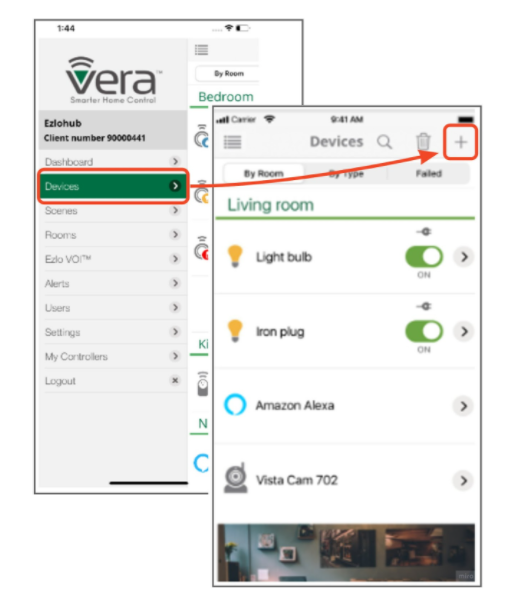
- Open the Vera app.
- Make sure your Z-Wave controller is powered on and has no Z-Wave devices attached to it.
- Tap ‘Devices’ then ‘ + ’ in the side-menu:
- Tap ‘Controller’ in the device-add list:
- Select ‘Ready to include’ to begin adding your controller to your network. This will start a 60-second countdown timer.
Follow the instructions to activate learning mode inside the controller’s application. This function is usually located in the app settings or in the hub settings:
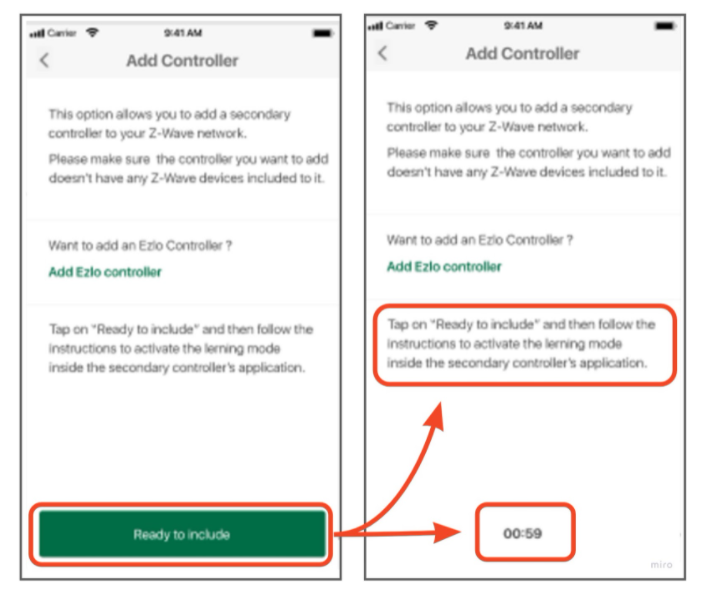
- Reminder – Make sure the controller you want to add doesn’t have any Z-Wave devices added to it. Keep the controller powered-on and within close proximity of the primary controller during the inclusion process.
- Security and inclusion. If your controller does not support encryption/authentication, then skip to step 7. If it does support them, then you need to configure now:
- First, choose your security level. Most users should just leave this at ‘S2 Access’.
- Next, add the device by either scanning the QR code or entering the DSK code in the controller’s app:
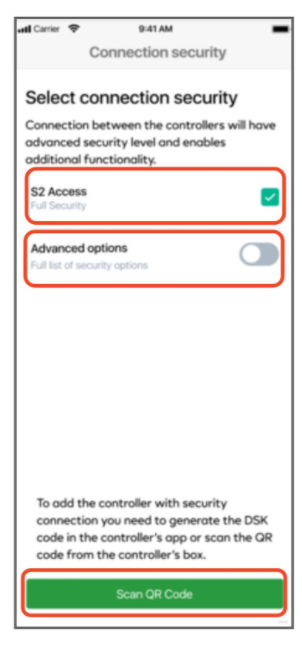
S2 Access – Full Security (default). All options under ‘Advanced Options’ are enabled if this is checked.
Advanced Options – Change the security level of the connection:
– Access Control – Encrypted connection
– S2 – Authenticated – Encrypted connection with authentication
– S2 – Unauthenticated – Encrypted connection w/o authentication
– S0 – Encrypted connection
– CSA – Client Side Authenticated
QR Code / DSK code – Click ‘Scan QR code’ to add the controller at your chosen security level. This presents you with the following two options:
# 2. Enter the DSK code. Tap ‘Enter DSK Code Manually’ if you are unable to scan the QR code. The DSK code is also printed on your controller. Enter the first five digits of the code in the space provided then hit ‘Continue’ to begin inclusion:# 1. Scan QR Code. Locate the QR code printed on your controller box and scan it with your phone’s camera. The inclusion process will begin after a successful scan: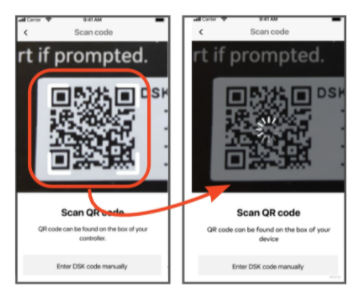

- The inclusion process will begin automatically if the controller does not support encrypted connections. If it does support encryption then inclusion begins after you have entered the DSK or scanned the QR code:
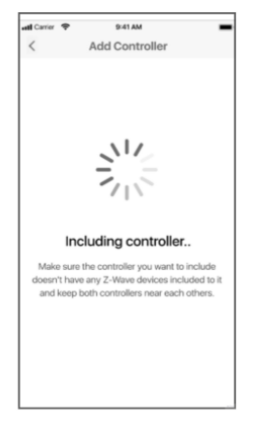
- The controller will be added to your network. You will next see the ‘Set up Device’ screen.
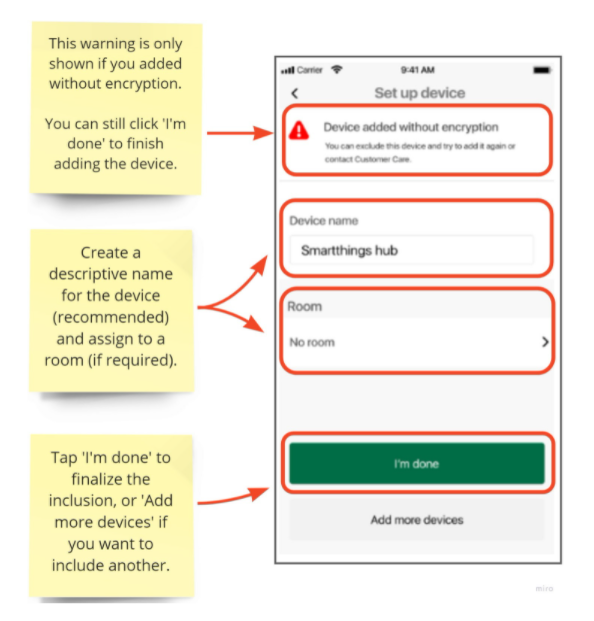
- You will see a warning if you added without security. You can still click ‘I’m done’ to finalize the process.
- Change the name of the controller to a more descriptive name (recommended) and assign it to a room (optional).
- Click ‘I’m done’ to complete the process, or ‘Add more devices’ if you want to include more:
Remove a Z-Wave controller from an Ezlo hub network
- Open the Vera app.
- Tap ‘Devices’ in the menu on the left.
- Select the Z-Wave controller you want to remove.
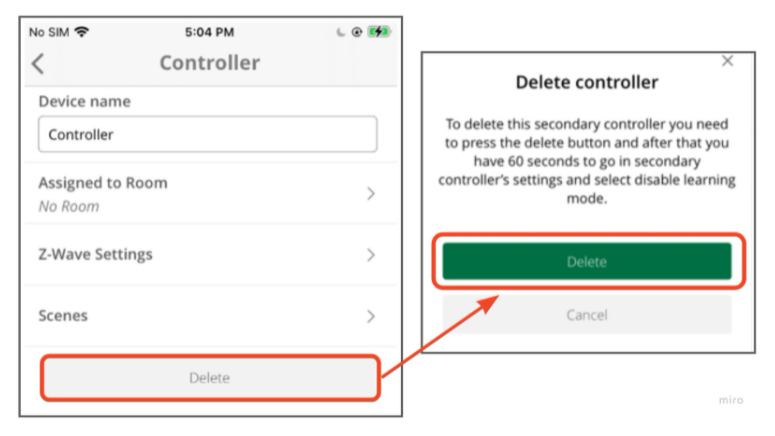
- Tap ‘Delete’ in the controller’s settings screen, then ‘Delete’ again in the confirmation window.
- This will start a 60 second timer during which you have to go into the secondary controller’s settings and disable learning mode:
- Open the 3rd party app from which you want to remove the controller and activate learning mode.
- The controller will be removed from the list of devices: