Install and Setup Vistacam 700
This guide will teach you how to:
- Mount and install your Vistacam 700 camera
- Setup your Vistacam 700 wirelessly
Wireless setup
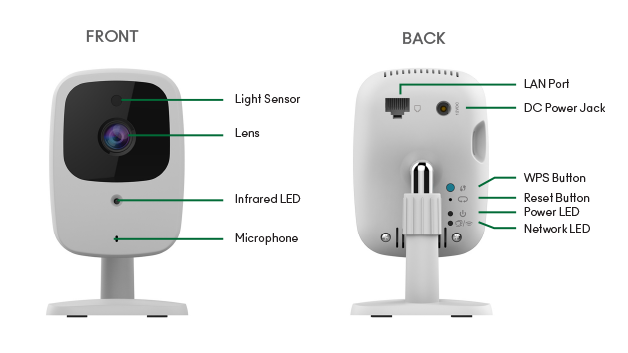
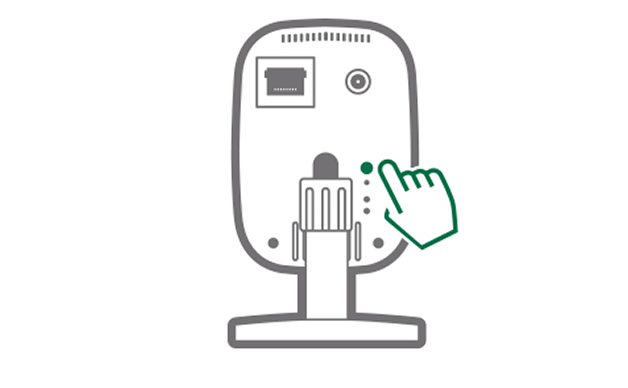
- Firmly press the blue WPS button once, located on the back of the VistaCam 700
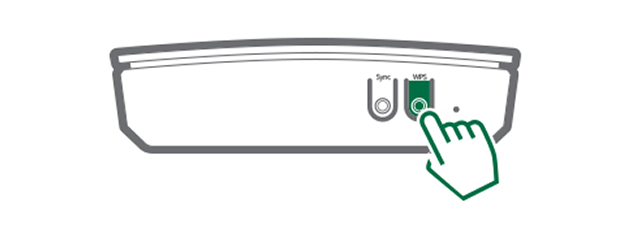
- The network LED will blink amber, indicating that the pairing process has started On the Vera unit, press the Select button until the Wi-Fi LED blinks Press the Sync button to confirm the selection and go to WPS mode.
- After a minute, the green power LED on the back of the camera will be solid and the network LED will begin blinking green
NOTE: The LED will first turn on and then start blinking. It will blink during startup, which will take about a minute. After the startup is completed, the green LED should remain ON.
Mounting and installation
NOTE: Please ensure that the Wireless Full HD IP Camera is configured and added to the network before mounting it.
- Identify the location for mounting the Vistacam 700 Camera
- Place the camera in the desired position on the wall/ceiling. Screw the two screws into the wall through the holes of the stand
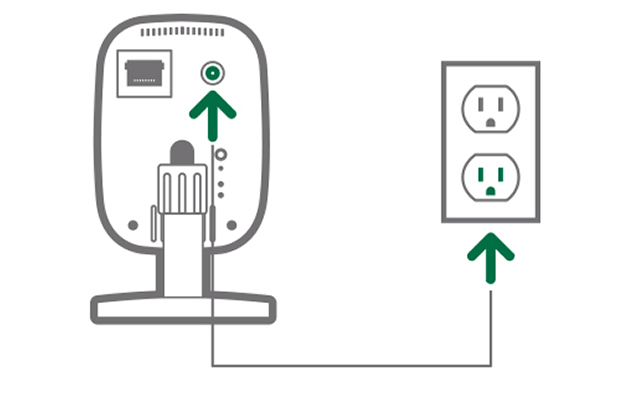
- Firmly connect the AC Power Adapter to the VistaCam 700 Power Connection and then plug it into an AC outlet.