Control Cameras in the Mobile App
The Vera app has dedicated device wizards with step-by-step instructions to guide you through the process of adding security cameras to your system.
This guide will teach you how to:
- Add and setup security cameras in your Vera Smart Home system
- Integrate cameras in scenes
Camera actions
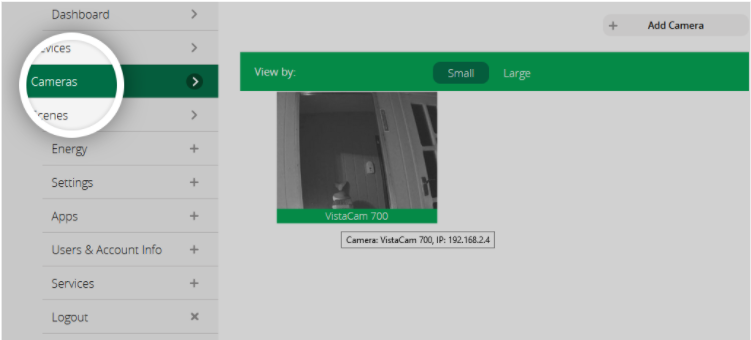
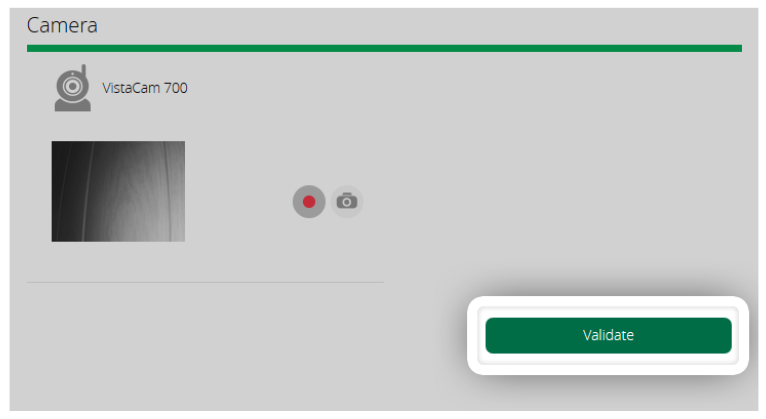
class=”mb-2″To access the list of security cameras in your system, click “Cameras” in the Vera side menu.
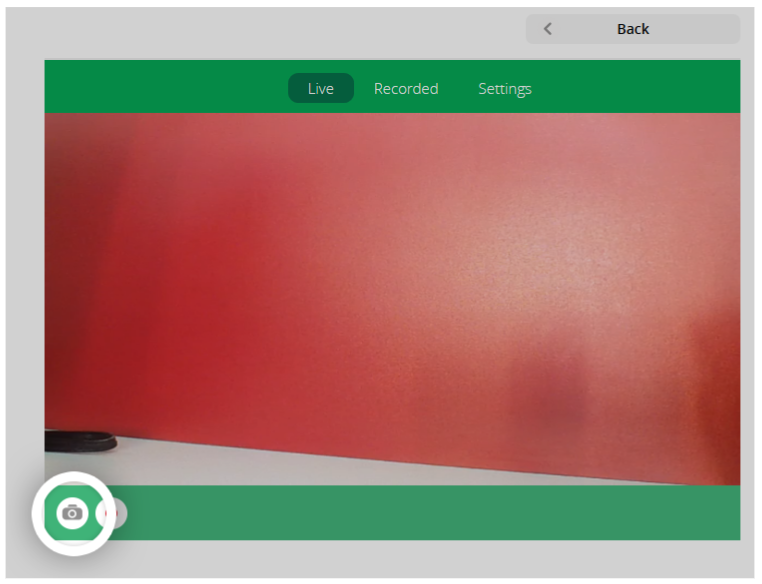
For a live stream, simply tap the camera snapshot icon. To start recording a video (you should record for at least 30 seconds), click the ![]() button either here on back in the list of devices. It is important to allow enough time to record your video for the desired length.
button either here on back in the list of devices. It is important to allow enough time to record your video for the desired length.
You can also save a snapshot by clicking the ![]() button (here or back in the list of devices).
button (here or back in the list of devices).
Both videos and snapshots can be accessed from the “Recorded” tab. For videos, you will have to wait for several minutes before seeing them on the list. To view an image or play a video, click the ![]() icon or to the
icon or to the ![]() icon respectively.
icon respectively.

For videos, you will have a “Download Video” option which will generate an MP4 file.

Create a Scheduled scene using cameras
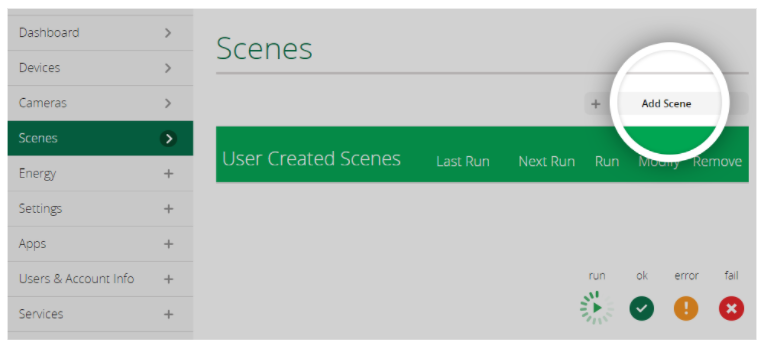
Scheduled scenes are useful when you need to select a time or interval that will trigger the activation. Suppose you want the camera to start recording when you leave for work (in “Away” mode) – click “Scenes” in the left menu, then “+ Add Scene” in the upper right corner of the screen
and select the “Schedule” trigger. For the time values, select “At the time of day” in the first list and “08:00” in the other 2, then click on “Validate”.
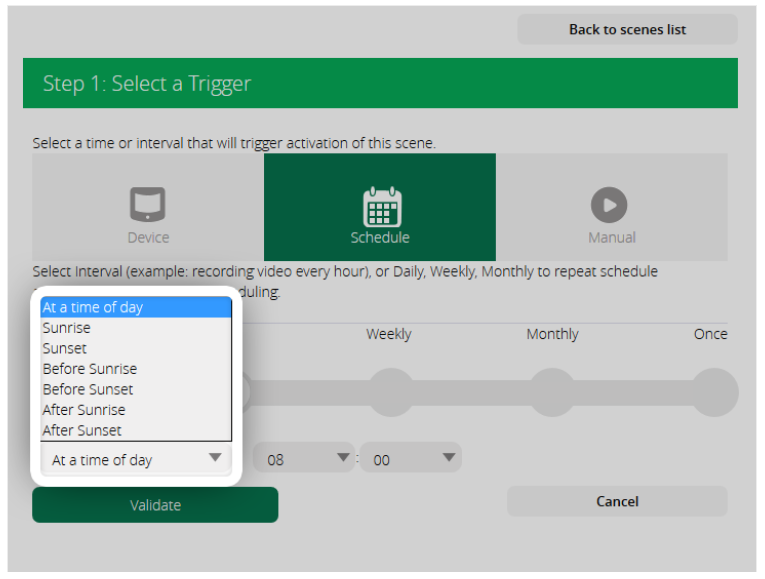
This means that the scene will activate every day at 08:00 AM.
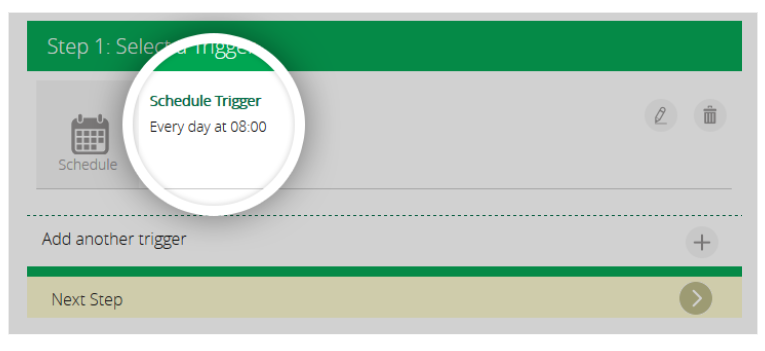
Click on “Next Step” to select devices and/or a delayed action.
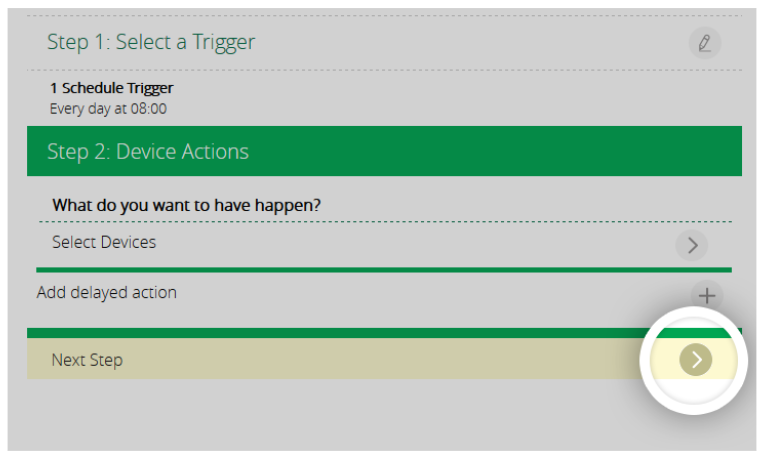
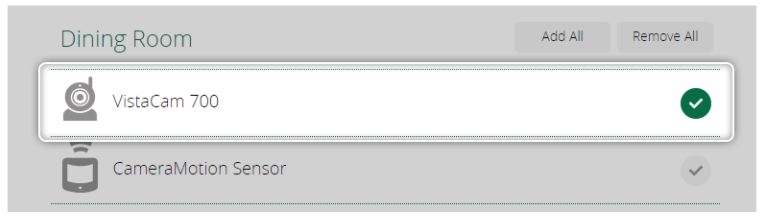
Click on “Select Devices”, check the camera from the list, scroll down to the bottom of the page and hit “Next”,
select the record action for the camera, then click on “Validate”.
By default, the action is set to “Immediately”, meaning that the camera will automatically start to record at 08:00. Note that the camera won’t record continuously, but for 15-20 seconds in a row. Each block will be a separate video file.
Note: If the camera supports pre-roll, the recording will start in advance, for instance at 07:55. Also, the duration of the video depends on the camera capabilities – with pre-roll it can have only 10 seconds.
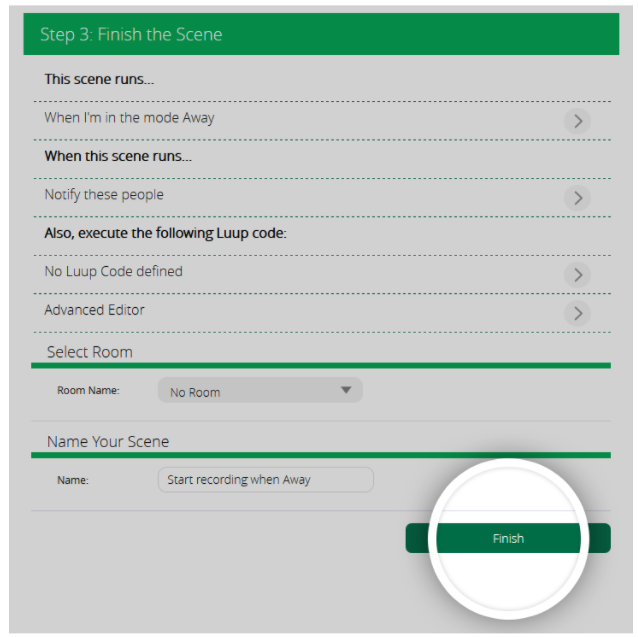
Click on “Next Step” to select the house mode the scene is activated for and the users that will receive notifications and also assign a room. The last step is to name the scene and to click on “Finish”.