Install and setup VistaCam 1101
This guide will teach you how to:
- Mount and install your Vistacam 1101 camera
- Setup your Vistacam 1101 wirelessly
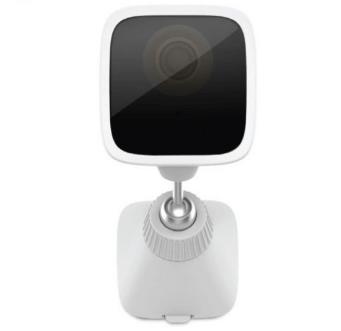
Mounting and installation
1. Screw the VistaCam 1101 on its stand
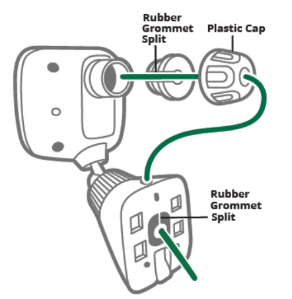
2. Put one end of the ethernet cable through the plastic cap
3. Put the rubber grommet over the end of the ethernet cable to ensure the connection is weatherproof
4. The split between the two grommets will open when the grommets are gently twisted (it is not easily visible)
5. Screw the plastic cap onto the back of the camera
6. Connect the other end of the ethernet cable to the wireless PoE AC adapter. Plug the PoE adapter into a power outlet within 3 feet of your Vera controller. On the PoE adapter, the green power LED light will be solid green and the bottom network LED will be turned off
7. Please allow at least 2 minutes for the camera to complete its initial set up process. At the end of the 2 minutes, the green LED light on the front of the camera will continue blinking
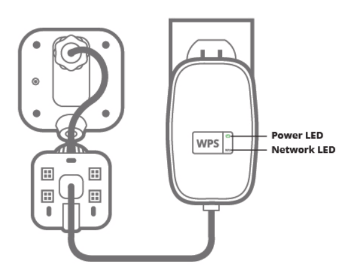
Note: Please ensure that the camera is paired to your network before permanent mounting.
The PoE power adapter is for indoor use ONLY. It is not weatherized for outdoor placement.
Wireless setup
Camera side
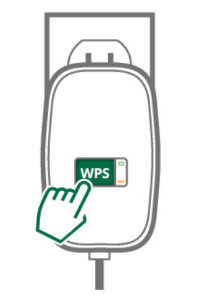
1. Press and hold the WPS button on the wireless PoE adapter 2 seconds or until the bottom LED starts flashing.
Vera side
Follow the directions for the type of Vera controller that you have:
VeraEdge
1. Press the WPS button for at least 5 seconds
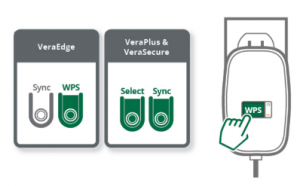
VeraPlus & VeraSecure
- Press and hold the Select button until the Wi-Fi LED blinks
- Your Vera will enter into selection mode
- Press the Sync button to confirm the selection and execute WPS mode
- The bottom LED on the PoE adapter will turn Green within 60 seconds
Note: The unit stays in WPS mode for 2 minutes.

